A-mess-of-links - Some Useful Links


More Posts from A-mess-of-links and Others
When I was in ninth grade I wanted to challenge what I saw as a very stupid dress code policy (not being allowed to wear spikes regardless of the size or sharpness of the spikes). My dad said to me, “What is your objective?”
He said it over and over. I contemplated that. I wanted to change an unfair dress code. What did I stand to gain? What did I stand to lose? If what I really wanted was to change the dress code, what would be my most effective potential approach? (He also gave me Discourses on the Fall of Rome by Titus Livius, Machiavelli’s magnum opus. Of course he’d already given me The Prince, Five Rings, and The Art of War.)
I ultimately printed out that phrase, coated it in Mod Podge, and clipped it to my bathroom mirror so I would look at it and think about it every day.
What is your objective?
Forget about how you feel. Ask yourself, what do you want to see happen? And then ask, how can you make it happen? Who needs to agree with you? Who has the power to implement this change? What are the points where you have leverage over them? If you use that leverage now, will you impair your ability to use it in the future? Getting what you want is about effectiveness. It is not about being an alpha or a sigma or whatever other bullshit the men’s right whiners are on about now. You won’t find any MRA talking points in Musashi, because they are not relevant.
I had no clear leverage on the dress code issue. My parents were not on the PTA; neither were any of my friend’s parents who liked me. The teachers did not care about this. Ultimately I just wore what I wanted, my patent leather collar from Hot Topic with large but flattened spikes, and I had guessed correctly—the teachers also did not care enough to discipline me.
I often see people on tumblr, mostly the very young, flail around in discourse. They don’t have an objective. They don’t know what they want to achieve, and they have never thought about strategizing and interpersonal effectiveness. No one can get everything they want by being an asshole. You must be able to work with other people, and that includes smiling when you hate them.
Read Machiavelli. Start with The Prince, but then move on to Discourses. Read Musashi’s Five Rings. Read The Art of War. They’re classics for a reason. They can’t cover all situations, but they can do more for how you think about strategizing than anything you’re getting in middle school and high school curricula.
Don’t vote third party unless you can tell me not only what your objective is but also why this action stands a meaningful chance of accomplishing it. Otherwise, back up and approach your strategy from a new angle. I don’t care how angry you are with Biden right now. He knows about it, and he is both trying to do something and not doing enough. I care about what will happen to millions of people if we have another Trump presidency. Look up Ross Perot, and learn from our past. Find your objective. If it is to stop the genocide in Palestine now, call your elected representatives now. They don’t care about emails; they care about phone calls, because they live in the past. I know this because I shadowed a lobbyist, because knowing how power works is critical to using it.
How do you think I have gotten two clinics to start including gender care in their planning?
Start small. Chip away. Keep working. Find your leverage; figure out how and when to effectively use it. Choose your battles, so that you can concentrate on the battle at hand instead of wasting your resources in many directions. Learn from the accumulated wisdom of people who spent their lives learning by doing, by making mistakes, by watching the mistakes of their enemies.
Don’t be a dickhead. Be smarter than I was at 14. Ask yourself: what is your objective?
figured out a way you can search for posts that are tagged TWO things on a blog!!! feeling clever
for anyone else who didn’t know, this is the format!:
https://[blogURL].tumblr.com/search/%23[tag1]%2C%20%23[tag2]
remove the [brackets] when using it!


æ is a visually stunning pseudohorror exploration game where you venture into surreal noisecore purgatories in search of glyphs.
Read More & Play The Full Game, Free (Windows)
How do you go about getting such high quality scans of your art?
ok bear with me cuz this is going to be a lengthy post since I see a lot of people struggle with this and I think I could help by detailing my process.
before anything else I have to remark, this whole process only works with paper, loose canvas and any other media that can at least bend and warp a little in order to properly fit into a flatbed scanner, if you're working on on hard/non-maleable surfaces like wood pannel or mounted canvas, I recommend these tutorials:
Now, the first step is the most crucial: USE A GOOD QUALITY SCANNER! a scanner that's capable of obtaining photographic quality images is crucial, as there's no amount of editing that can salvage an image that has been overexposed, burnt, and artifacted to hell and back, here's an example: on the left, a scan of one of my paintings taken on the scanner of a cheap all-in-one printer. on the right, the same painting, scanned on a dedicated HP Scanjet G4050 flatbed scanner, which is the scanner that I still use to this day.


The difference might seem minimal at first, but when you start getting up close, the differences become REALLY apparent, not only are the colors washed out and muddy on the all-in-one scanner; there's some heavy artifacting on its scan as well as random blurry spots that makes the image look much worse, and the overexposure has completely killed the paper grain which is much more visible on the flatbed scan.


it's worth pointing out that both images you see here are what they looked like /AFTER/ adjustments and corrections in photoshop; the first one, as bad as it looks, took me several hours to of tweaking to get to that point, while the latter took me about 10 minutes of saturation adjustments to make it look as close as possible to the original painting. the reasons for this stark difference in quality are very simple: all-in-one printer-scanners ARE NOT made for scanning art, they're made for scanning documents, so the quality needed for that is much lower than the one needed for a painting or a photograph, so what you need instead is a dedicated, photographic quality flatbed scanner. One that I could recommend, not from personal experience but from recommendation from my peers, is the Epson Perfection V550/V600 Photo Scanner, BUT I don't want you to think from this that you NEED to shell out the big bucks into the most expensive and latest equipment in order to be able to get decent scans of your art, the previously mentioned scanner that I used is a lower-mid range device and is almost 10 years old, so if you ask me, it is perfectly acceptable to buy a pre-owned, used, refurbished photo scanner, as long as it's in decent shape and works as intended, you will be able to get what you need out of it. (***EDIT*** Another tumblr user with experience in professional media scanning has pointed out that while these scanner models are great and very advanced, they are very expensive and most of that pricetag is related to photographic scanning features that are not useful for anything that isn't photo negatives or digitizing of documents, their suggested model instead is the Epson Perfection V19, because "it's running the same photo scanning firmware as the higher-end models, has the same bit depth and still scans up to 4800 dpi. They run ~$70 brand new, even cheaper if you find them on sale or used.") Ok, I have the scanner, what now? the first and most important thing to consider when you're going to scan your work is: SCAN AT THE HIGHEST POSSIBLE QUALITY THAT YOUR COMPUTER CAN HANDLE, most if not all scanners give you the option to select the dpi (dots per inch) measurements at which you want to scan. the standard for "decent" quality images is 300 dpi, but I personally find that extremely insufficient, yes, it will give you decent-ish images to post on social media, but if you want to do anything else with your images, like making high quality prints, posters, or high quality closeups of your work, those 300 dpi are going to fall really short and become extremely limiting. personally, I scan ALL my work at 1200 dpi, I could go higher than that all the way to 2400 but honestly, I've yet to find a use for an image size that big, at 1200 you already have enough quality to print a house-sized poster with a pretty decent looking final product, so unless you plan on hanging copies of your work to the side of the Empire State building or if you're trying to scan EXTREMELY small pieces, 1200 dpi should be enough, the file sized you're going to get out of 1200 are already almost ridiculous (yes, this image is over 1 GB in size)


Next, to address the elephant in the room: What do I do if my painting is bigger than the flatbed of the scanner? well, you're gonna have to learn to scan in parts like I do! the trick to scanning in parts is that every section you scan needs to cover a little more area than it should so that when you start stitching the individual scans together in your preferred image editing software, you can erase the sections warped by the edges of the scanner bed and cover them over with the extra area scanned in the other images, for example, here's a little chart I made on how I scan a medium sized painting in 4 parts:

make sure to NOT rotate the painting while scanning it, simply slide it across the bed to match your desired section, always with the top, bottom, left, and right pointing always to the same directions, if you start rotating the painting you run the risk of warping the whole scan, or warp it in less predictable ways, and it's gonna be a bit of a nightmare to stitch together. I also recommend to instead of closing the top of the scanner to make it flat against the scanner bed, keep it open and put a few books on top of the painting that are a 1 or 2 cm smaller than the scanner bed, the reason to do this is because closing the scanner cover and letting that flatten the painting, the fit between the top and the bed is so tight that you risk bending and damaging the paper/canvas when scanning, giving it some space at the edges when scanning lets the paper/canvas curl naturally with the material's own flexibility, so the risk of damage is much lower. if your painting is bigger than that, you will essentially follow the exact same process but just divide the painting into more scans, personally I've done up to 9 scans per a single painting on my biggest pieces, any more than that can get a little toooo complicated to stitch together, but not necessarily impossible, especially considering that a lot of image editing softwares nowadays have automated stitching functions, which CAN get over the edge warping on their own, but I've personally found that you'll still get better results if you can eliminate that warping and let the AI work with the best sections of the scans only. PERSONALLY I don't use the automated functions and prefer to do it completely by hand in Photoshop because I'm a neurotic perfectionist and I tend to zoom in into the paintings and notice every little microscopic smudging and bad overlap the AI does between the scans that 99% of people won't notice, but hey, that's just me, absolutely feel free to use the automated functions that the software gives, you don't need to be as extra as me! I think that about covers most of my process there, remember this is a process that might take a little practice so don't give up if your first scans don't look that great or look wonky when stitched together, you have plenty of room to finetune and adjust everything to your liking. If you have any more questions, feel free to ask and I'll try my best to answer. Also if you found this small tutorial useful, maybe drop me a tip or checkout my patreon and store to support me ;) ***edit*** noticed someone added a flashing imagery CW so I modified the gif so that it blinks slowly and it's hopefully less hard on the eyes!
Streaming companies are the landlords of media. You will rent in perpetuity, and never actually own anything.
New: Search operators for better searching!
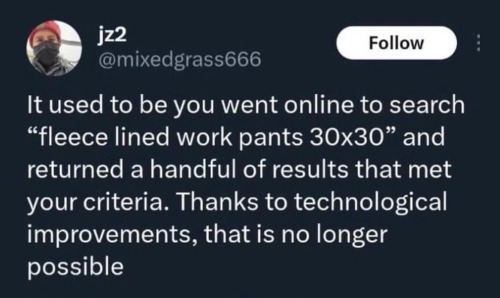
We hear you, and we share your frustrations: it’s hard to find a specific post. You know it has a particular tag or phrase, and it was posted on this date, or at least, within a specific year. But you can't find it!
So, today, we’re excited to announce that you can use ✨ advanced search operators ✨ in the search bar now! You can now say potato from:staff year:2021 to easily enjoy that video of a potato being microwaved again.
Before we jump into the details, a couple of caveats to note:
These search operators are only available in the main Tumblr search bar. They don’t work in the search bar in individual blogs.
The search operators only work on posts created in 2017 or later.
OK! Let’s go explore these operators!
Exact phrase match
When you surround your query with regular double quotes (not curly quotes), it will match posts with that exact phrase in the post's text content, or that exact phrase as a tag.
For example, "chappell roan is roan of arc" matches posts with that exact phrase in the content, and also matches posts that have the exact tag #chappell roan is roan of arc.

Match operator
By default, the query matches the post on either the text or the tags.
You can use match:text to specify you want to search the post content, or match:tags to search the post tags. For example:
sword world match:text looks for posts with the words "sword" and "world" in the post content.
sword world match:tags looks for posts with the words "sword" and "world" in the post tags.

From operator
Use from:blog or from:@blog to find only posts by a particular blog.
For example, halloween from:staff finds all posts by @staff that has the word "halloween" in the post content or tags.

Year operator
Use year:YYYY to find posts from a particular year.
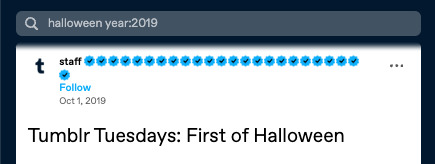
For example, halloween year:2019 finds all posts from 2019 that has the word "halloween" in the post content or tags.
Date operator
Use date:YYYY-MM-DD to find posts from a particular date.
For example, halloween date:2019-10-08 finds all posts created on October 8, 2019 that has the word "halloween" in the post content or tags.

All together
You can combine all the tools above to form even more specific queries:

Congrats! You’re now a Tumblr search wizard! 🪄
Other syntax
As a reminder, you can already search by a tag, or by multiple tags:
Prefixing your query with # performs a tag search — that is, it will find posts with that exact tag. For example, #star wars will only return posts with the #star wars tag.
You can search for multiple tags at at time. For example, #star wars #art will find posts that are tagged with both the tag #star wars and the tag #art.
You can combine this with the new operators to find what you are looking for!
We will add a guide for this new syntax soon to our Help Center.
Tumblr Patio support
The enhanced syntax makes Tumblr Patio even more powerful. You can now open multiple search columns each with different fine-tuned queries that use the syntax above to get you customized feeds.
Feedback
We’d love to hear what you think! Please share your feedback in the replies and reblogs of this post, or by reaching out to Tumblr Support.
-
 millie931 liked this · 4 weeks ago
 -
 yee-haw-wizard reblogged this · 4 weeks ago
 -
 colpfiction reblogged this · 4 weeks ago
 -
colpfiction liked this · 4 weeks ago
-
 elecctromechanika liked this · 4 weeks ago
 -
 valen-dreth liked this · 4 weeks ago
 -
 electoons reblogged this · 4 weeks ago
 -
 abditiveconnection reblogged this · 1 month ago
 -
abditiveconnection liked this · 1 month ago
-
 scify65 liked this · 1 month ago
 -
 anhaga liked this · 1 month ago
 -
 ofermod reblogged this · 1 month ago
 -
 atsa-reference reblogged this · 1 month ago
 -
 ilinit reblogged this · 1 month ago
 -
 losttheraven liked this · 1 month ago
 -
ofermod liked this · 1 month ago
-
 cookieloveranddaydreamer reblogged this · 1 month ago
 -
cookieloveranddaydreamer liked this · 1 month ago
-
 sagaspell liked this · 1 month ago
 -
 wistfulwizard reblogged this · 1 month ago
 -
 pengrins liked this · 1 month ago
 -
 ninhaoma-ya reblogged this · 1 month ago
 -
 elsa-lost-in-translation reblogged this · 2 months ago
 -
 abbessolute reblogged this · 2 months ago
 -
 redandglenda reblogged this · 2 months ago
 -
 fag-the-wholewideworld liked this · 2 months ago
 -
 pongnosis liked this · 2 months ago
 -
 katrinahelena reblogged this · 2 months ago
 -
 herehaveafandom reblogged this · 2 months ago
 -
 eclipsedrawsthings liked this · 3 months ago
 -
eclipsedrawsthings reblogged this · 3 months ago
-
 pipseroo-too liked this · 3 months ago
 -
 starvulture liked this · 3 months ago
 -
 trelaney reblogged this · 3 months ago
 -
 suspiciouslyqueeraardvark reblogged this · 3 months ago
 -
 bottlesandbarricades reblogged this · 3 months ago
 -
 nemesisreflection reblogged this · 3 months ago
 -
 myidealhousehaschickenfeet reblogged this · 3 months ago
 -
 the-greatest-8 liked this · 3 months ago
 -
 fag-wizard reblogged this · 3 months ago
 -
 crimboscrungly liked this · 3 months ago
 -
 liaonyxrayne liked this · 3 months ago
 -
 copperandstone reblogged this · 3 months ago
 -
copperandstone liked this · 3 months ago
-
 questionableliterarymerit liked this · 3 months ago
 -
 nahdogyouarenthavingit reblogged this · 4 months ago
 -
nahdogyouarenthavingit liked this · 4 months ago
-
 duckteap liked this · 4 months ago
 -
 killerrabbitsparkles liked this · 4 months ago
 -
 corruptedremnant reblogged this · 4 months ago
