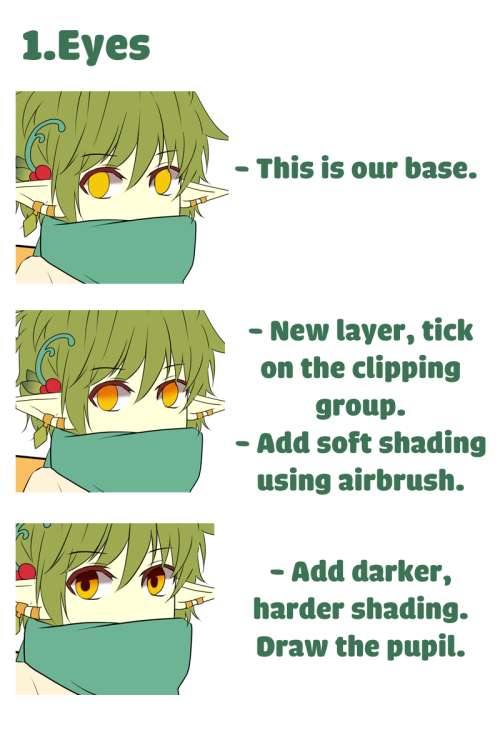
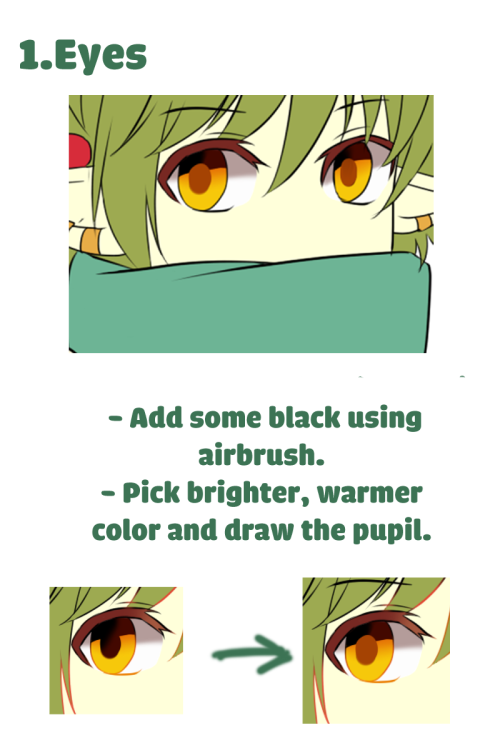
Lazy “coloring” Tutorial


Lazy “coloring” tutorial
More Posts from Itsmeif and Others

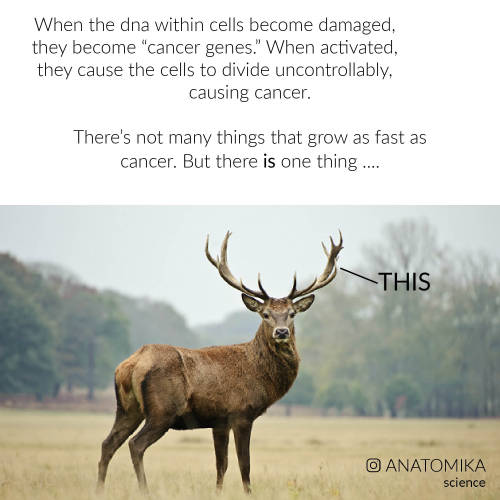


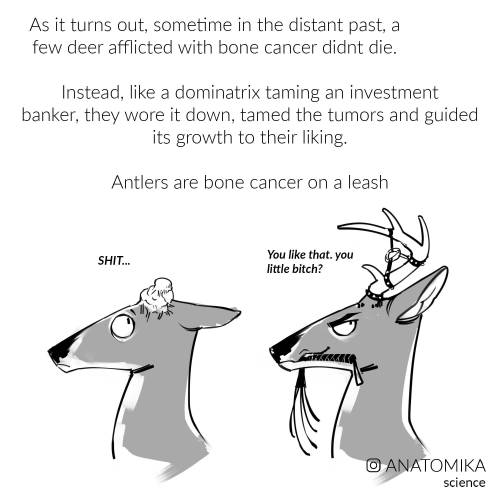
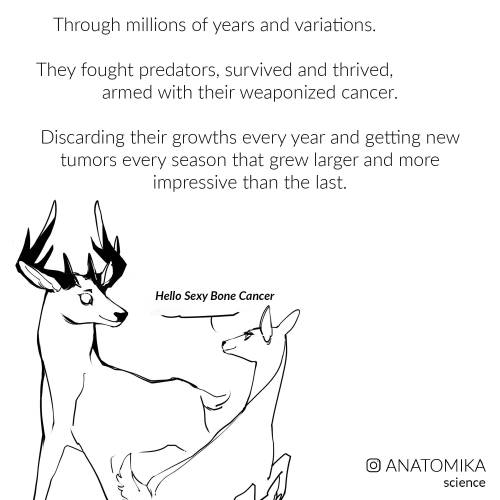
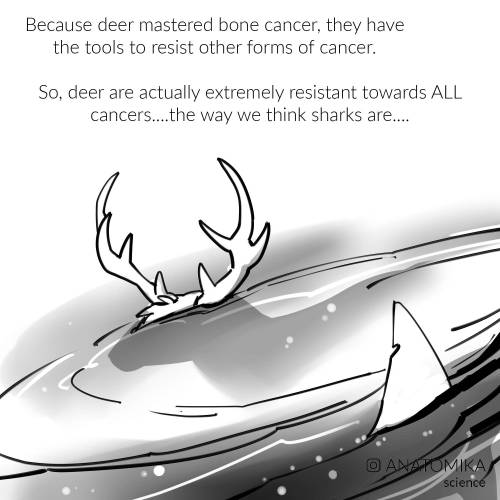

#WEAPONIZEDCANCER
Other places to see my posts: INSTAGRAM / FACEBOOK / ETSY / KICKSTARTER


hope this tutorial helps, anon!! a lot of this is a result of experimentation and seeing what looks best based on your picture. what i’m essentially doing is relying on the overall “mood” bg colour tie everything together cohesively by putting the local colours over it on the “soft light” filter. the other changes i do, such as the blue light on him and the flavour elements are all based around making it more cohesive, e.g. the glow from the pool is all over the background AND the subject, instead of just the pool, pulling them together, if that makes sense!
of course this also relies on having some sense of what a realistic version of your scene would look like - for this comic i looked up “pool scenes night” on google to gather references i could take the colours from, and looked up lighting references for the way light would hit a face if coming from the bottom, stuff like that.
the other example is from a commission i did:

in this case, the lighting situation has a lot more light, and isn’t as atypical as pool-at-night lighting. so it was easier to rely on my usual method of colour layering, i.e.
local colour on multiply (as opposed to soft light)
monochrome shading on normal
again, experiment experiment experiment! hope this helps!
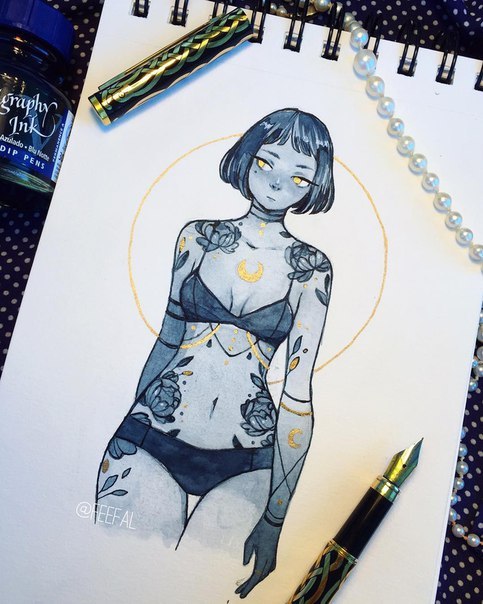

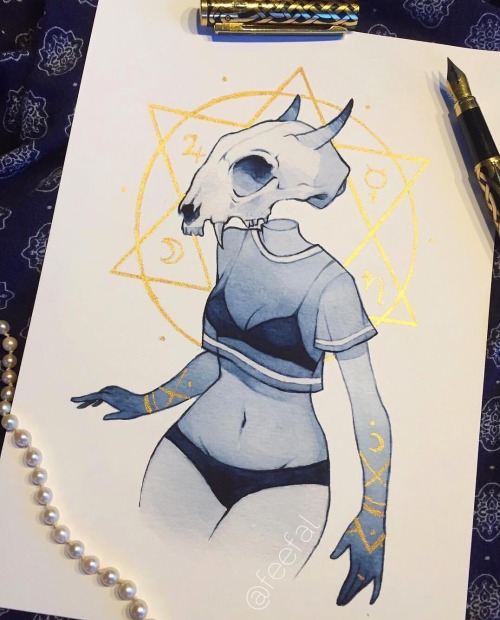

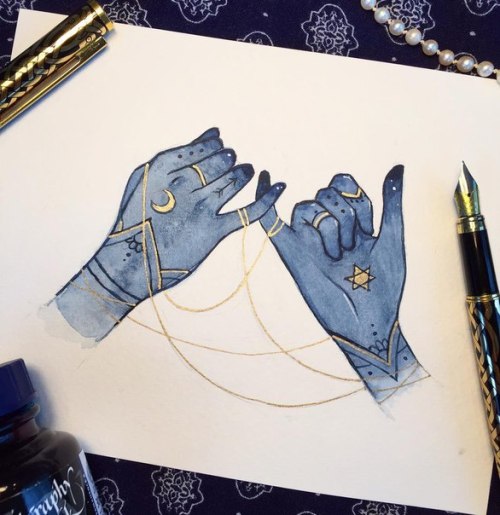


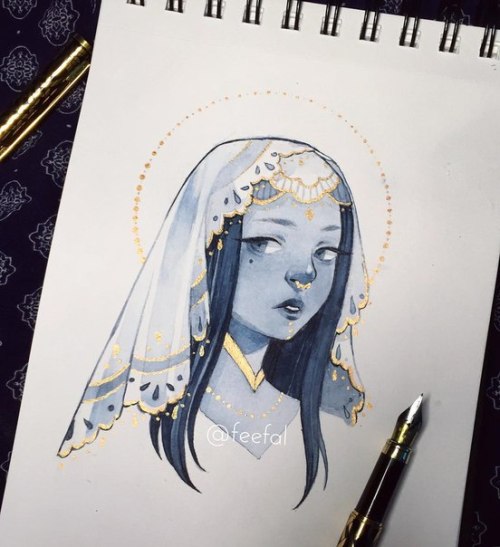
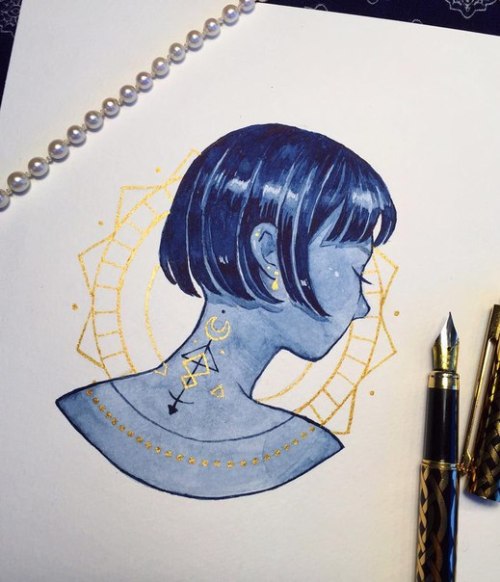

Art by IG: @feefal Instagram: @artwoonz


My friends asked me for an tutorial
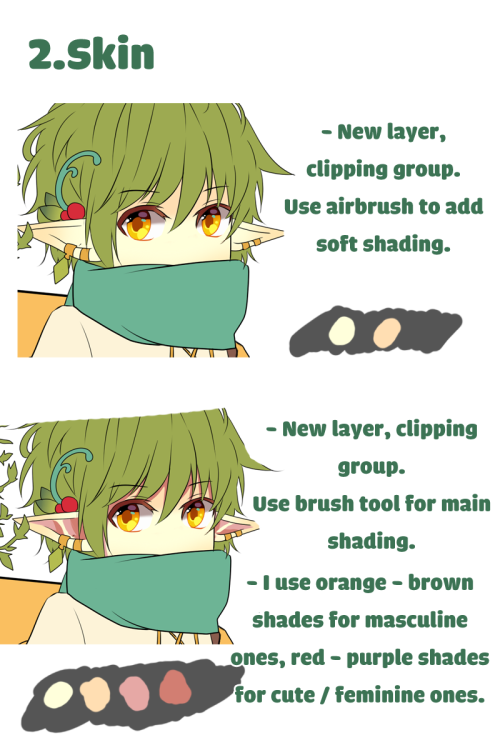
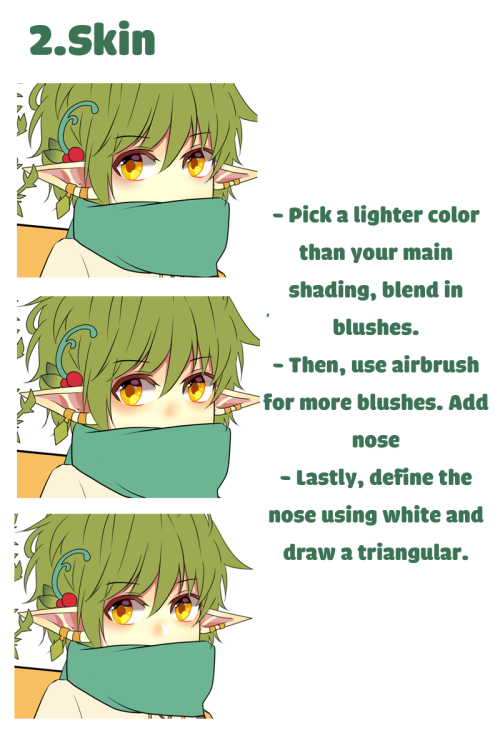
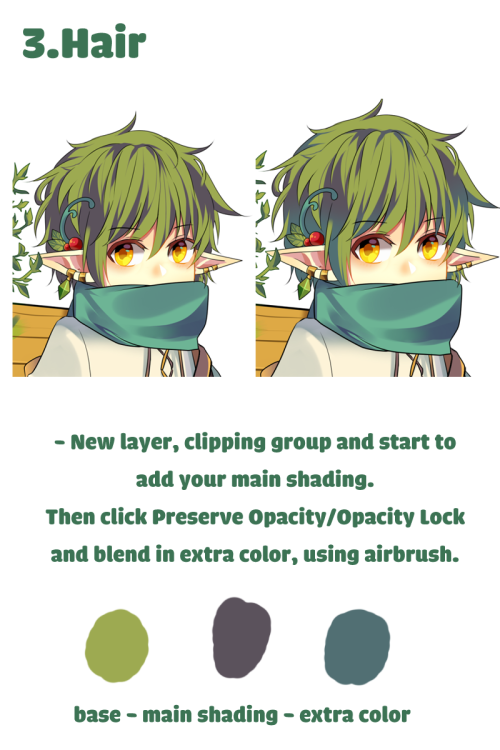
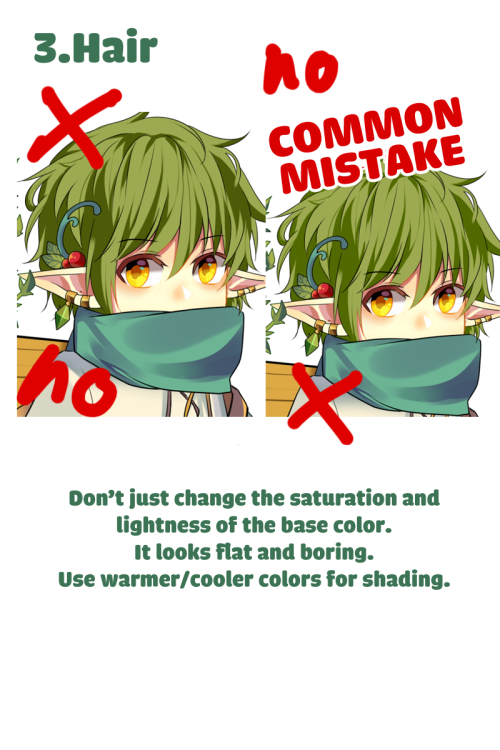
For Paint Tool Sai users. There should be plenty of guides on how clipper group, preverse opacity/opacity lock works so I won’t be adding them here.
Excuse my lame English, I’m not a native speaker.


a little larger than the entire universe - fernando pessoa // hafsa qasim // rosewater1997 // iphigenia in forest hills - janet malcolm // img // genesis 3:6

Thank you everyone for lifting us up to new heights. We are getting writers together and making plans for 2020. We do want to shed some light on burn out, which is something our visual artist is facing at the moment! Remember to take care of yourselves. For that reason it will be quiet from us till January when we come back with renewed strength! 💖💖💖🌈#thankyou : : #rise #studiokillers404 #cherry #jenny #dynamink #goldiefoxx #edm #music #animation #mentalhealthawareness #burnout #love https://www.instagram.com/p/B6TpEDqHint/?igshid=wo77yb0iy30t


Fox walk - Step by Step~
> Links to my social media < Patreon | Instagram | Twitter | DeviantArt | Youtube |


this is my own personal method and it might not guarantee results, but don’t overwhelm yourself and start small if the canvas is too intimidating. starting small also makes me more open minded to creating more dramatic poses. don’t overthink and have fun! hope it helps!
Your designs always have such lovely details. May I ask, how do you find the time to do so much intricate detailing? I feel like it takes me forever to do stuff like that and it's a bit discouraging. I end up sticking with simpler designs despite loveing more detailed designs. I've tried using custome brushes but your details look so much more natural.
it’s 50% me finding lazier ways to make details and 50% me just liking detail work a lot! here’s stuff that might make things easier for you tho~
Fancy Easy Lace (clarification! this is a FireAlpaca thing; make your life Super Easier by adding a Border Layer Mode if you’re using Photoshop!):

Gold Details:

Roses:

Sheer Cloth:

Then mix and match and put them all together:


Gemstone/Jewel Tutorial by Noqimir
Support the artist and buy them a coffee!
-
 varia-is-bored liked this · 4 weeks ago
 -
 mfreedomstuff reblogged this · 1 month ago
 -
 berrycrusty liked this · 1 month ago
 -
 redvolet liked this · 2 months ago
 -
 flowerlds-blog reblogged this · 3 months ago
 -
flowerlds-blog liked this · 3 months ago
-
 stormflowerstudios liked this · 4 months ago
 -
 kingakiuwu liked this · 5 months ago
 -
 bansheestrks reblogged this · 5 months ago
 -
bansheestrks liked this · 5 months ago
-
 caligocanis reblogged this · 5 months ago
 -
caligocanis liked this · 5 months ago
-
 chooeychoco liked this · 5 months ago
 -
 icikiwiro liked this · 6 months ago
 -
 knooter liked this · 8 months ago
 -
 mar-chive reblogged this · 8 months ago
 -
 redcotai reblogged this · 9 months ago
 -
 i-can-not-art liked this · 9 months ago
 -
 tximista-rissole liked this · 10 months ago
 -
 losos-in-the-clouds reblogged this · 10 months ago
 -
losos-in-the-clouds liked this · 10 months ago
-
 isaactea liked this · 10 months ago
 -
 melonnabar liked this · 10 months ago
 -
 nyxlux liked this · 10 months ago
 -
 drdoolotl liked this · 10 months ago
 -
 mardotmov reblogged this · 11 months ago
 -
mardotmov liked this · 11 months ago
-
 nymbra-tti liked this · 11 months ago
 -
 thefishdeath reblogged this · 11 months ago
 -
thefishdeath liked this · 11 months ago
-
 a-randomgnome reblogged this · 1 year ago
 -
 plushfrogg reblogged this · 1 year ago
 -
 2-cicadas-lacking-dignity liked this · 1 year ago
 -
 portal-patters reblogged this · 1 year ago
 -
 frys-the-cat reblogged this · 1 year ago
 -
frys-the-cat liked this · 1 year ago
-
 thesnowydragon reblogged this · 1 year ago
 -
thesnowydragon liked this · 1 year ago
-
 ace1diots reblogged this · 1 year ago
 -
ace1diots liked this · 1 year ago
-
 rockeyyyyyyyyyyyyyyyy reblogged this · 1 year ago
 -
 ibujous liked this · 1 year ago
 -
 scribbles-inks-main liked this · 1 year ago
 -
 azuregraves reblogged this · 1 year ago
 -
azuregraves liked this · 1 year ago
-
 genodotjpeg liked this · 1 year ago
