Some Vaguely Furby-related Doodles


Some vaguely furby-related doodles
More Posts from Thefurbenthusiast and Others
underrated form of humor: just making shit up in past tense


YALL REBLOG THIS POST WITH UR MOST CRYPTIC/CREEPY PICTURE OF UR LOVELY FURRY FUZZBALLS THAT ARE FURBYSSSSSSSSSSSSSSSSSSSSSSS


Loud Lime tutorial
so everyone really likes Loud Lime, my Furby I made in response to the huge influx of people enjoying the Juicy Grape and Tart Tangerine models. Here is how I did it.
Need:
water
acrylic paint
a cup or something to put paint in
another cup for more paint
a clean toothbrush
lots of paper towels
a hair drier (this is recommended but not that important, it just dries the paint faster)
a clean, flat workstation like a table
most importantly, a Furby!
so how I did mine was I took this:

a standard Tuxedo Furby
make a dime sized spot of paint in your paint cup
pour two tablespoons of water into the paint cup
stir it with something until it looks like you’ve got a whole cup of the color paint you poured in
ok and then dip the paintbrush in the mixture
*make sure to wiggle the extra paint off, drip drop it back into the cup*
>>>> brush brush brush! where you want the color to be, scrub scrub scrub at the area until Furby has a completely new fur color and no white fur is left
after the scrubbing, review your work; is there….
spots that aren’t colored in?
globs of paint in one area of fur?
paint where where shouldn’t be?
that’s okay because the next step involves gently patting your Furby’s fur with paper towels
get the extra paint off, so it isn’t all wet, should just be a lighter version of the full color you want
hair drier it for 5 minutes while brushing it with a comb/cat brush/brush
OR: wait for like 10-15 minutes. occasionally check to see if the fur is still soft and the texture feels good. brush your furbs fur!
step #3: once your Furby is dry, repeat everything i just told you to do.
>for the ears, just brush a thin layer of paint over the pink, it’s the easiest part
step #4: the faceplate
i used q-tips, those cotton swab on a stick things & dipped them in just regular paint to paint on the faceplate and eyelids. it wasn’t easy.
enjoy your Furby
i hope this helped lol
Bean’s way to create an OwO beak.
So you may have seen my furbies like Pongo or Salem or even the fake furby Furbish which has a reverse owo. I hope you enjoy this tutorial and it helps you! If you have any other questions, please let me know! Also please excuse my bandaids I jabbed myself while sewing.

The tools that will be needed to complete the owo task include:
A sharp implement
An implement that can poke things out from tiny places
Something that has the ability to grab
A colored pencil
Sandpaper
and the furby beak of course!
Other tools like hot water, hair dryer, dust mask, and protective gloves are optional, but all safety precautions are suggested.
Here are the tools I used

You will need to begin by skinning the furby then removing its beak. Using your poking implement poke out the rod that holds the beak together.


After the rod is poked out, you are easily able to remove the top and lower beak as well as the tongue that easily pop out. Please place all these pieces in a place where you will not lose them. I try and lay them out in a way so that I remember how they will go back in. The top beak part is always the one with the hooks on the outermost sides.

Take the top beak and using your colored pencil ( a colored pencil easily rubs off when everything is done) draw a line down the middle of the beak and then from that line create a triangle for how big you want your owo mouth to be. Keeping in mind you will be sanding some later.

Before this step for ease of carving it may be helpful to place to the beak in hot water or to use a blowdryer on the warm setting to soften up to plastic to make it easier to cut. I use a boxcutter because it is a little safer and easier to control and grasp. Using your sharp implement and wearing gloves or having an adult do so for you, with sawing motions begin to cut your triangle out.

Using a method with heat makes this process go a little quicker and sometimes smoother. But using the sawing motion go deeper and remember to saw the edges of the beak where your triangle ends. I put a little pressure in the cuts as I go to see where the cut is on the other side.

Keep in mind these photos are positioned in a way to show whoever is using the tutorial on how it is done. It is best to use both hands at all times. You will make your way through the beak and be able to take out the rest with your gripping implement. You may need to twist a bit to have it release.

After this has been accomplished, using sandpaper round out the edges to how much you want the owo curved. It is also helpful to sand the cut edges and the top of the triangle as well to give it a softer look.

When all this is complete, you now have an owo mouth! Congrats! I am so proud of you! If you want, you can paint or decorate the beak as well. To put the beak back in it is best to put the bottom beak, then the tongue, then the top beak on the furby. Then lastly slide the rod back in!

I hope you enjoyed this tutorial and I cannot wait to see all the cute creatures you create! Have fun and be safe! If you need any help, please let me know!
SOUND STUDIO


AS THE BAND’S MANAGER HE DECIDES THE SONGS!
My two baby boys in the recording booth!!!!
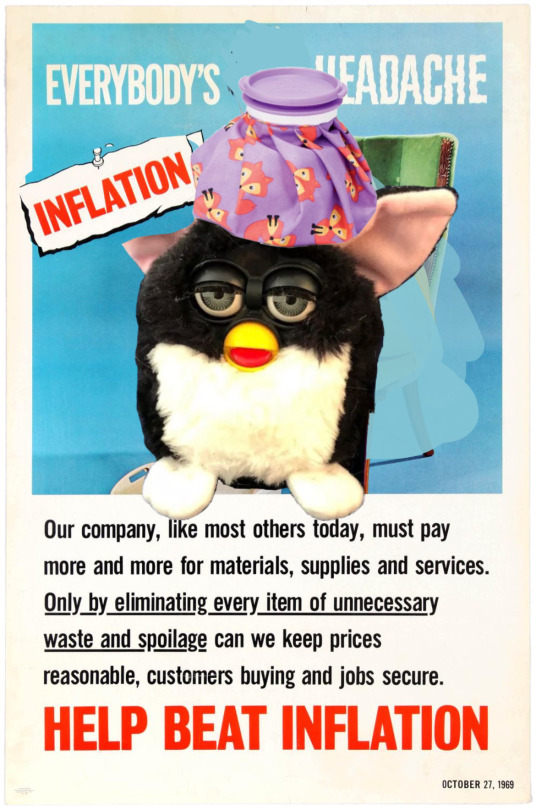
 let’s stop furby inflation

recently, I’ve noticed people selling normal Furbys for over $100 contributing to the trend that Furbies are very rare in any condition and are worth hundreds of dollars I’m sorry but your old crusty, dusty smelly Furby sitting in your basement is not hidden gem at most. It’s probably $30. this is a PSA to all the middle-aged women selling their Furbies for hundreds of dollars on Facebook marketplace 


Here are some prices that are good but just remember if your Furby is in rough condition, it’s probably gonna be lower things like a missing tag or missing, eyelash or not working can contribute to them being lower
update I made some propaganda posters feel free to upload these wherever you want


took 9/11 to walmart on the way to the beach! she was eeby deeby
Do you yield?
I YIELD. I FUCKING YIELD. PLEASE IM BEGGING.
a dead scene kid is trying to contact me through captcha


-
 mygoogledrivescaresme liked this · 1 year ago
 -
 furbbagel reblogged this · 1 year ago
 -
furbbagel liked this · 1 year ago
-
 millalya liked this · 1 year ago
 -
 skulldogstudios reblogged this · 1 year ago
 -
skulldogstudios liked this · 1 year ago
-
 pidgeonentity reblogged this · 1 year ago
 -
pidgeonentity liked this · 1 year ago
-
 kiwi276422 liked this · 1 year ago
 -
 mrgromitisdead liked this · 1 year ago
 -
 furbylover123456789 liked this · 1 year ago
 -
 organicsaturdaychurch liked this · 1 year ago
 -
 sodapop-hospice liked this · 1 year ago
 -
 aquaemreal liked this · 1 year ago
 -
 thefurbenthusiast reblogged this · 1 year ago
