Dask-s-folly - DasK's Folly

More Posts from Dask-s-folly and Others


Monica! My new DnD character, a tiny mewling that is totally 100% completely normal, nothing weird with her!
This was also my first time animating, and it was way easier than expected, and fun! I hope to animate things more in the future.
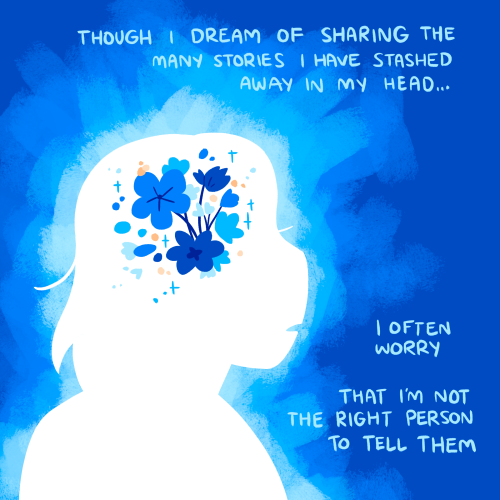

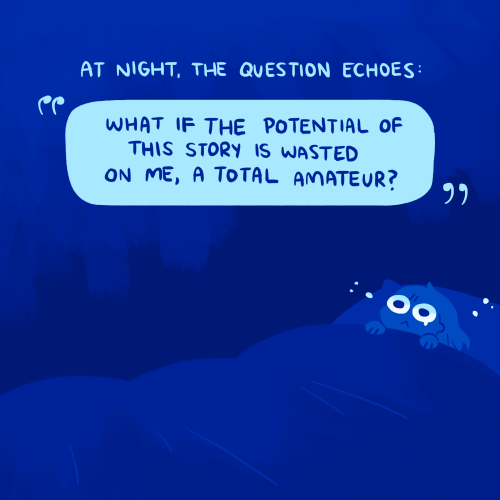
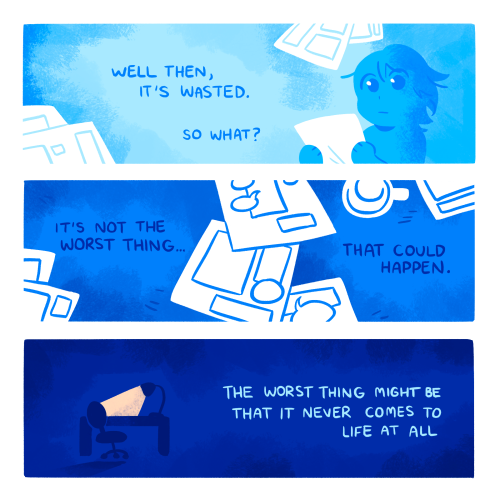
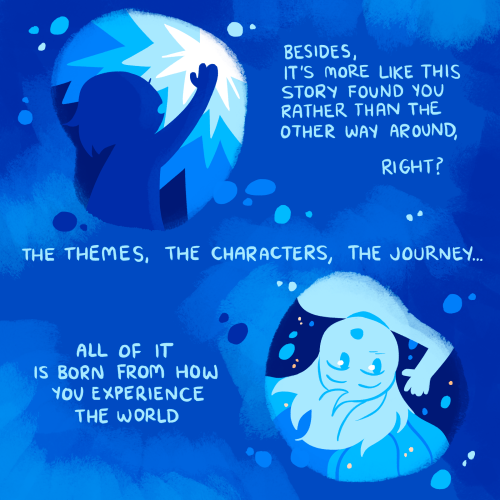
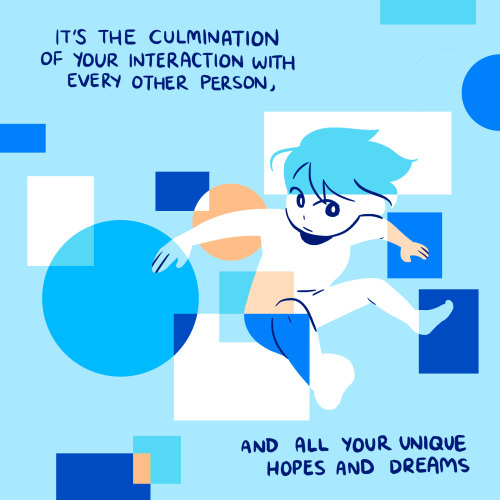
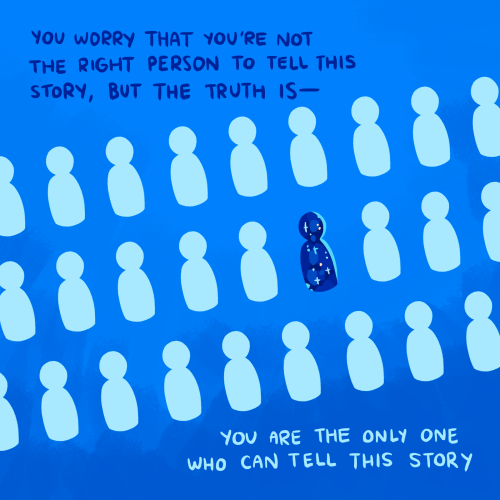
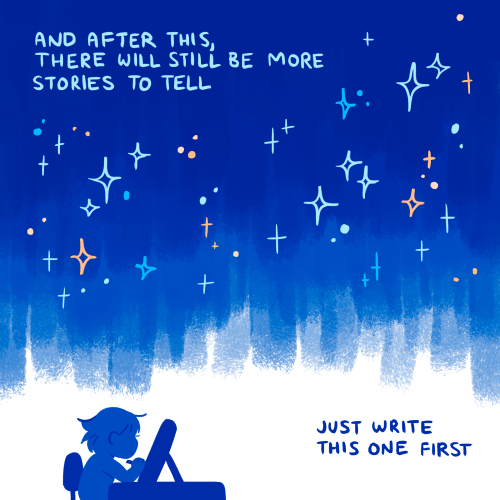
storyteller
sometimes I forget that I'm just a teenager writing a webcomic in my spare time, so I shouldn't hold myself to the same standards as, say, a feature film with an entire team of professional writers, or Hiromu Arakawa. Writing flawed stories is okay, and even necessary in order to write better ones :)
(if you want to read aforementioned amateur webcomic...)
#saaaaaaame, I want someone to compliment my boooooobs


Finally got some free time to do a live stream today! Consider sliding by and getting your character sculpted live!
link to stream: https://youtu.be/VC9JQgbZwNQ
to submit your character simply reblog this post with a full body, colored ref and be available in the stream for any follow up questions!
Make a Plush Step 2: The Pattern
So, you have an unwrapped 3D model now what? in theory, you could get those parts, print them and use those as patterns... but this dude called Seb Stamm, made this awesome free site that makes so much work for you! Man, if you can, please, donate this man a kofi for me! https://plushify.net
In that site you can find more info on how to UV unwrap and prepare your 3D model, and other guides better than this one, so i totally recommend you to take a look!

Anyway, you can upload the OBJ file you created on the last step, and the site will tell you if something is wrong. In this case, some tiny parts of the model are too stretched... but thats ok, i dont think they are gonna affect the model that much.
So, next step after uploading, is to give names to the parts of the pattern. You can omit this step, like I did... then I spent 1 hour trying to identify the 7 different kind of triangles this plush have, and even marked the wrong pieces on fabric ¬¬ Dont be like me, kids. You dont have to name everything, but do name parts if there are similar pieces in the model. Also, name how many of them you need, as sometimes you need to print 2 parts with the same pattern piece.

Coloring is also unnecessary, the program can tell you how to place the pieces on the fabric to minimize usage, so that's nice. I just did it cause I liked to see it in color :3

You can also add markings to the plush... but i have no idea how to do that, so... I'll ignoring them :P . Then, comes the place where i made my biggest mistake. The one that is gonna make this project take SO MUCH LONGER... Did you see how I have been using the tag Hubris? yea its there for a reason: I made this thing too damn BIG

Big Boi. Anyway, after all of that, you should get a PDF! With all the pieces and patterns, ready to print and assembly, this is so cool!

On the next step, ill print and assembly the patterns, and mark the fabric!
<- Prev | Intro | Next ->

Mosfet, cleric of Twilight, is having a very interesting dream. Again, pretty quick dumb drawing, but i kinda liked how this one ended. Again, done on paint.net with the curved line tool

ポケモンマスターズEX マジコスヒビキ ルギア
Happy 30th birthday Kirby!!
-
 possumpit liked this · 2 years ago
 -
 justsomeone27 liked this · 2 years ago
 -
 soft-anomaly liked this · 2 years ago
 -
 sylestial liked this · 2 years ago
 -
 purplexingpupp reblogged this · 2 years ago
 -
purplexingpupp liked this · 2 years ago
-
 razzledazzlesalazzle liked this · 2 years ago
 -
 dragongirltongue reblogged this · 2 years ago
 -
 skkskejejen liked this · 3 years ago
 -
 cephalopriince liked this · 3 years ago
 -
 raibnuuy liked this · 3 years ago
 -
 muttyum-archived liked this · 3 years ago
 -
 emmypupcake reblogged this · 3 years ago
 -
 waflbeans reblogged this · 3 years ago
 -
dragongirltongue liked this · 3 years ago
-
 approximately-63-crying-cats reblogged this · 3 years ago
 -
 andriel-and-others reblogged this · 3 years ago
 -
 6-----6 liked this · 3 years ago
 -
 mishyfishy99 liked this · 3 years ago
 -
 raker67 reblogged this · 3 years ago
 -
 nobody-bmp reblogged this · 3 years ago
 -
raker67 liked this · 3 years ago
-
 jam-chimera reblogged this · 3 years ago
 -
jam-chimera liked this · 3 years ago
-
 graylitschii liked this · 3 years ago
 -
 neosnivy reblogged this · 3 years ago
 -
neosnivy liked this · 3 years ago
-
 shawslayer liked this · 3 years ago
 -
 hardyorange liked this · 3 years ago
 -
 lowkeydeer reblogged this · 3 years ago
 -
 its-a-tyler liked this · 3 years ago
 -
 nikocat reblogged this · 3 years ago
 -
 lizard-city liked this · 3 years ago
 -
 qiisevil liked this · 3 years ago
 -
 gnollforhire reblogged this · 3 years ago
 -
 actualdikdik liked this · 3 years ago
 -
 maniakmonkey liked this · 3 years ago
 -
 bunnygirlskull reblogged this · 3 years ago
 -
 goopy-goopy-goopy reblogged this · 3 years ago
 -
goopy-goopy-goopy liked this · 3 years ago
-
 typhonlure reblogged this · 3 years ago
 -
typhonlure liked this · 3 years ago
-
 goblinbongwater reblogged this · 3 years ago
 -
goblinbongwater liked this · 3 years ago
-
 cooper-blogs reblogged this · 3 years ago
 -
 cooper-draws liked this · 3 years ago

This is where I dump things I made or steps of projects I work in
106 posts