So For Those Wondering.
So For those wondering.
The rules changed :(
I can't join the so wiki anymore and I am deeply upset i cant partake in something I've been dreaming to join since I was a little kid. It hurts but ig its okay.
We dont get to achieve all of our dreams in life and that happens.
It just sucks alot :(
After all this time and all the effort put into my scp related ideas
The thought of never being able to actually participate on such an amazing community hurts ALOT SJFBRKEH
that gamer moment
when you’re about to sign in to the ducking scp wiki, read everything in detail and learn where to do what but-

so you kinda just wanna enter to have “experience” but you don’t want to fail the rules so you’re thinking about waiting 2 years to creat the account.
but i completely understand the rule, and the fact that i’m complaining about it on tumblr shows that the rule is there for a reason.
so yeah. you better ducking bet im about to wait 2 years of my short and useless life just to creat an account there.
More Posts from Genderlessanxiousweirdo and Others


Abandoned

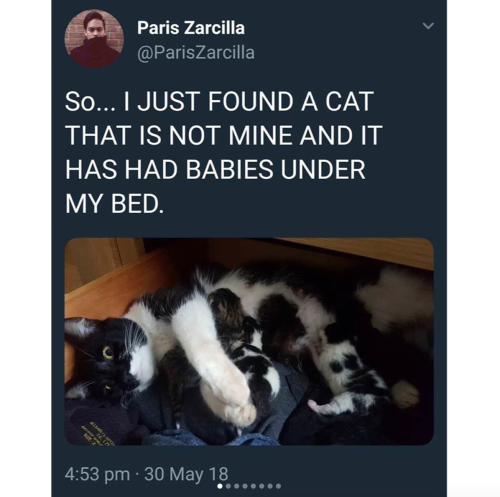

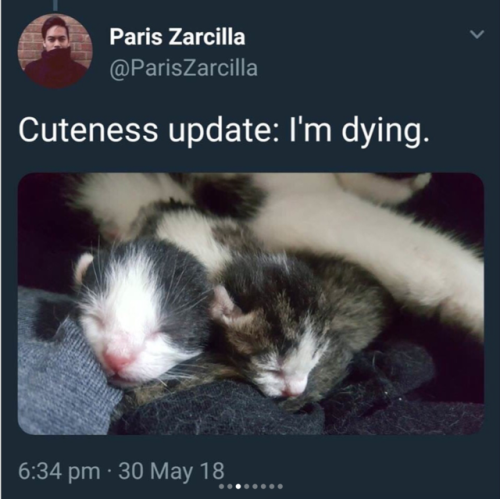
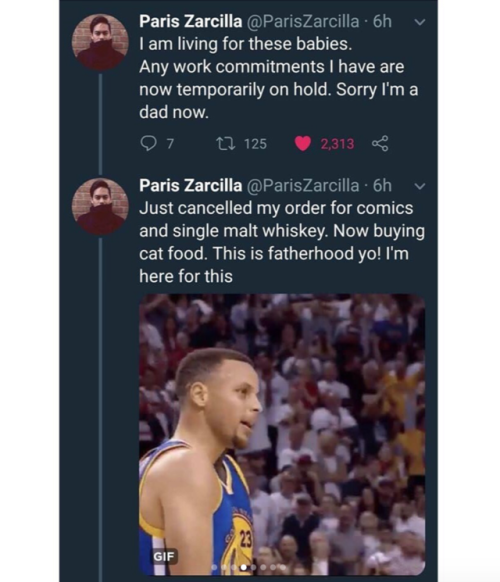

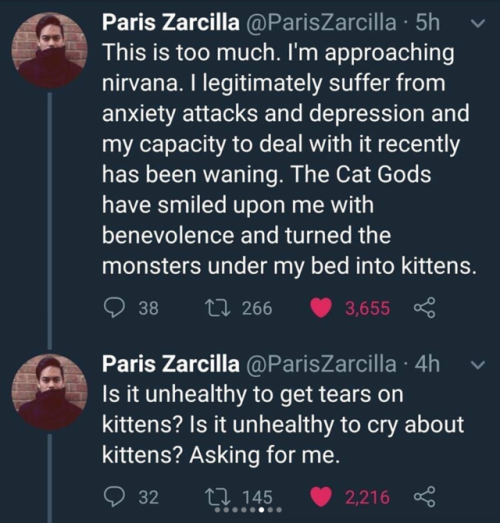


This is so wholesome
everyone knows about Human Pet Guy but i feel like only the real tumblr OGs remember Train Fucker Guy. the dude who would show up on literally every post even tangentially related to social justice issues being all internet tough guy like “unlike you sjws I’m not so easily triggered, there’s only two genders and white privilege isn’t real, lol u mad” and then you went on his blog and all his other posts were about him being very openly, proudly sexually attracted to trains. I dont remember his url because he would change it every two days but you always knew it was him, his icon was usually some ms paint anthropomorphic train girl with huge tits. everyone would immediately just be like “heyyy it’s Train Fucker” every time he popped up just like they do with Human Pet Guy


drain gang
happy father’s day to my real father, james corenthal. love you dad


ms paint. you know her. u used her age 8 to make loads of rainbow ovals all over the canvas and then scramble it with selection tool. now u will know her true powers with my handyrandy tips under the readmore. some will be pretty basic and others are very special.
this post has 8 cool trix to learn for you. enjoy and i may do another in the future if i remember/learn more stuff
some of it might be common knowledge. but its got some deep cuts. all tips have gifs to show process easily.
🙂 enjoy and i hope this encourages you to fuck around in mspaint more
soundtrack for this post (loop it while you learn for advanced learning experience)
TIP 1) the right click trick
left and right mouse click correspond to col1 and col2 respectively, which u can see in the top bar. this applies to all brushes and the fill tool like above. when using shapes col2 will be the fill colour (if you have solid fill selected). right clicking with shape maker will reverse the colours use on the shape.
TIP 2) right click eraser
this one is extremely helpful for lineart or add shading. the eraser always uses col2. so your eraser can technically be any colour. but here's where you get powers: right clicking with eraser will only erase onto col1, with col2.
TIP 3) transparent selection change a guy destination
the beloved transparent selection tool works based on what is selected as col2. so long as you have the correct colour as col2 you can make any image transparent and put it on top of anything else. and yes this works with photo bg as you can see.
TIP 4) the gradience
this one is a little more complex. you want to start off with any canvas size, and make as many diagonal coloured bands as you want. (protip: holding down shift makes a perfectly diagonal line with line tool)
then you need to resize the canvas to a width of 1px (make sure you resize by pixels, and do not maintain aspect ratio). then resize again back to its original width (or a different width i cant stop you). you will have your lovely gradience.
TIP 5) superimposter
so. you got a cool gradient and wanna put a guy on it. heres what i do:
i open a 2nd mspaint with same canvas size and draw whatever i want on there. i then pick a completely unrelated colour to my entire piece, and set that as the bg. you could use white, pink, geen, whatever you want as long as it doesnt appear somewhere else in ur drawing. copy the guy.
go back to your gradient tab. ensure that col2 is set as that bg colour you picked (lilac for me). have "transparent selection" enabled. paste your guy in. cue fanfare
TIP 6) advanced superimposter
the great thing about this method is u can put multiple gradients in multiple areas of the image. this is where it gets all japanese printmaking type of shit. ukiyo-esque
all you need to do is make another canvas with a new gradient, ensure col2 is set as the colour you want to replace, then paste your original piece onto the new gradient. now my guy has a soft fade. you can do this as much as you want. (you could even make a canvas with a texture or photo and paste your drawing onto there)
TIP 7) "sketch layer"

so as you now know, col2 is what is removed when you click "transparent selection". which means you can also remove any instance of a colour from ur drawing. which means you can have a unique colour for sketch layer and remove it from the drawing later. i admittedly dont do this but it is a great trick to have.
now combine this with lowering your dpi for smoother lines. may seem obvious but it helps. its like a free stabiliser whenever u want.
TIP 8) rainbow art

now this is where you can get dizzee rascal "bonkers". check out my small and shitty rainbow trick. you can select anything and hold down shift, then drag with left mouse, to turn that selection into its own brush. i even did it with a guy. and you can of course do this with a photo as well.
🙂well that it for now. hope you liked it thanks for reading now back to your regularly scheduled tgcg programming
anyway. onto better things

-
 genderlessanxiousweirdo reblogged this · 3 years ago
 -
genderlessanxiousweirdo reblogged this · 4 years ago
-
genderlessanxiousweirdo reblogged this · 5 years ago
