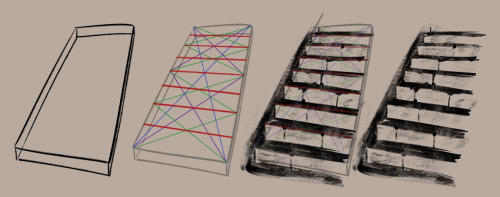
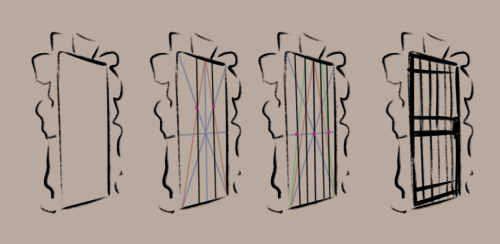
Really Helpful Technique ^ Once You Know How To Divide By Halves And Thirds It Makes Drawing Evenly Spaced

really helpful technique ^ once you know how to divide by halves and thirds it makes drawing evenly spaced things in perspective waaay easier:
More Posts from Scrapbox-in-the-attic and Others


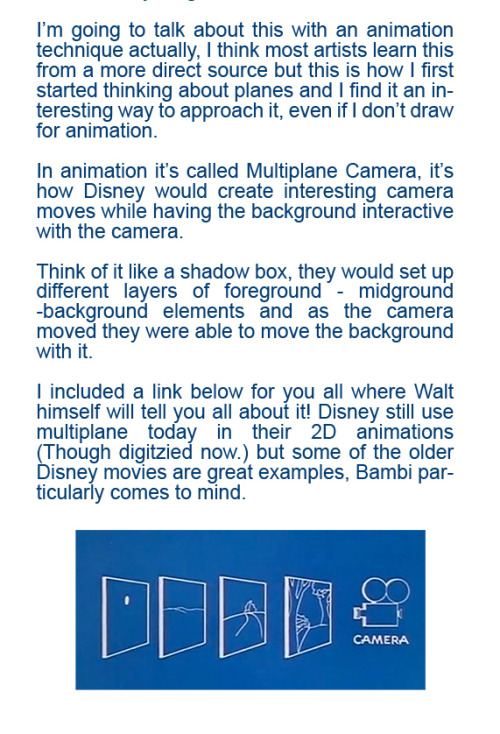


Walt Explains Multiplane Camera
I’ll also do some notes on perspective and dynamic posing later. (We’ll see how dynamic posing goes considering I’m not too great at it myself so… yeahhhh.)

If you do more tutorials maybe poses?
How to do better poses:

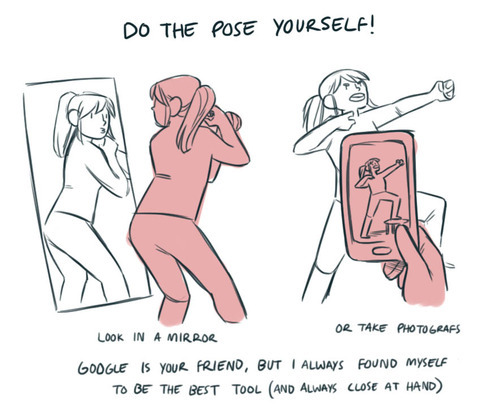
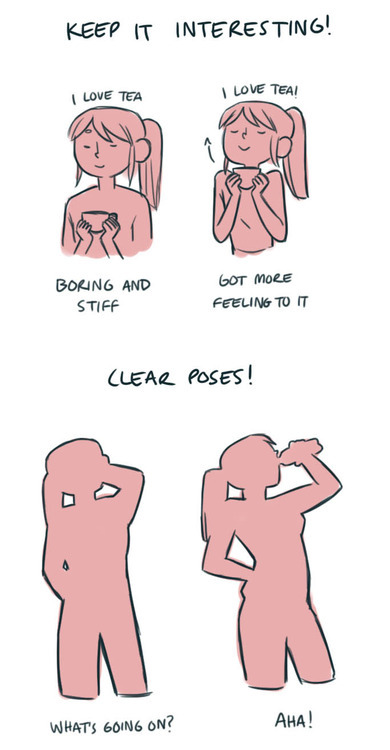
a few things to think about when doing poses, just from the top of my head so it’s not very thorough. Hope it helps!


Prepping your print from file to finish: I always hear people complaining about how much better the piece looked digitally, SO, here is a run down on how to get prints that look more like your original piece. First of all, every printer is different. Every paper is different. Make sure you take the time to do test prints and become familiar with how your printer and paper combo work, as you’ll rarely nail a print your first try. This one took about 5 test prints before I was confident to print on the expensive large paper Every time I mess up on a print, I save the remaining paper to use as scraps for test prints. As you can see, the original piece looks very nice! The focus is super strongly on the tiger, and all of the vibrant colors are still super evident in the background. That said, when I print it as is, everything about 85% gray or darker turns BLACK. And this is high quality paper designed to get accurate vibrant colors, too. The best way to fix this is to do layer effects. Brightness/contrast is my favorite, as a typical piece will generally print about 5x better if you up the brightness to around 15-25, and adjust the contrast up or down by 5-10 points. That said, if you have a HIGH contrast piece (Darks against brights) like this one, you typically need to do a few more steps. Often I’ll do a second brightness/contrast adjustment layer and push brightness to an obnoxious level so the darkest darks are closer to a mid-dark range. From there, I’ll create a mask and use a transparent gradient tool to slowly pull back the brightness on all of the lighter areas of the image. Additionally, due to printers using CMYK and your screen being RBG certain colors just physically CANNOT print. Some people will always work in CMYK because of this, but honestly I like my saturated colors and most of my work is intended to be seen digitally so I only ever work in RGB. Photoshop has a nifty toggle (Ctrl + Y) where you can toggle between CMYK and RGB view to see how your piece will appear when it prints. It’s useful to check this because if you worked in a color that cannot replicate in print, you may want to shift it entirely before you even bother printing. Artwork tends to desaturate a bit as it prints, so I’ll often make a Hue/saturation layer to play with, too. In this case the image was already pretty damn saturated, BUT some of the shadows on the tiger were printing more brown than orange, so I adjusted the saturation a bit to keep them vibrant with the rest of the image. **DO NOT use “Lightness” to lighten your image! It basically adds a white overlay to your image. Always use Brightness, instead. After all of that, I have a final print that much more closely captures the essence of the original painting. I could have tinkered even more, but to me the goal is a good print rather than an exact copy. For ULTRA high contrast images, like a dark room looking out into a snowy exterior, expect to do a LOT of adjustment to get it to print correctly. Printers just aren’t too fond of super darks right up against super lights. I could make a proper tutorial on this if people request it. Mostly, just wanted to put my thoughts down in one spot!

“Sneaker and ankle drawing techniques”
Source: Twitter at takuya_kakikata
fat bodies tutorial!
ALRIGHT SO my pal @kalreyno wanted help with drawing fat characters and as a fat artist i felt like i could give a bit of helpful insight on that. there’s also been a lot of complaining about “boo hoo fat characters are hard to draw so i can’t include them in my work Ever” goin on lately so if that’s your case then this is for you too!! and also just for anyone who would like help with fat bodies in general, ofc. anyway, let’s get this show on the road!!

let’s start with some common misconceptions. these are the two main attempts at chubby bodies i run into, so i’ll focus on them.
the Anime Chubby i see everywhere, and it’s just……so wrong in many ways. first of all, there is almost no additional body fat compared to your average thin character - except for where it’s added in “attractive” places (breasts, hips, thighs). the breasts are way too perky, and don’t have the realistic shape fat would give them (though how to draw accurate breasts is another tutorial all on its own lmao). there is still a thigh gap, which usually only happens in very thin people, and bones are still visible on the surface of the skin, which also rarely happens in fat people.
the Michelin Man is better in some ways, but still not that great. it’s a slightly better attempt, but basically all that’s done there is taking a thin character and blowing them up, while giving no thought to fat distribution. the thigh gap is usually still present, and they look a lot more hard than soft - and fat is very soft and pliable.
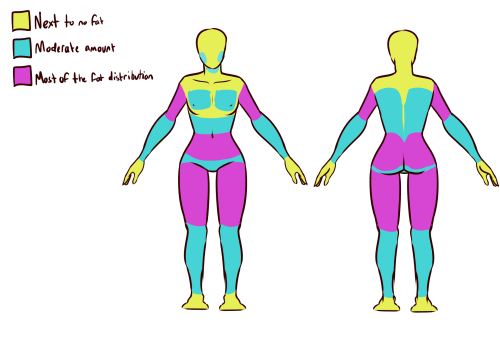
here’s a chart on how fat usually distributes (if you can’t read my messy writing, “1. next to no fat, 2. moderate amount, 3. most of the fat distribution”). basically, the more muscle an area has, the more prone it is to develop fat, such as the abdomen, thighs, and upper arms. it’s important to note that fat sits on top of muscle, and that it does distribute in different levels, and not evenly across the body as shown in the Michelin Man.
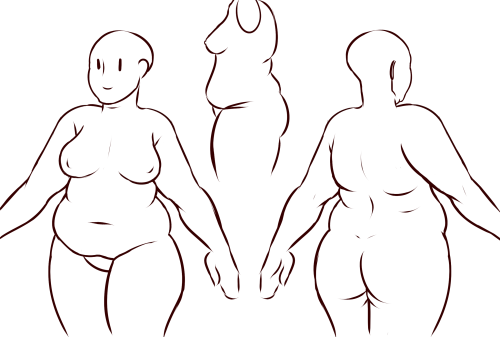
now, here’s an accurate fat body with all of that kept in mind!! notice how the fat isn’t only kept to aesthetically pleasing areas, and how it sits realistically on the character’s body. their breasts sag a lot more, which happens even in thin people with larger breasts, and the nipples are pointing more downwards than straight out. there is no thigh gap in sight, there are no bones in sight, and most importantly, they have fat rolls, which are very important in drawing a convincing fat character!! as far as i know i’ve never met a single person with no rolls at all, and everyone has them, whether thin or fat - they’re just more prominent and more consistently present in fat people. pay close attention to where they are and how they’re shaped.

here are a couple of drawings showing how fat is affected when sitting vs stretching. as seen in the first, the fat specifically on the stomach is distributed a lot more evenly and stretched out, so it becomes “flatter”. the love handles are still pretty visible, though, as well as the fat on the thighs and arms. the breasts are raised with the shoulders, and the fat on the shoulders and near the neck forms rolls as it’s being pushed together.
in the second, there is a lot less room for distribution, so the fat is all pushed together. the breasts sag and the stomach forms rolls and spills into the lap. a good analogy for the way fat works is to liken it to a water balloon, and thinking of how its shape would change when resting flat on a surface, hanging off of a ledge, held upright, etc.

here are a few extra tips i find a lot of people miss!
first on the top is the hip/pubic region. the first circle is showing the way the bellybutton is folded in fat people, as opposed to stretched out in thinner people. the second is the stomach fat spilling over onto the pubic region and creating a separation in the two areas, which is something that’s missing in a lot of art. in addition, the pubic mound also gains fat, making it round as seen in the profile drawing i did up there (i’ve heard people refer to it as fupa?). the last in the hip region is the lack of a thigh gap. i can’t stress this enough!!!! if you’re trying to draw a convincing fat character, make sure their thighs are pretty much always touching!! for reference, mine literally don’t separate until my feet are about 2ft from each other.
the bottom right is showing the double chin, which a lot of people are afraid to draw!! fat does distribute itself here too, and there’s nothing wrong with it, so don’t feel like you shouldn’t give fat characters a double chin in your work for fear of it looking like a caricature.
in the bottom middle, it’s showing how fat affects different types of breasts with the presence of more or less breast tissue.
lastly, at the very right are stretch marks with their usual locations and directions, which i also can’t stress enough!!!!! i sometimes forget to add them honestly, but they’re so important in accurately portraying fat characters, as they literally come from the skin being stretched from fat being gained (and they’re also just rlly neat lookin like why wouldn’t you lmao). some people have less and some people have more, feel free to experiment with them!

the last thing is body types!! there isn’t one single way for a person to be fat, so feel free to experiment with shapes once you’ve learned the basics!!
so there you have it, a tutorial on how to draw chubs!! now go forth and make some accurate fanart or some rad fat characters, because the world could always use more of both. hmu if you have any questions or concerns, and thanks for reading!!
UPDATED DISCORD FORMATTING ♡ updated reference sheet for those newer to discord (or those who aren't familiar with markdown in general) ! my last post didn't include links, headers, or lists. you can access the google doc version in the source link.

Attention anyone who needs hairstyle references
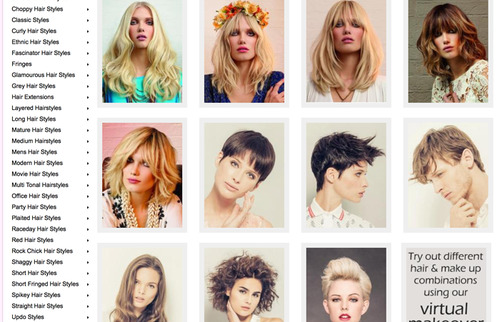
I want to introduce all of you to this amazing place called the ukhairdressers style gallery.
It’s basically a massive database full of high-quality images of different hairstyles. I mean, look at all the options in that sidebar (and part of it’s cut off):
In total they have 976 pages of hairstyles with about 17 styles each, that’s about 16592 hairstyles to look at.
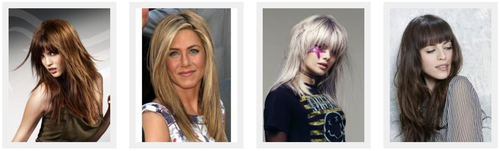
Look at all the stuff they’ve got! Long hair:
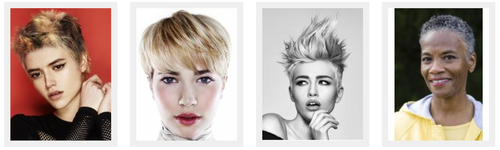
Short hair:
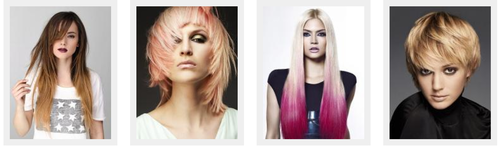
Straight hair:
Curly hair:

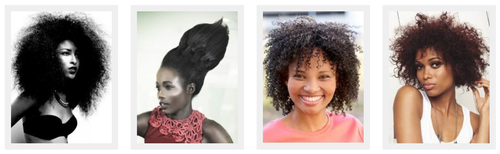
Afro hair:
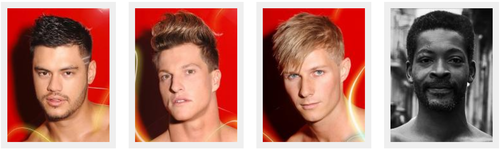
Men’s hair:
Hair on older models:

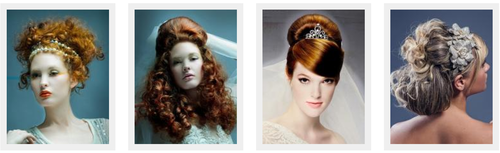
Extra-fancy hair:
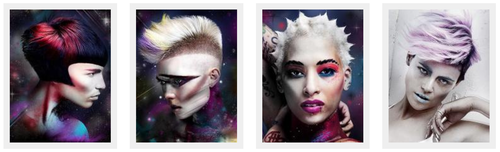
Even crazy avant-garde hair:
So if you need help with designing a character or you just want to practice drawing hair, this is a fantastic resource.
-
 anikinetic liked this · 1 month ago
 -
 babababookmark reblogged this · 1 month ago
 -
 whydoievenbotherwiththat reblogged this · 1 month ago
 -
 unabashedlykitty reblogged this · 1 month ago
 -
unabashedlykitty liked this · 1 month ago
-
 nolongersatan reblogged this · 1 month ago
 -
 kangaroomaze reblogged this · 1 month ago
 -
kangaroomaze liked this · 1 month ago
-
 adinosaurnamedmittens liked this · 1 month ago
 -
 lichtecht reblogged this · 1 month ago
 -
 no-longer-babygirl reblogged this · 1 month ago
 -
 babygirlismpersonified liked this · 1 month ago
 -
 dearamor reblogged this · 1 month ago
 -
 11sunflower110 liked this · 1 month ago
 -
 tbhcreacher reblogged this · 1 month ago
 -
 bluebellsarchive reblogged this · 1 month ago
 -
 redpawner reblogged this · 1 month ago
 -
redpawner liked this · 1 month ago
-
 brokenxana reblogged this · 1 month ago
 -
 gonnaneedthatlater reblogged this · 1 month ago
 -
 classic-snake liked this · 1 month ago
 -
 vethale reblogged this · 1 month ago
 -
 fruitsfantome reblogged this · 1 month ago
 -
 4gn0l0tt1-dud3 liked this · 1 month ago
 -
 evi4th liked this · 1 month ago
 -
 pyrriax reblogged this · 1 month ago
 -
 rtn-loveur liked this · 1 month ago
 -
 the-official-furry-idiot liked this · 1 month ago
 -
 patr0n-sa1nt reblogged this · 1 month ago
 -
 marquisiere liked this · 1 month ago
 -
 halfmaskshadow liked this · 1 month ago
 -
 mythiious reblogged this · 1 month ago
 -
mythiious liked this · 1 month ago
-
 ongoingmunchies39 liked this · 1 month ago
 -
 tazeffect reblogged this · 1 month ago
 -
 romdocitizen liked this · 1 month ago
 -
 oldmanontumbler liked this · 1 month ago
 -
 mechon117 liked this · 1 month ago
 -
 event-x-horizon liked this · 1 month ago
 -
 neonsugarcube reblogged this · 1 month ago
 -
 imaginehavingaregularthought reblogged this · 1 month ago
 -
 sparkyscout reblogged this · 1 month ago
 -
 sarkos reblogged this · 1 month ago
 -
 monsterfluffer liked this · 1 month ago
 -
 nyxia-rose reblogged this · 1 month ago
 -
nyxia-rose liked this · 1 month ago
-
 sprinkles62 reblogged this · 1 month ago
 -
sprinkles62 liked this · 1 month ago
-
 redacted-moon liked this · 1 month ago
 -
 dappio liked this · 1 month ago
