I Don’t Post This Often, But I Have A Pokemon Dnd Discord If You Want To Join. We Talk About Pokemon,

I don’t post this often, but I have a Pokemon dnd discord if you want to join. We talk about pokemon, dnd and try to get games together.
https://discord.gg/yDaCBREF
More Posts from Dask-s-folly and Others

Anyone needs a boss melted?
Man, they nerfed Lunafaction??? I've only played destiny for a short while, between forsaken and the season of opulence, but my favorite combo was always Merciless + Lunafaction. Who needs Whispers when you have these two?
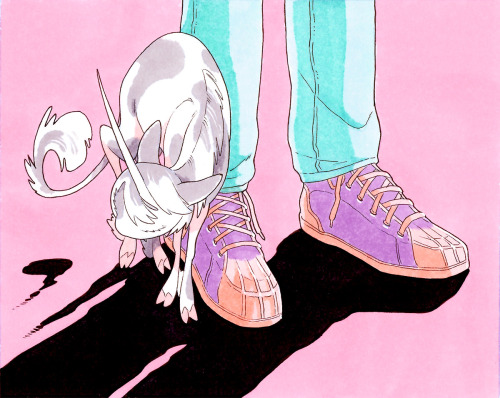
Im WAY happier with this drawing than with the rest of my inktober ones, but those where experimental and took like... i dunno, a quarter of the time of this one

Finally got some free time to do a live stream today! Consider sliding by and getting your character sculpted live!
link to stream: https://youtu.be/VC9JQgbZwNQ
to submit your character simply reblog this post with a full body, colored ref and be available in the stream for any follow up questions!


i spent wayyy too much time on this ahaha.. anyway day one!! first meeting
@heropartnerweek


Favorite drawings of 2021 ♥️ Thank you for coming along on this ride with me!


botanical pokemon 🍀


Make a Plush Step 2: The Pattern
So, you have an unwrapped 3D model now what? in theory, you could get those parts, print them and use those as patterns... but this dude called Seb Stamm, made this awesome free site that makes so much work for you! Man, if you can, please, donate this man a kofi for me! https://plushify.net
In that site you can find more info on how to UV unwrap and prepare your 3D model, and other guides better than this one, so i totally recommend you to take a look!

Anyway, you can upload the OBJ file you created on the last step, and the site will tell you if something is wrong. In this case, some tiny parts of the model are too stretched... but thats ok, i dont think they are gonna affect the model that much.
So, next step after uploading, is to give names to the parts of the pattern. You can omit this step, like I did... then I spent 1 hour trying to identify the 7 different kind of triangles this plush have, and even marked the wrong pieces on fabric ¬¬ Dont be like me, kids. You dont have to name everything, but do name parts if there are similar pieces in the model. Also, name how many of them you need, as sometimes you need to print 2 parts with the same pattern piece.

Coloring is also unnecessary, the program can tell you how to place the pieces on the fabric to minimize usage, so that's nice. I just did it cause I liked to see it in color :3

You can also add markings to the plush... but i have no idea how to do that, so... I'll ignoring them :P . Then, comes the place where i made my biggest mistake. The one that is gonna make this project take SO MUCH LONGER... Did you see how I have been using the tag Hubris? yea its there for a reason: I made this thing too damn BIG

Big Boi. Anyway, after all of that, you should get a PDF! With all the pieces and patterns, ready to print and assembly, this is so cool!

On the next step, ill print and assembly the patterns, and mark the fabric!
<- Prev | Intro | Next ->
Make a Plush Step 1: The Model
So, i decided to make an Helioptile plush cause, well, the guy needs more love, and i have a PMD D&D character, so yea. Also! I found a pattern for it by Diffeomorphism! but, unfortunately, it was one of their first attempts and the result was a bit... underwhelming (It was their first pattern, they got really good at this) So I started wondering... why don't I make my own pattern?
I found this awesome site called Plushify, that can create patterns just by uploading an UV unwrapped 3d model. Hey, i made that donut tutorial on blender, and i watch Captain Disillusionment... that kinda makes me an expert on blender! I can totally do that! Lets me just grab an already rigged model from Model Resources:

Fine, lets pose it and use the edit tools to cut and them mark as seam the eyes and other lines so i can cut it on different materials and... done!

Man, this is so easy! Now, to UV Unwrap! The process is a bit hard to underestand at first, you grab the 3d object and cut it and present it as a 2d plane... If you have seen a Skin for Minecraft or a source engine npc texture, then you are gonna understand how it works. You also need to add extra cuts so it bends right and has a good shape after sewing, and some other concerns. Its a bit hard to put in paper, but if anyone wants me to talk about how i cut this, send me an ask and I'll make a post!
Anyway, i do papercrafts, thats basically UV unwrapping in reverse, right? yea this is gonna be so easy!

Wait, no...

oh heck no... third times the charm!

OH SHIP NO!

THEEEERE WE GO! Again, i suck at explaining this, but if you want some help on how to do this, let me know! It did take me a couple of days and some tries tho, this is the 6th and final revision

I even printed some patterns before realizing some error I made, but yea, once done, export an OBJ file and you are ready to upload it into https://plushify.net! I talk about this on the next step
Intro | Next ->

freedom at last :)
-
 fishoftheocean liked this · 3 years ago
 -
 jaelbells liked this · 3 years ago
 -
 solarflareanon liked this · 4 years ago
 -
 squighetti reblogged this · 4 years ago
 -
squighetti liked this · 4 years ago
-
 tranquilrabbit liked this · 4 years ago
 -
 sagefox84 liked this · 4 years ago
 -
 dask-s-folly reblogged this · 4 years ago
 -
 guiltyidealist reblogged this · 4 years ago
 -
 yeeshastone reblogged this · 4 years ago

This is where I dump things I made or steps of projects I work in
106 posts