How I Use Google Drive For University - Pt 1: Digital Notetaking By Kkaitstudies

how i use google drive for university - pt 1: digital notetaking by kkaitstudies
idk about you but i’ve tested a bunch of note taking methods. in my last few years of university, i was indeed lazy and rarely referred back to the professor’s slides in the course shell. i opted to read off the slides in lecture and take notes. while MS OneNote is great, i found myself enjoying Google Drive much more. so here is a quick overview of how i take notes using Google Docs.
folders are your friends
make separate folders for each of your courses. google drive even gives you the option to change the colours of the folders. in these folders, add any relevant coursework such as the syllabi, readings, and your notes document.

use one doc for notes per course
once you receive the syllabi, take some time to take note of required readings, and assignment deadlines. i have created a free template you can save to your own google drive that you can access here. fill out:
- course code & name - prof’s name, office hours, and email - date(s) for each week of class - weekly readings (tip: if you have online readings, you can link them in the doc!) - & open the document outline (view > show document outline)
you also don’t have to use all these features. T B H, i didn’t do weekly readings. a lot. oops. BUT i did always pay attention in lecture. i simply deleted the “reading notes” header every week i didn’t bother to read.

make use of early access to lecture slides, headers, etc.
some profs (bless their souls) post the slides sometime before the lecture. if you have the time, copy the lecture slides into your notes. and if they don’t…type real quick to get all the info as it’s happening (or go back to slides online after lecture to see what you missed out on). i separate lecture topics with headers, with the bullet points underneath (see above). if there is anything that the prof says during class that isn’t in the lecture slides, i will change the colour of the text to a different colour. any important concepts or testable material are highlighted.
…and that’s how i take notes! everyone is different. not all note-taking methods work for everyone. this is what worked for me in my last 2 years of uni. hopefully a similar structure works for some of y’all! also, let me know what you think and @ me if you end up using my template. have a great semester!
coming soon: [ part 2: grade tracker | part 3: gmail and gcal ]
More Posts from Swirlspill-study and Others
how i use notion #1: mega assignment list
i promised i would update this from last year, and decided to do a walkthrough for @sleepanon!
i’ve taken my school bujo-ing digital for the past year, so i’m going to create a mini-series of how i’ve tinkered with notion to make it work for me! there’s a fair learning curve to it, so my inbox is open for questions if you have any from my posts (not notion in general. ..i’m not an expert lol).
step 1: start a new page! under database, select table

step 2: rename the labels to assignments and class (leave Files alone) for now. you can also title the page and add icons/covers


step 3: select the files label, then under ‘property type’ change it to ‘date’ (this is for deadlines–i start with my official syllabus dates)

ALSO a part of step 3, but after changing to the deadline property, add another one! click that next label, and follow the same menu as above, but select checkbox to give you an option to ‘complete’ your tasks:

step 4: in the ‘class’ row (the first blank after the label), type in a course name to create a tag. once you do so, you can select the tag to edit it or change colors // you can repeat this step as many times as you need to for your assignments. i like to do my entire semester at once since i work ahead of the syllabus, but it might be good to take it month by month!

step 5: now, let’s add the calendar view. on the lefthand side, ‘add view’, name it, then select calendar (not just highlight like me, but click it!)

step 6: you should now see your assignments on the calendar. on the right side (top) of the calendar, click ‘properties’ and turn everything on!


you can also filter the calendar to only show completed/non completed tasks or by class:


and you can click on any assignment to open it, and add further properties:

again, if you have any questions about this, please let me know!
I think a lot about what it is to be a woman in science, but I have the inherent privilege that comes with being a white woman to shield me from the worst of it. I had an absolutely eye opening conversation with classmate of mine last year, and I’d like to share it with y’all.
This other lab member of mine became a great friend of mine around the time I decided to switch labs. She had a different PI and was a year ahead of me, so I was comfortable bringing my concerns to her. Her support was instrumental in my decision and my current happiness in my new lab. She presented in a lab meeting the day I went to the director of our grad school and requested a change in PIs, so I missed it. I knew she had been nervous (it was meant to prepare her for for her preliminary exam) so I asked her the next day how it had gone.
Now. To put this in context, I need to explain my old PI. He was an almost eighty year old white man, and if it wasn’t his opinion, it was wrong. He was very, very bad at being a PI. He was also probably worse at being a co-worker. I recall at least three lab meetings that devolved into him yelling with another PI, and several student presentations that he was terribly mean and unnecessarily fixated on insignificant details. So it comes as no shock that he went after my friend.
My old PI (who was not involved in bacteria research AT ALL) had taken some issue with the strain of bacteria she was using, one that was selected based on clinical relevancy. This had resulted in a dissolving of my friends presentation into him interrogating her about this strain, interrupting her explanations and generally getting louder and louder and louder until her PI stepped in. Upon hearing all of this, I apologized profusely for his behavior and asked how she was doing now. She expressed to me how she had struggled to remain calm, and how she was ultimately grateful to her PI for de-escalating the situation.
Now here’s the part that hit me hard: my friend explained to me that she was grateful mostly because she wasn’t sure how much longer she would have been able to withstand his nonsense without raising her voice, to which I responded, “he would have deserved it. You were right and he was wrong, and it’s beyond time he was put in his place. He’s not your PI, and he’s not on your committee, so I think you would have been wholly justified in standing up for yourself.”
“If I’d had raised my voice at him, even a little, I would have been labeled an angry black woman, and everyone in that room would have written me off as a stereotype of my race.”
Oh. Ohhhhh. OH that hit me in the heart and the brain and the soul and I’m shocked I didn’t get a bruise. My sweet, strong, smart friend, who was a mom and a wife and a brilliant student and a kind soul, had to weigh every word out of her mouth with a gravity I couldn’t understand, and had never considered until that moment. And it probably says a lot about my white privilege and my bubble I’ve grown up in that I was 24 years old before this came across to me. But this conversation has lived in my head ever since, and my perspective of the world shifted because of it. I think what made this particular incidence so eye opening to me was that being interrogated by this man over stupid details was something that happened to me regularly, and had just pushed me over the edge. Realizing some level of privilege had protected me all along from it being worse was enlightening.
I’ve benefitted my whole life from white privilege (a thing my family doesn’t think exists). I’m nowhere near perfect as an ally or a friend or a person, but I want to be better at standing up for and alongside those who need the protection my privilege offers. I share this now in case it resonates with someone else the way it did with me.
Black lives matter. Black people matter. Your hearts matter and your ideas matter and your feelings and your dignity and hurt and anger and fear. It shouldn’t require stating but it does, and I am so so sorry for your pain, for every situation I wouldn’t think twice in that you have to navigate carefully. I’m sorry, and I stand with you.
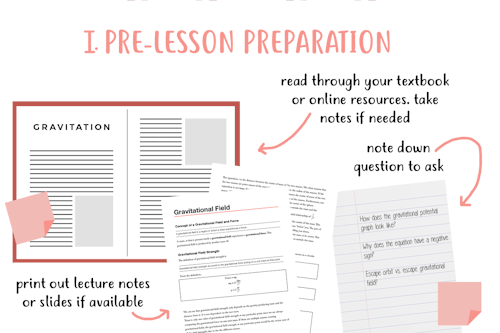
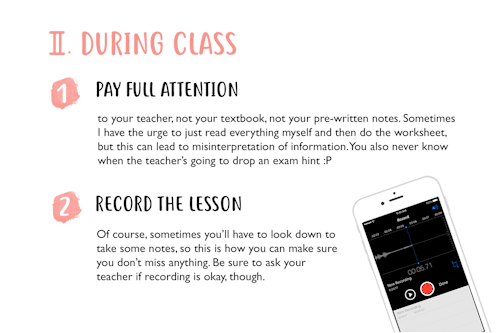
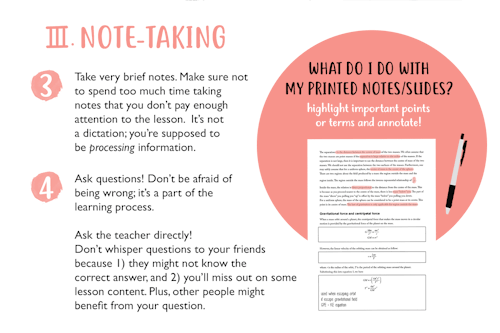
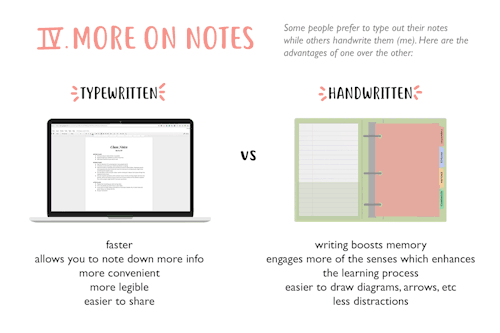
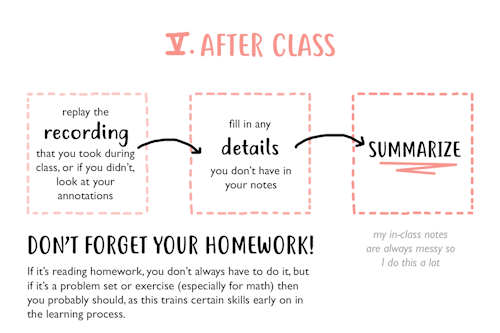

HOW TO APPROACH CLASSES A guide to getting the most out of your classes and lectures
By Eintsein
Design inspired by this post by @journalsanctuary
![Some Useful Phrases For Discursive/persuasive Essays In Spanish!! [french Here]](https://64.media.tumblr.com/17782f9cfb4e4f53d18dcef04893215b/tumblr_o4aicbnTOf1v229xjo1_500.jpg)
Some useful phrases for discursive/persuasive essays in Spanish!! [french here]
INTRODUCTION
Voy a escribir sobre el tema de… — I am going to write about the topic of…
Voy a discutir — I am going to discuss
No hay [noun] que se pueda comparar a [noun] — No [noun] can be compared to [noun]
Debido la influencia de… — Due to the influence of…
En nuestra sociedad — In our society
Hoy en día — Nowadays
Como nunca antes — Like never before
Ha desarollado considerablemente durante los últimos # años — Has developed considerably over the last # years
Ventaja — Advantage
Desventaja — Disadvantage
ANALYSIS
A raíz de — As a result of
Se extienden desde … hasta … — Range from … to …
La razón por la que… — The reason why…
Algunas investigaciones han mostrado que… — Some studies have shown that…
Formar parte clave de — To form a key part of
Esto apunto a — This points to
Las tasas de — The rate of
Aumentar — To increase
Se caracteriza por — Is characterised by
Se fundamenta en — Is founded upon
Un repunte de — A rise in/surge in (the quantity of sth)
EVALUATION
Estoy de acuerdo — I agree
Si tuviera que decir, diría que… — If I had to say, I’d say that…
Si debiera elegir, elegiría… — If I had to choose, I’d pick…
Que yo sepa — As far as I know
Que yo recuerde — As far as I remember
Si yo fuese ell@s — If I were them
Si estuviese en su pellejo — If I were in their position
Vale la pena agregar que… — It’s worthwile adding that…
… aparte, — Aside from …/…aside
CONCLUSION
Para concluir — To conclude
En suma — To summarise
Es (crucial/esencial/importante) que [+subjunctive] — It is (crucial/essential/important) that
Lo ideal sería que [+imperfect subjunctive] — Ideally
ADJECTIVES
Expressing importance and benefit: Importante, crucial, esencial, vital, influyente, concluyente, decisivo, beneficioso, eficaz (plural: eficaces)
Expressing risk/disapproval: Peligroso, perjudicial, erróneo, arriesgado, equivocado
the thesis progress journal
it’s all based on louise desalvo’s concept of a process journal for writers, from her book ‘the art of slow writing’ which i read way back in 2014 but has stayed with me all this time. she based that concept on sue grafton’s journal, which “stands as a record of the conversation she has with herself about the work in progress.” desalvo talks about her own process journal : “to plan a project, list books i want to read, list subjects i want to write about, capture insight about my work in progress, discuss my relationship to my work (what’s working and what’s not, whether i need to make changes to my writing schedule, how i’m feeling about the work)”
her view of the concept is so interesting and can easily be applied to grad school : “keeping a process journal helps us understand that our writing is important work. we value it enough to plan, reflect, and evaluate our work. a process journal is an invaluable record of our work patterns, our feelings about our work, our responses to ourselves as writers, and our strategies for dealing with difficulties and challenges.”
she says, and i quote : “our progress journals are where we engage in the nonjudgmental, reflective witnessing of our work. here, we work at defining ourselves as active, engaged, responsible, patient writers.” and like ???? yes, go off louise!
every week i make an entry with my three to five priorities. since i currently still have seminars, my entire week cannot be dedicated to my thesis, so these priorities allow me to really focus on specific things. they can be bigger or smaller depending on the amount of time i have to work on my thesis.
every day i work on my thesis, i make an entry. i try to answer two questions : “what did i do that day to make progress on my thesis?” as well as “how am i feeling & what i can do to feel better?” i also choose two to five specific tasks to achieve that day and write about the progress. for example, if my task is reading an article, i’ll write it down, check the box once i do it and write a summary of the “experience” (how was the article, was it useful for my research, should i read more of that author’s work, etc.) that way, i can look back at previous tasks, know what happened and learn from it.
i also use the journal almost like a bullet journal (the OG kind) with ongoing lists of important things. of course, there are some to do lists here and there (even though i prefer having my comprehensive task list on todoist), but it’s mostly things like
names of people who have helped me so i can thank them in my thesis
call numbers of books to borrow or archives to consult
research hypotheses
things to look for in the archives i consult
questions to ask my professor/advisor/archivist/etc.
issues that need to be fixed in my thesis
books/articles to read
additional things to research
i also use it as a regular notebooks for all things thesis. one of my seminars this semester is a methodology course, so i take notes in my journal as reference. i also sometimes will write some reading notes if i don’t have my computer on me, such as key quotes or arguments. also, all of my notes from meetings/calls/emails with my advisor are put in the journal, as well as a any pertinent meeting notes (with an archivist, fellow student, my mom, etc.) lastly, sometimes it just becomes a catch all for brainstorm sessions and random thoughts.
for me, this thesis progress journal is the best way to take a step back from the actual work and reflect on what i’m doing, good or bad, and what i can do to make things better, but most importantly, it allows me to understand my progress.
TRIG REVIEW #2: IDENTITIES, EQUATIONS, & POLAR GRAPHS
So this trig review is going to be about trig identities, how to solve trig equations & oblique triangle problems, and last but not least, polar graphs.
Trig Identities: You have to know these identities (except half-angle and sum/difference). Also the bottom two are necessary for solving trig integrals, so memorize those!


Trig Equations: Here are various example problems showing how to solve trig equations.
Oblique Triangle Equations: You only have to know the equilateral equation for area of cross sections in Calc BC. The rest is just extra info. that is nonetheless helpful to know. (:

Polar Coordinate:

Polar Graphs: Memorize these trig graphs for finding polar area! (All graphs come from Wolfram Alpha)

And that’s basically all the trig you need to know for Calc BC. Good luck! If you haven’t seen my part 1 post, you can find it here.


revisiting some of my old sketches and book notes inspired by leonardo da vinci.
tips for graduate grants, awards, & fellowships
hello! usual disclaimer applies: i’m a phd student, not an expert. i work in an english department with a medical humanities project, so this advice may not apply to STEM folks, undergraduates, or to all fellowships or grants. use your own common sense & discretion. beneath the cut:
finding the money
keeping track of the money
actually applying for the money, feat. the world’s longest treatise on project proposals
soliciting (& receiving) letters of rec
Keep reading


yesterday I realised that I barely know anything in maths so I’m having to sort myself out - trying to go over 2+ topics a day, making what I like to call “emergency notes”, so far so good but #prayforzoë
How to Take Notes: from a Textbook
(Be sure to change the post type from link to text post when you reblog, if that’s what you want to do)
This method is best suited for textbook or article notes, and is a version of revised notes. It is also well suited for books you plan on returning to the bookstore or books you have rented, as it does not involve writing directly in the book itself.
First, you’ll need to find a notebook, and the pens you like the best. My favorite notebooks to work with for note-taking, especially for my “revised” notes, are the Moleskine, hard or soft cover, in size extra large. For this specific class (Intro to Gender and Women’s Studies), I decided that lined pages would suit my needs better. For my math, engineering, and science classes, I usually opt for squared paper, as I draw in lots of diagrams and graphs.
My favorite pens ever are Staedtler Triplus Fineliners, so even though they show through the pages a little bit, I still choose to use them. I just love the way they write. I usually write out my notes themselves with a Pilot G2 05 with black ink, as it writes with a finer line and doesn’t bleed through quite as much.
I usually try to set up my notebooks about a week or so before class starts, that way it’s ready to go on my first day of class.

You’ll want to start off by setting up your notebook. On my first page, I put my course code for my university, as well as the course title.

Next, and this is perfectly optional (I just like the way it makes the book look, especially at the end of the semester), I include some sort of related quote to the course. For my engineering courses (which are related to my major), I put a different quote at the beginning of each section. But as this is a two-month long course during the summer, I opted for one quote by Mohadesa Najumi at the beginning of my book.

Next I set up my table of contents and include a page with basic course information. As this course is all online, my course information just included the start and end dates of the course, what time content is posted and on what day, and the name of my professor. For my usual courses, I will include the days of the week the class meets on and where, TA names and contact info, as well as posted office hours for my professors and TAs and tutoring hours either in the library or in the College of Engineering.

Next is one of the things I’m most proud of.
While I religiously use my Erin Condren planner to map out my days, weeks, and months, I have found throughout my college experience that including monthly views for the months my class ranges has been helpful. This way, there’s no sifting through the multiple colors I have in my planner, and everything related to that class is in the same notebook.
On this calendar I include start dates of the class, the end date, the dates of exams or quizzes, assignment deadlines, office hours, etc.
For this course, as I just started a few days ago, I don’t have a lot of dates or information, so my calendars are still very empty.


Next up I go to my weekly overview. At the beginning of each week, I set up a weekly layout, and I include a list of assignments, tests, quizzes, tasks, projects, etc that need my attention throughout the week, and I place the days I plan on doing them or the days they need turned in onto the weekly layout.

Now you’re finally ready to get into taking the notes.
Gather your book, some sticky notes, and your favorite pen or pencil.
I color code my stickies so that the “revision” process later goes a bit smoother. In this case, I’m using blue to denote something interesting, intriguing, or thought provoking, greenish-yellow to represent the facts or important concepts, and pink for important vocabulary words and their definitions.

Read the selection once.
As you read along the second time, write notes on your stickies, and place them in a place of relevance directly on the page in the book. Just make sure you don’t cover up anything you need to keep reading.


Now, once you’ve read all the material in questions (you can choose to break it up however you want, but since Chapter 1 was assigned for the week, I’ve elected to break it into chapters), carefully remove your stickies one by one and lay them out on a flat surface. This is when having a separate color for vocab can be helpful, as I sometimes put all of my vocab at the beginning or end of a section, especially if the section of reading was particularly large.
Organize your stickies in an order that makes sense to you, and use this order as your basis for transferring those notes into your notebook. The order you choose can just be lumping them under similar headings. Some classes even lend themselves to a nice chronological order. Whatever you choose, just make sure it’s something that will make sense to you when you come back to it in the end.

Okay so up there I wasn’t following my own advice, I just thought I would include the picture because my handwriting looks nice…

Now organize the stickies!

Now you just start writing everything from the stickies into your notebook. I like to take each category or subgroup and put them in the book on the facing page, then put them back in my textbook as I finish with each post it.

Moving on to the next category.


Before you know it, you’ve written all of your stickies into your notebooks.

Now you’re revved up and ready to go. You can either keep going and make a note summary page (which I’ll show you next week), or you can leave it. These will also be helpful when reviewing for tests and quizzes. You can highlight or underline, or use even more stickies (which is what I usually do) as you review.
Well, that’s all I have for you right now. Happy studying!
(To view this post on wordpress, click here)
-
 l0veal liked this · 1 month ago
 -
 slytherinscript reblogged this · 1 month ago
 -
 neogotmypack liked this · 1 month ago
 -
 roxypearl1 liked this · 3 months ago
 -
 coffeeandsnark reblogged this · 6 months ago
 -
 annav8lx4 liked this · 6 months ago
 -
 sirentsuki liked this · 1 year ago
 -
 benschiff reblogged this · 1 year ago
 -
 uhleesuhsimports reblogged this · 1 year ago
 -
 insertmoviereference liked this · 1 year ago
 -
 bolsdersforthcaha liked this · 1 year ago
 -
 fabfabfa-fab reblogged this · 1 year ago
 -
 hydrangeahelper reblogged this · 1 year ago
 -
 unsuccessfullyknown liked this · 1 year ago
 -
 trstmeimaliar liked this · 1 year ago
 -
 languagesandstuff reblogged this · 1 year ago
 -
 tenzpm reblogged this · 1 year ago
 -
 studyingfeminism liked this · 2 years ago
 -
 sislearning liked this · 2 years ago
 -
 imagineadi reblogged this · 2 years ago
 -
 indefinitereferences reblogged this · 2 years ago
 -
 coffeeandsnark reblogged this · 2 years ago
 -
 rkiveofstudies reblogged this · 2 years ago
a study blog for collected references, advice, and inspiration
267 posts