I Got Multiple People Asking For Help With Eyes, So I Threw Something Together Quick


I got multiple people asking for help with eyes, so I threw something together quick
EDIT: ah yeah, my bad! thank you @yipyo20

More Posts from Artrefforsteph and Others
HIIRAREFS: Basic and Intermidiate guide to colouring in
What better day to end the year then with a basic guide to colouring- This is for beginners or intermediate artists. Colouring is a big part to an art piece, whether you decide to use colours or not, that’s up to you, but for the most part, having some knowledge on appliance of colour will really help you out!
____________________________________________
ARTISTS WITH AN INSPIRING KNOWLEDGE OF COLOUR APPLICATION! Please take the time to have a look at other artists work so that you ca research and get inspired!
Gullacass: Uses brights, dulls and pastels to create brilliant guro, pop and macabre pieces| DA + TUMBLR
TinyCalcium: Old friend of mine who explores brights and mustard colours and places them as a foundation for their work | TUMBLR
BeastPop: Talented with opposing and Triwheel colours. Outstanding cell-shading, and knows how to flexibly bend colour form to their will in popart. | DA
H0stel: Fantastic composition of light direction and applies colour to bodies based on ambient occlusion. | TUMBLR
_____________________________________________
COLOUR SLANG: I use some strange slang to express colour types and shades as well as groups. Although they may not be canonically correct, I will use these terms to describe colour palates to the best of my ability! Analogous: Colours that are near or adjacent to each other on the colour wheel, EG: Red and Orange
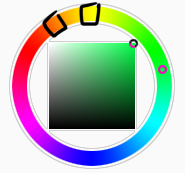
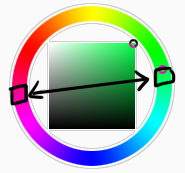
Oppositional/complimentary: Colours that are opposed or opposite from each other on the colour wheel, EG: Cherry and Green
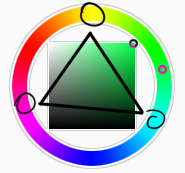
Triadic: Colours that form a triangle on the Colour wheel, EG: Cyan, Magenta and Yellow. These three colours when mixed together will make black.
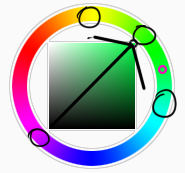
Arrowtype/Quadcolour: Four colours, that generally form an arrow shape on the colour wheel.
Tetradic: Colours that form a rectangle or square in the colour wheel

Neons: The very brightest you can get a colour, be careful where you use them as they can look ugly together at the most. Try to use neons when you are adding bright glowing objects to your piece. Neons are great for highlights.

Brights: Slightly washed Neons. Appropriate if you have characters that are colourful.

Washed: Very washed brights with a hint of grey. These are also useful for colourful characters.

Pastels: Colour with white in them to make them seem light.

Baby Pastel: Pastel with even more white in them, good for subtle highlights.

Darks: Colour with black added to them. Used mostly for lineart.

Mustards: Colours with dark grey added to them

Earthen: Colours with brown added to them

Warm and Cool colours: Warm colours are colours that range fromMagenta to Yellow. Cool ones range from Lime to Fuchsia.

Straight tones: A greyscale palate. or a straight scale of one colour from black to it’s neon form.

Warm and cool tones: Warm tones are a greyscale mixed with warm colours and cool tones are greyscale mixed with cool colours.

Skintones: Warm washed or pastel colours generally used to colour in skin, but they don’t have to be warm at all! ( I will not show you a palate for this however)
______________________________________________
WHAT TO AVOID WHEN COLOURING: beginner artists, tend to go ahead and start by colouring their line art with neon and mustard colours. Neons are not necessarily good for base colours unless the character has a glow.

I often see lazy attempts to shade, often a beginner artist with use an airbrush and use black and white to shade and highlight their piece. This is not very effective, and I’m sorry to say… It’s kind of gross as well. Try to avoid being lazy. If you have a piece that has bold black lines, avoid using soft shading and airbrushing at this point of time.
Black and white isn’t always the best option when colouring in your piece, but it also depends on the style you are trying to convey. If you plan on only using straight tones to colour in a piece, black and white is good.

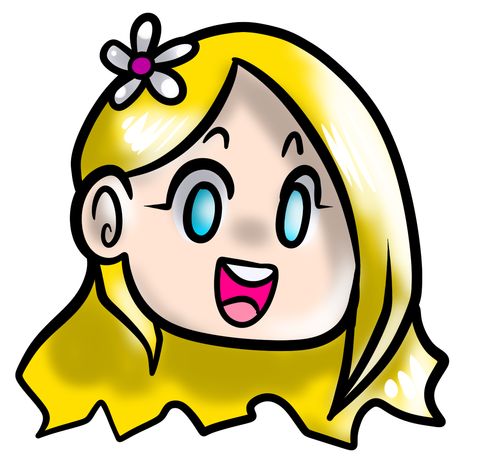
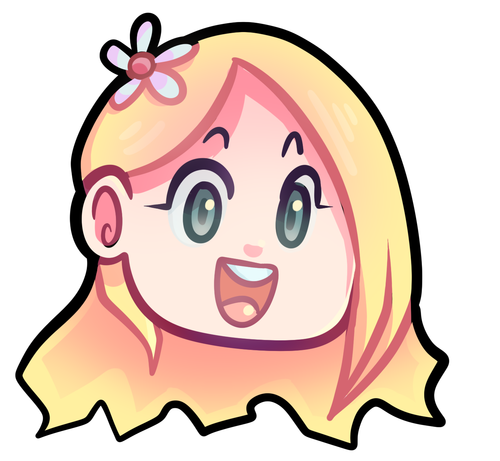
A GOOD BASIC WAY TO COLOUR For this basic tutorial I will show you a nice way to colour in a piece with bold lines. I will be using Minty’s Classic character as an example.
Begin with using brights that have been washed down a little and washed skin tones if your character is human based. Avoid using neons or mustards if you are able. If there is white on the character, such as the white on an eyeball or the teeth, consider using baby pastels. For Minty’s eyeballs I have used a baby pastel blue. I have chosen to use a darker and more washed version for her Irises.
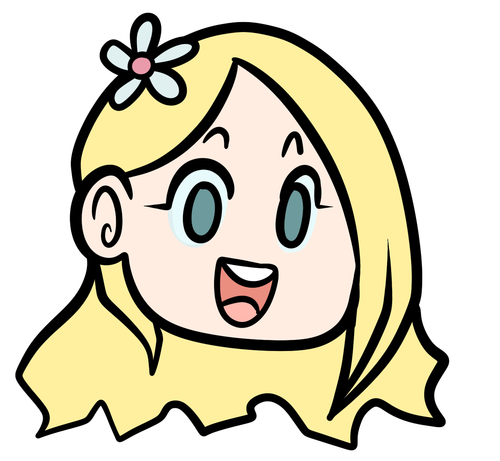
With you foundation colours placed down, use a washed warm colour for the skin tone, such as a salmon. If the character’s hair or fur is warm coloured, use a pink or red orange to shade that as well. Use the cell shading technique. This may mean you will have to erase some of your shading so be sure to do this on another layer. For your baby pastels, you can use a regular pastel to shade it. For Minty’s eyes I have used pastel blue and lowered the opacity by a little.

For Highlights, I have chosen to use baby pastel yellow. I wanted the piece to be warm.

Applying a light airbrush over the top of the piece makes it feel a little softer. I have also applied the airbrush over the initial borders to create colour bleed, giving a very subtle reflective approach.
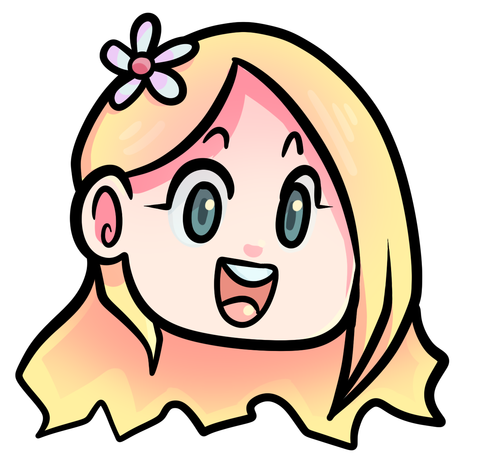
Colouring your line art layer, particularly if you have bold lines, can really make a piece look more interesting! I like to leave the overall outline black. You can gradient and bleed colour in your line art as well
Light tracing is a technique lots of artist’s use, where they run a sharp line of highlight next to line art to divide borders.
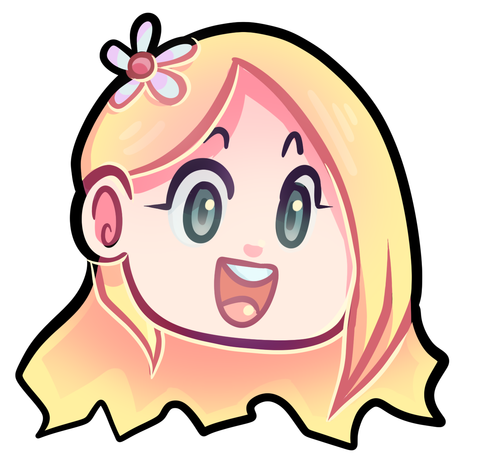
This looks a lot nicer than the black and white shading, doesn’t it!? __________________________________________
This is a very very simple guide to applying colour to your piece! If This helped, please reblog and share this guide around!
If you have any questions or feedback, don’t be afraid to send me a message!
If you're an artist looking to diversify your faces:
click this link
draw whomever you get
don’t worry about making it super-accurate, just focus on the characteristic parts of the face and have fun
the outcome might not look like the ref, but it will be different and more varied than faces you draw out of your head, an dprobably pretty rad on its own right!
feel free to reblog with your drawing, if you want!
i just found this website that can randomly generate a continent for you!! this is great for fantasy writers

plus, you can look at it in 3d!

theres a lot of viewing options and other things! theres an option on-site to take a screenshot, so you don’t have to have a program for that!
you can view it here!


FACES
Drawing a face (the circle thing)
How to draw faces
Heads in profile
Drawing heads
A face tutorial
Avoid same facing
Diversify your faces
Face shapes
To make your drawing look like the person you’re drawing
Make your faces look like the person
Expressions
More about expressions
Drawing lips
Lip tutorial
Drawing ears
Drawing eyes
Realistic eyes
Drawing a nose
Drawing kisses
Drawing glasses
Drawing hoods
BODIES
Guide to human types part 1
Guide to human types part 2
Guide to human types part 3
Different kinds of athletic body types
Ladies tutorial (nudity)
Fellas tutorial
Curves on girls tutorial
How to draw necks
Drawing shoulders
Drawing arms
Drawing hands
Hand tips
More hands
Hands tips and techniques
Hands, arms, legs and feet
Legs, torso and expressions
Drawing boobs
How to boob
Boobs and hips
Drawing abs
Beer belly tutorial
Drawing backs
How to draw back views
Legs reference
Drawing knees
How to draw butts
Penis tutorial (nsfw)
Drawing feet and shoes
Sitting reference
Realistic woman body shape chart
Hair
Drawing hair
Hair tutorial
Drawing curls
Drawing braids
ANIMALS & CREATURES
Canines vs felines
Drawing cats
Drawing cats tips
How to draw big cats
Drawing rats
Basic deer tutorial
Deer sketching
Dog anatomy
Dog anatomy tutorial
Dog nose tutorial
Dog paw tutorial
Basic wolf tutorial
Horse tutorial
Sheep vs goats
Drawing giraffes
Basic owl tutorial
Bird wing tutorial
Drawing bird beaks and faces
Butterfly tutorial
Drawing animal legs on humans
Winged people anatomy
Dragon tutorial
Drawing dragons
Dragon wing tutorial
Fur tutorial
Drawing sharp teeth
OTHERS
Drawing clothes
Clothing folds tutorial
Collars, vests and pants reference
Hats reference
Drawing jeans
Drawing bows
Drawing trees
Tree tutorial
Drawing water
Water tutorial
Drawing crystals
Ice
Clouds
Creating form
Perspective tricks
Character design reference
How to draw better (video)
Learn how to draw better
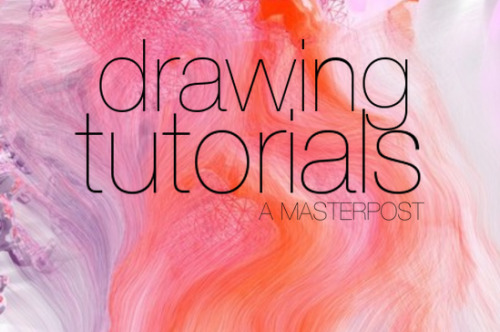
Art reference & tutorials blog
Tutorial masterpost
How to draw anything


i just found myself using this random trick that one of my art professors taught me and i thought other people might like it!
other tips: -at rest, the elbow hits the bottom of the ribcage, and the wrist hits the bottom of the crotch -the distance from your inner elbow to your wrist is about the same length as your foot -the length of your hand (from wrist to the tip of your middle finger) is about the same length as the distance between the bottom of your chin and your hairline
so, if you have a feeling that proportions are wrong on something, those work as quick gauges. like, if a character’s forearm looks too long, try to visualize their foot being the same size and see if that works. if the hands look too big, look at their size in relation to the face.
hope this helps someone!


-
 goatsmalk liked this · 2 months ago
 -
 bonerot19 liked this · 3 months ago
 -
 a-real-magical-girl liked this · 3 months ago
 -
 hopetimistic reblogged this · 3 months ago
 -
 mkhx liked this · 3 months ago
 -
 xdd22008 liked this · 4 months ago
 -
 chanrelle liked this · 5 months ago
 -
 multidimensionalfang1rl liked this · 8 months ago
 -
 muchbeauty-manyplaces liked this · 9 months ago
 -
 hearmeout---explosivediarrhea liked this · 9 months ago
 -
 xffhajaskqw liked this · 10 months ago
 -
xffhajaskqw reblogged this · 10 months ago
-
 shakychameleon reblogged this · 10 months ago
 -
 eclipsery liked this · 10 months ago
 -
 tenkaistar liked this · 1 year ago
 -
 somehelpfulart-tutorials reblogged this · 1 year ago
 -
 deactivated20042025 liked this · 1 year ago
 -
 kiaulpiene liked this · 1 year ago
 -
 yonussy reblogged this · 1 year ago
 -
 artreferencesarchive reblogged this · 1 year ago
 -
 rice-n-honey reblogged this · 1 year ago
 -
rice-n-honey liked this · 1 year ago
-
 mar-chive reblogged this · 1 year ago
 -
 twadi-gurl reblogged this · 1 year ago
 -
thingsforart reblogged this · 1 year ago
-
 tupapupa liked this · 1 year ago
 -
 mrneedle liked this · 1 year ago
 -
twadi-gurl reblogged this · 1 year ago
-
 stinkysoks reblogged this · 1 year ago
 -
 crowdoesart21 reblogged this · 1 year ago
 -
 a--mess--of--things liked this · 1 year ago
 -
 flamingstar12 liked this · 2 years ago
 -
 tacent-abscond-references reblogged this · 2 years ago
 -
 fake--artist reblogged this · 2 years ago
 -
 hotaru99 reblogged this · 2 years ago
 -
hotaru99 liked this · 2 years ago
-
 teamdoctor liked this · 2 years ago
 -
 skindamage reblogged this · 2 years ago
 -
 dreamingcoyotes reblogged this · 2 years ago
 -
 ryandidindoom liked this · 2 years ago
 -
anonymusuko liked this · 2 years ago
-
 tigertail1111 reblogged this · 2 years ago
 -
 avocado33x liked this · 2 years ago
 -
 coven2003 liked this · 2 years ago
NSFW because there will probably be nude refs | this is a side blog to sort all of the art stuff I need | none of it is mine
151 posts