"and The Centry Owl Stood Guard, Protector Of All In Need." TFE, S1E13

"and the centry owl stood guard, protector of all in need." TFE, S1E13
Love love love Nightshade's new form 🦉
I compiled a reference for all my artist homies, and myself~
More Posts from Basket-of-references and Others


I've had this little idea in my head for a while now, so I decided to sit down and plot it out.
Disclaimer: This isn't meant to be some sort of One-Worksheet-Fits-All situation. This is meant to be a visual representation of some type of story planning you could be doing in order to develop a plot!
Lay down groundwork! (Backstory integral to the beginning of your story.) Build hinges. (Events that hinge on other events and fall down like dominoes) Suspend structures. (Withhold just enough information to make the reader curious, and keep them guessing.)
And hey, is this helps... maybe sit down and write a story! :)
Heres a MEGA folder filled with art book pdfs, if anyone has some others that you'd like me to add to it thats missing, please let me know and send me the link
EDIT 1: If you're a bit new to art and you're super overwhelmed by the options and you don't know where to start, I highly recommend the morpho series of books
Edit 2:No more Google Drive, just the MEGA folder now, so don't panic if the stuff on Google ain't there no more, its still up, just in a different location
Write fanfic for yourself.
Publish fanfic for the rotation of 3-6 people who are devoted readers and will either go feral or leave you very nice words and yell with you about it.

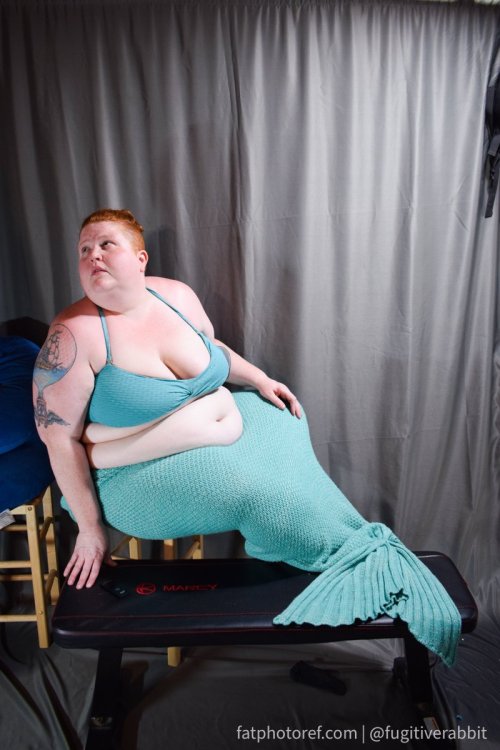


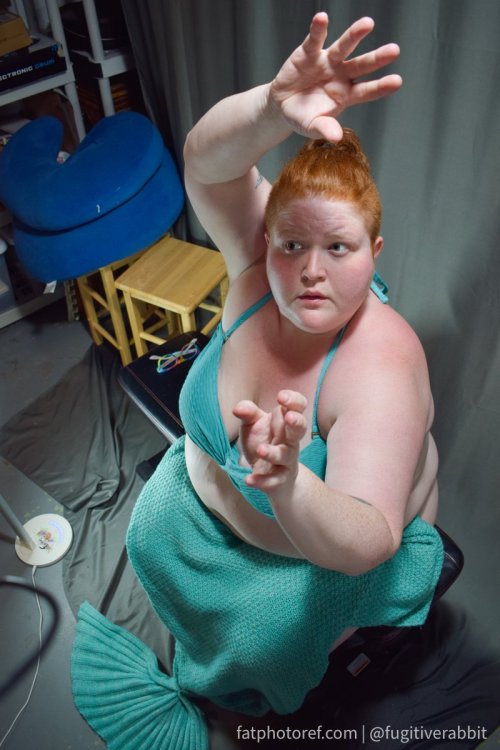
Just a reminder about fatphotoref.com—it exists!! I'll be updating with new photos next week and hopefully more regularly after that. Request access by going to bit.ly/fpraccess 💙🧜♀️ happy mer may!
If life is a never ending loop of dirty dishes and laundry then that means life is a never ending loop of home cooked meals and comfy clean clothes
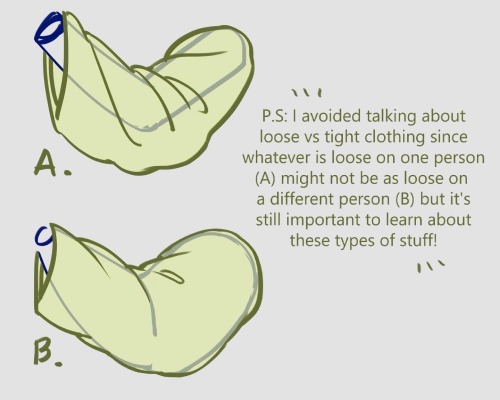
I forgot I have to be active here so here’s my Twitter tutorial on how to draw folds I made a while back to help a friend!


![[1] Color Zones Of The Face [Tried To Find Source, I Think It’s Here ]](https://64.media.tumblr.com/82181df6330fcb3655a2e40c6c43287a/tumblr_or5nykhGCu1sm0kjdo1_500.png)
![[1] Color Zones Of The Face [Tried To Find Source, I Think It’s Here ]](https://64.media.tumblr.com/1703500f3e1292e370eda4d4cb761252/tumblr_or5nykhGCu1sm0kjdo2_1280.jpg)
[1] Color Zones of the Face [Tried to find source, I think it’s here ]
[2] Navate’s Skin Chart Supplement – the actual tutorials are: Section I: Skin Basics & Section II: Skin tones
Two brilliant skin tutorials. Do not use flat colors for skin! Underpainting is important for realistic, vivid skin. Remember, underneath your skin is fat, muscles, red blood, blue veins, bones.
Consider reblogging this to support the original artist. I recommend following them as well!
More Helpful links: Ask a Question/Request a Tut | Submit a Tutorial | Promote Your Art Commissions to +18.3 K Dashes | Stay Updated on DeviantArt! | Visit me @astrikos
i love love love the way you paint back lighting!! do you have any tips/ a step by step for the way you do it?
ended up making a whole painting just to break it down and explain my general process for subjects lit from behind so heres that + a timelapse!

main thing for drawing anything with a strong light source behind is to make the main subject Darker and more desaturated to convey that the light is behind them rather than to their sides (face cant be properly lit if the light is behind). Also making the Main highlight the brightest hue in the image helps to intensify it. I tend to use teeth/eyes as a good comparison point

some people have a tendency to make the sclera white out of habit but darkening that+ the rest of the whites helps the image read as Darker compared to the brighter highlight
Digital Painting: tips for beginners
Heyo! I got asked if I could make a tutorial on digital painting so I’m gonna throw together some advice meant for people who are starting out and want to figure out exactly how this stuff all works. Because it’s hard! What I hope to accomplish here is to make painting more approachable for you.
Firstly, I have put together something like this before, so for archival purposes here it is: http://holy-quinity.tumblr.com/post/89594801811/i-dont-know-how-much-of-this-kind-of-thing-you
For those of you who don’t wanna bother reading that, here are the main points:
1. Learn your program and its tools, from brush properties to layer styles. And I mean learn them. Make a cheatsheet that shows you exactly what each button and scale does, both in isolation and in conjunction with other buttons and scales. Refer to this as much as possible until it is intuitive. The end goal is to know exactly what to do to your brush’s settings to achieve a given effect.
2. It’s perfectly okay to use your sketches, linearts, and other forms of line in your paintings. They can help guide the form and there’s no need to make something fully “lineless”! I never make things “lineless.”
3. Study other people’s art and try to think how they could have possibly achieved the effects they did. You can learn a lot just by observing and mentally recreating the process stroke by stroke—muscle memory is a powerful tool at your disposal. This becomes easier to do once you’ve started doing item 1 above.
OKAY!
So where the heck do you even begin?
What I’m gonna do is try to make digital painting as approachable as possible for someone who’s never really done it. The main idea here is that digital painting is just like real painting. So if you’ve ever done real painting, you already kinda know what’s coming.
I’m gonna assume you know the basics of digital art: you can sketch, line those sketches using layers and opacity changes, and fill the lines with color, maybe even opting to add some shading…and you’ll get something like this:

You know, cell-shaded, or maybe the shading’s blended, but you’ve still obviously a line drawing with color put down on layers beneath the lines.
The next intuitive step is to try going “lineless”…but when you remove the lines you get this:

idk about you but I’m laughing at how stupid this looks
When I was first teaching myself to paint digitally, I didn’t really know how to deal with this. Without lines, the form of the subject vanished or became a mess like the above. Even if I was meticulous and careful about placing down the color such that without the lines layer turned on, the shapes fit together, it didn’t look quite right. There’d be gaps, I wouldn’t know how to incorporate the subject into a background, the contrast wouldn’t be high enough, or it’d just in general look too much like a screenshot from Super Mario 64.
Painting requires a different process than the above. You’ll have to let go of some of your habits and conventions. Such as staying in the lines. Such as fully relying on the lines. Like, I love my lines, I love my sketches—but in painting, they are guides for form, and are not the form itself. So let me go through how I approach a given painting:

My painting process starts with a sketch (here a boring portrait for demonstrative purposes). I make the opacity of the sketch layer something like 30%, and then throw down my base colors on a new layer underneath. I’m not being meticulous about the sketch itself, because again it’s just meant to guide my placement of color. I’m also not meticulous about my placement of the color.
We’re essentially sketching with color. Because ultimately what we want is for the color to take on the form and shapes conveyed by the sketch.
There’s a lot going into this about how to use value, how to shade, how to use color, etc. that I’m kinda skipping over because it takes a lot of time to explain…but there are hundreds of tutorials out there on those topics so please, google around! I found some helpful tuts that way when I was starting out.
Something I find v useful is to keep selecting colors that already exist in your image for shading and hue adjustment. This is why I start with really blendy, low-opacity brushes when throwing down color on top of the background. I can then select colors within there that are a mix of the two.
For instance, I’ll select the color of the lines here:

…and use that to shade:

And maybe I’ll select one of the darker shades around his eye, but not the darkest, to make the shading a smoother gradient…and so on.
What I do in general at this point is go over the shapes and lines of the sketch. Such that I can turn off the sketch layer and see this:

I’m replacing the lines with shading and value. I’ll continue to do this as I keep adding color.

This is all super loose. I am not dedicated to any particular stroke. I just want the colors and shading and light source to be right. I’ll use overlay layers to boost contrast or add a hue.
Here are other examples where I used this process:


I am constantly changing brushes and brush settings as I paint. It really depends on what effect I want where. I am also constantly selecting new colors and applying or blending those in. I don’t believe in having some uniformly applied base color and then shading with only one or two…that’s what I’d do if I was cell-shading like the first drawing I showed you here, but painting should be about messing with color and opacity and blending to make millions of hues!
Good rule of thumb: Hard, opaque brushes for applying color. Soft, dilute brushes for blending colors. Sometimes hard, dilute brushes can make some cool blending effects! I personally prefer harder edges on my shading so that’s a brush I use often.
This is getting a bit long so I’m gonna split it up into multiple parts, but really what I want you to get from this is:
1. learn the tools at your disposal until they are intuitive
2. sketch and line are guides for form, not the form itself
3. rather, hue and value will produce the form
And of course, practice makes perfect!!! Every drawing you make, every painting you make, will bring you one step closer to the artist you want to be, and thus every drawing and every painting, no matter what, is a success.
-
 seithr03 liked this · 1 month ago
 -
 humongousauthorfishllama liked this · 3 months ago
 -
 lillcarolyn liked this · 3 months ago
 -
 drawstringsstuff liked this · 3 months ago
 -
 bitchyphantomdonut liked this · 4 months ago
 -
 tsaheyluu liked this · 5 months ago
 -
 arlo192 reblogged this · 5 months ago
 -
 gentlemewn liked this · 5 months ago
 -
 laranomyprisma liked this · 5 months ago
 -
 toothlilli liked this · 6 months ago
 -
 clg-artisa liked this · 7 months ago
 -
 that-fanperson-meg reblogged this · 9 months ago
 -
that-fanperson-meg liked this · 9 months ago
-
 annabelle-creart liked this · 9 months ago
 -
 fandomhoedamien reblogged this · 9 months ago
 -
fandomhoedamien liked this · 9 months ago
-
 gsuxhdh liked this · 9 months ago
 -
 frimplo liked this · 9 months ago
 -
 princesstarfire1234 liked this · 9 months ago
 -
 bitbytebeast liked this · 9 months ago
 -
 its-needles liked this · 9 months ago
 -
 starfallstudio liked this · 9 months ago
 -
 deskraven liked this · 9 months ago
 -
 ashleyazuno liked this · 9 months ago
 -
 hopelessglowz liked this · 9 months ago
 -
 silverasks liked this · 9 months ago
 -
 fujoshitica05 liked this · 9 months ago
 -
 derpdino34 reblogged this · 9 months ago
 -
 fuzzypickles71 liked this · 9 months ago
 -
derpdino34 liked this · 9 months ago
-
 placeholder-tf-name reblogged this · 10 months ago
 -
 ghoulwings reblogged this · 11 months ago
 -
 mushiemoth liked this · 11 months ago
 -
 v3n-dingmachine liked this · 1 year ago
 -
 kilonovaria liked this · 1 year ago
 -
 and-the-paradime-shifts reblogged this · 1 year ago
 -
and-the-paradime-shifts liked this · 1 year ago
-
 jengeling liked this · 1 year ago
 -
 shwimpberry liked this · 1 year ago
 -
 blurrdies reblogged this · 1 year ago
 -
 eat-a-friggin-snickers liked this · 1 year ago
 -
 thegooseofmons liked this · 1 year ago
 -
 firekate-3 liked this · 1 year ago
 -
 the-last-slice-of-bread liked this · 1 year ago
 -
shinalu liked this · 1 year ago
-
 night-writer-writer liked this · 1 year ago
