Please Excuse My Messy Lining, Writing, And Everything Else


please excuse my messy lining, writing, and everything else
More Posts from Zelo-ref and Others
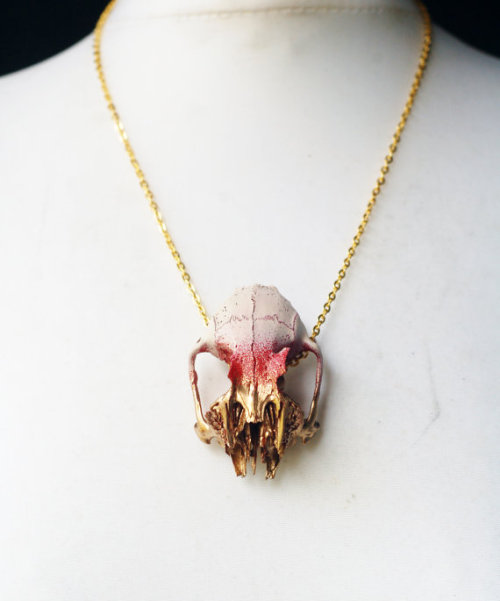
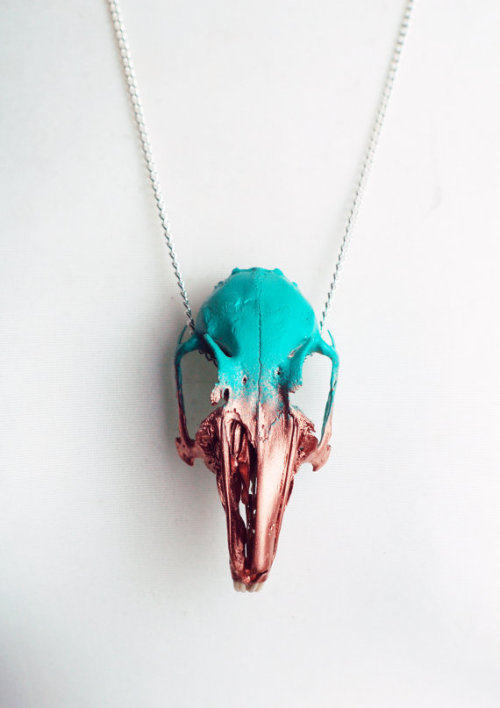


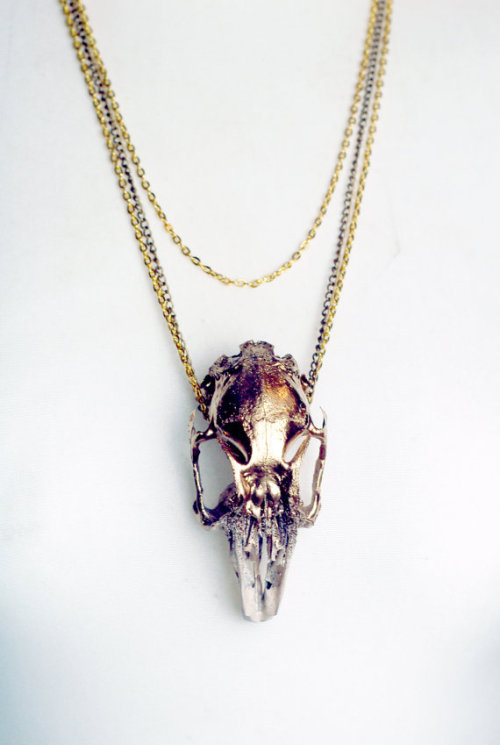


real animal skull necklaces
Virginia the Wolf


DIY Shell Wrap Bracelet
Make this easy boho beachy wrap bracelet using just a few supplies.
Learn how to create summer charms for this bracelet, using copper headpins, shells, and wooden beads.
Find this DIY Shell Wrap Bracelet Tutorial from Happy Hour Projects here.
More Beachy Shell Summer DIYs
TIP: Shells can be bought at the Dollar Store and Craft Stores.
DIY Gold Ordon Inspired Shell Ankle Cuffs from Honestly WTF here.

DIY Shell Bracelet with Sliding Knot Closure from Happy Hour Projects here.

DIY Shell Candles from Burkatron here.

DIY Seashell Jewelry Tutorial from Polka Dot Chair for Everything Etsy here.

DIY Knockoff Fortalezza Shell Ring from you want me to buy that? here. Spend $225 for the “real deal”, o a few minutes and dollars to make your own.

DIY Kelly Wearstler Knockof Metallic Sea Shell Earrings from Honestly WTF here.

DIY Inspiration Shell Collage from A Mermaid’s Tale here. Match items from nature, like shells and rocks, with quotes or words that have meaning to you or loved ones.


How To Shade
a quick tutorial on shading (with graphite) by yours truly. this is the process I use for shading, and there are tons more out there if this one doesn’t work for you.
MATERIALS USED

1 HB graphite pencil
1 2B graphite pencil
1 4B graphite pencil
1 blending stub (the bigger the better)
1 plastic eraser (white)
1 kneaded eraser (grey)
now why do I use two erasers? well, they’re very different from one another, and each serves their own purpose.
the plastic eraser is harder, and when it erases, it erases everything. the kneaded eraser is soft, and it doesn’t completely erase everything all at once. you can use it to pick up some of the graphite and leave some behind, lightening (but not totally erasing) your shading. plus, the kneaded eraser is so soft you can mold it, and it doesn’t leave pencil shavings. if one end gets too used, you can just stretch it out, and it’s as good as new.
REFERENCE USED

now lets get this started, shall we?
STEP ONE
scribble lightly over your drawing with either an HB (aka a regular #2 pencil) or 2B pencil. you don’t have to be extremely neat, but do it light and nice enough so it can still be erased/you can still see the original lines underneath.

STEP TWO
take your blending stub (the wider the better, and if you don’t have one, use a tissue) and rub in the opposite direction of the scribbling. don’t press too hard, because it might streak/not work if you do.


STEP THREE
erase the extra shading around the edges (using the plastic eraser.).

STEP FOUR
roughly add your darks

STEP FIVE
roughly add your lights by erasing with the kneaded eraser

STEP SIX
add your finishing touches (secondary shadows, background, etc)

(I reshaped the sides, added more lights, and added the background shadow)
and voila! you just did some shading!


JX3 qixiu martial art school || Coser: 唐八狗 PHX:@十二岁萝莉 Photoshop@我左青龙右白虎腰间纹个米老鼠 @盯叮叮丁 Backup: @悠司Yuuji_ @鬼才Kisai


Beating Brush Lag in Manga Studio

Booooooooo… what is this, Photoshop?!
Lagging brushes are an occasional problem in any illustration software. Here’s a troubleshooting guide for Manga Studio if your tools are acting like molasses. (Some settings may be different on Windows or if you’re running the Clip Studio Paint branding of the software. For what it’s worth, I’m running Manga Studio 5.0.3 on Mac OS 10.7.5. Yup, I’m behind the times.)
There are a few options to beat the lag:
1. Quit Stuff Bye bye, YouTube. See ya, Skype. Later, Tumblr.
Save your computer’s processor by quitting RAM-hogging apps and tasks while painting. Streaming audio/video will drastically reduce performance, but even leaving browsers open can slow things down, so best to just close it up. Guess that rules out Spotify, but then there’s always ye olde Zune. Gotta love cringing through those high school playlists while working.
2. Change Preferences Easier than changing your mind, and quicker too.
Check under the hood of Manga Studio’s Preferences for a few speed boosts. Do the following in these sub menus:
Preferences/Tablet/Tablet Settings: Change from 1 to 6 (I believe this option is Mac only).

Preferences/Performance/Undo: Lower the Undo count. Try taking it down 10-15 notches from default. You could also turn up that long-titled setting (“Delay before recognizing new object…”) by 100 ms, but I haven’t figured out what that does exactly…
Preferences/Cursor/Display Position of Reversed Cursor: Make sure to check “No Delay”.
After changing preferences, it’s a good idea to close and reopen Manga Studio.
3. Modify Brush Tool Settings Your brushes may take it personally, but remember you’re in charge here.
The Tool Settings window is a wealth of options for customizing brushes. Some are more processor-intensive than others. Here are a few of the best ones to modify: (Note: the look and behavior of brushes may be affected. You may want to duplicate and/or export a brush before changing its settings.)
Tool Settings/Anti-Aliasing: Turn down to “Little” or “None”
Tool Settings/Brush Tip: Reduce the number of materials on your brush.
Tool Settings/Stroke/Space: Increase spacing, but not too much. Brushes are essentially a string of material stamps. A low space setting means a smoother brush, but more work for your computer. Picture it frantically scrubbing a rubber stamp across your canvas. On that note, also make sure Continuous Spraying is not on.

Tool Settings/Watercolor Border: If your brush uses this setting, turn on the “Process After Drag” option. This renders the effect after each brush stroke and saves computing power.
Tool Settings/Correction: Turn off (or decrease) Stabilization, Post Correction, and Brush Stroke.
Tool Settings/Starting and Ending: Turn off all this stuff. Pfffft, who needs it, right?
Here’s a speed test after fiddling with some settings:

Woooooooo! We’re getting faster! Still a bit laggy, which leads to one last tip:
4. Rework The Canvas Might as well rework my life goals too.
Okay, disclosure: The two gifs in this post were recorded on a 4500x3000 canvas at 300dpi with a size 500 brush to emphasize lag. This third one is recorded on a 1080x720 canvas at 72dpi with a size 100 brush:

Yes! We’re cruising now!
Canvas sizing and resolution has a big affect on brush performance. It’s a bit of a conundrum. Getting the best image quality means working at a minimum resolution of 300dpi, which can be taxing for brushes on large canvases. So what to do? Just like traditional paintings start with thumbnail sketches, digital work can start on a low-resolution canvas. Here’s the method:
Set up your canvas normally at the full target resolution. But before drawing anything on the canvas, use the handy tool under Edit/Change Image Resolution. Reduce Resolution to 72dpi. Use this smaller canvas for rough sketching, background filling, blocking in large areas of color, etc. Then increase resolution to 144dpi for building up the body of the painting, still keeping it loose. (I’d recommend switching Interpolate to Hard Outline when increasing resolution.) Finally, blow it up to full resolution and get into the nitty gritty of rendering. This is where you’ll do the crisp line work, highlights, details, etc.

The idea here is to work big to small. This will keep away brush lag by using large brushes on small canvases. As the canvas resolution increases, decrease brush size and work smaller, tightening things up in the process. NOTE: Increasing canvas resolution causes pixilation. Don’t worry about it. This can be cleaned up in the final stages of painting.
Hope this guide is helpful! If lagging persists, remember to check drivers and tablet settings as well. If all else fails, Google’s a good friend ;)
-Armin


Modified Chinese hanfu | Most by hanfu stodio 鹿韵记 The last one by 流烟昔泠
-
 sakuraswordly reblogged this · 2 months ago
 -
 hiryama liked this · 4 months ago
 -
 animeschibia reblogged this · 7 months ago
 -
 the-letter-horror-lover liked this · 8 months ago
 -
 kitnightowl reblogged this · 9 months ago
 -
kitnightowl liked this · 9 months ago
-
 amateurartisttriesandfails reblogged this · 11 months ago
 -
 totallyteejaydraws reblogged this · 1 year ago
 -
 sheika-akeysblog liked this · 2 years ago
 -
 tunay-skeleton liked this · 2 years ago
 -
 synthsnakes reblogged this · 2 years ago
 -
 asttriferous reblogged this · 2 years ago
 -
 iris-kafka liked this · 2 years ago
 -
 darkness-star-draws liked this · 2 years ago
 -
 cyanicus liked this · 2 years ago
 -
 izumi-yami liked this · 2 years ago
 -
 bl00000g liked this · 2 years ago
 -
 kintsugi-rabbit reblogged this · 3 years ago
 -
 tophatcat112 liked this · 3 years ago
 -
 m00ndunes liked this · 3 years ago
 -
 artista1210 liked this · 3 years ago
 -
 greeter1987 liked this · 3 years ago
 -
 diecedhoards reblogged this · 3 years ago
 -
 thomasthetranstrain liked this · 3 years ago
 -
 ssvartbomb liked this · 3 years ago
 -
 porcelaindancer liked this · 3 years ago
 -
 sephirothyan liked this · 3 years ago
 -
 mangomelonboba liked this · 3 years ago
 -
 itsbristolboard liked this · 3 years ago
 -
 sonicfan8967 liked this · 3 years ago
 -
 save-retrograde-eyestrain reblogged this · 3 years ago
 -
 jahsession2 liked this · 3 years ago
 -
 differencesintheworld liked this · 3 years ago
 -
 belleeverygreen liked this · 4 years ago
 -
 zanda-rl reblogged this · 4 years ago
 -
zanda-rl liked this · 4 years ago
-
 daredevil9612 liked this · 4 years ago
 -
 arthurtristankingsmen liked this · 4 years ago
 -
 ericadoesntunderstand liked this · 4 years ago
 -
 lauradonorez liked this · 4 years ago