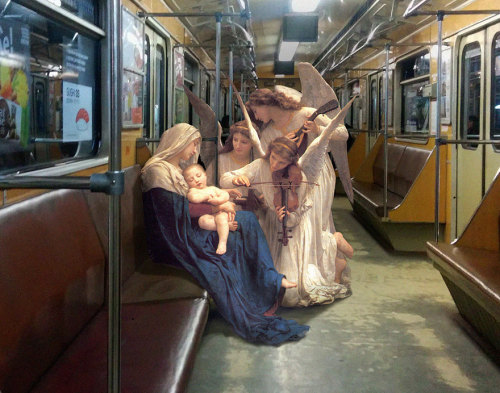
For All The Photographers Out There.


For all the photographers out there.
More Posts from Zelo-ref and Others
8 Wedding Veil Styles
1. Angle
The Angle is a type of wedding veil that can be worn to the side of the head giving you a slight angle to the front (or to the back of the crown). This particular example features soft illusion netting and is finished with bobby pin loops for easy addition to a fascinator (fascinator example shown in photo below, right).

2. Bavolet
A Bavolet veil has a blusher veil on the front with a back snood style (snood refers to a type of garment worn at the back of a woman’s head). These two types of veils – the blusher and the snood – are sewn together to create one veil. In this particular example, the front veil can be flipped for the reception to provide another look.

3. Blusher
A blusher veil is very versatile and can be worn on the side of the head, back of the head, or flipped for a snooded look at the reception.

4. Elbow Length
This next style offers a dramatic look with fullness. An elbow length veil traditionally hits at your elbow and this particular example measures 32″ in length; it also features a corded edge. Elbow length wedding veils can be one-tiered (as shown) or two-tiered for additional fullness.

5. Fingertip Length
The fingertip length veil is a traditional choice and, as shown below, can be made in a two-tiered style for added volume. The second tier can be used as a blusher when you walk down the aisle, which can be then worn back during the reception. As the name suggests, this veil measures approximately to the length of your fingertips.

6. Cap
The cap refers to the portion of the veil that sits atop the head and frames the face. This particular example, for instance, uses ribbon to create a capped look that is simply timeless.

7. Mantilla
A mantilla veil is one that is lined with a wide edging of lace. This example below uses Alencon lace to frame your face beautifully.

8. Cathedral
The Cathedral veil makes a statement with its floor-length elegance. This veil can measure between lengths of 6 feet, 7 feet, 8 feet, or even 9 feet.

hi there!! may i ask if you have any tips when it comes to making a color palette/picking colors? the colors of your finished pieces (and even your wips) are always amazing to look at!
ALRIGHT ANON BRACE YOURSELF. I spent a really long time on this sO HERE COMES A REALLY INTENSIVE COLOUR TUTORIAL AKA Houdi learns much in college painting classes.As usual, we need sth to work with so we’re gonna use my OC Anna. Everyone, meets Anna.

Anyway, every drawing starts with a sketch. We have a sketch plus a crash course on warm and cool colour idk why I wrote “hot” and “cold” here but whatever it’s late.

ANYWYAY, what you’ll need to know is red = warm and blue = cool. Anything deprived from these two are gonna be either cool or warm based on the colours surrounding them, so there is no in between. And an important thing related to palette is the line colours. If you’re painting without lines then it doesn’t matter, obv. But choosing the line colours for your drawing is very important. I used to do dark red but HAHA no. Lately I’ve been enjoying a lot of greyish purples and blues, since they’re pretty dark and neutral.
While we’re at it, let’s talk grey. Below is a horrible chart of complementary colours –> greys.

Idealy, they all should be cool machine grey. But alas, I’m not pulling out my oil paint for this and I can’t really blend digitally like I blend tradinationally sO WHATEVER. Anyway, greys are important in your piece. At least for me. It calms the colours down if it’s too vibrant, and lets the eyes travel throughout with ease. I’ll show you the differences later!


Now on to the actual colouring. Usually I start out with the lightest and then shade. Here I’ve blocked out the part where I want the shadow to be. What I do when I choose colours to shade is I use a warm and cool colour, not neccessairly complementary. It depends on which colours you like. I would advise to not use too saturated colours as of yet. I would blend those colours out, and choose the greyish/greenish colour they make. Sometimes you would get purple too, I usally just choose it from the colour wheel if I need it.


Now is the time to choose a darker slightly more saturated colours for the shadows. And just, blend everything until u die. More layers of shadows adds more depth, but it’s also can destroy all your colours altogther, so I suggest 3-4 shades + blush (is applicable) at most. (Althought 5 is when the fun really starts. It’s also kinda advanced and I suck at it lol)

Anyway, colouring lines makes the face lit up.
Hair. Same process.


For the clothes, I chose a really de-saturated blue, and a yellow that’s not too bright. You can see the most saturated thing right now on her is the hair, the eyes, and the buttons on her collar.

Below I have messed around with the saturation. And while to each their own (I kno, that really saturated one might look temtping but stay with me), if you’re just starting out with colours, try to use a more variety of saturation. Too saturated makes it very hard on the eyes, and the printing is gonna be hell on Earth. Too much de-saturation is just meh for me. Ofc, there are artists who utilizes these colours very well, but they know when to and not to abuse them. Just play around and see what you like. BUT TRY AND USE SOME GREYS THEY ARE MAGICAL. And no absolutely no black for shading. Just don’t. please.

Anyway, filters. I like overlaying. Just don’t abuse it cause when you’re doing traditional art after this you’ll cry.

Here’s some colour relationship charts I had to do in college lol it was really hard to mix them with oil paint.

I hope that was useful for you anon! There is another question for how I do BG and PLEASE BE PATIENCE WITH ME IT’S TAKING A VERY LONG TIME TO COMPILE THINGS TOGETHER ;;;;;


Really usefull
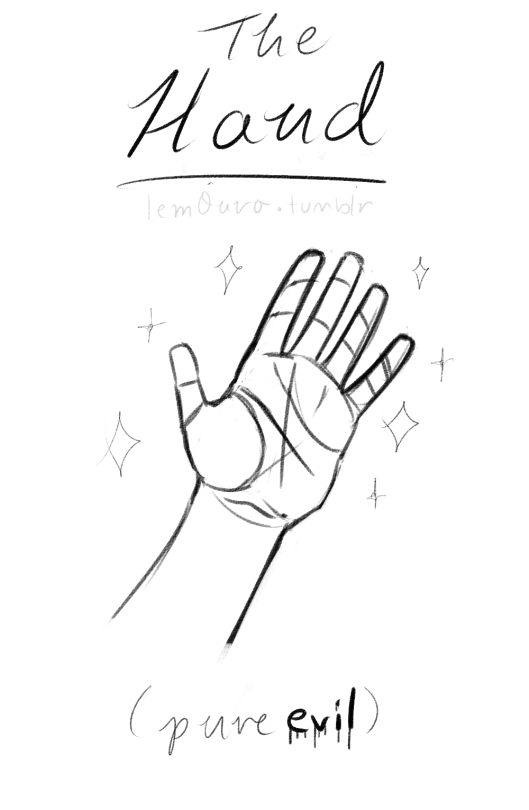
I'm kinda ashamed to ask this, but could you make a tutorial on how to draw hands? ;A;
omg dont be ashamed at all!! Hands are generally tough to get used to, lots of artists struggle with it! so dont be ashamed i feel you.
and I actually have made a hand anatomy guide before in fact! If you want to get better at drawing hands I def recommend you learn the basic anatomy first. Please check out the ones I made, I try to make it simple and easy to understand:
Artistic Anatomy: Hands Part 1
Artistic Anatomy: Hands Part 2
There’s my guide to the anatomy, but here’s some more tips that I’ve noted to myself that I’d like to include
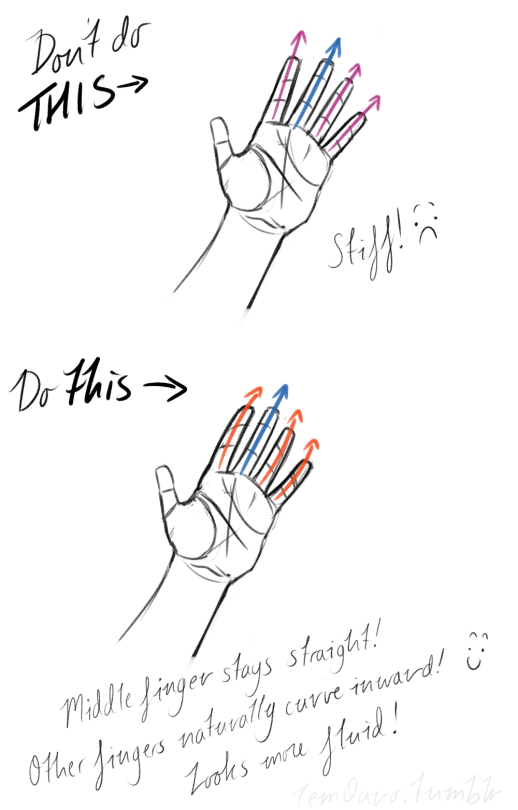
First off, I’d like to just note on the fingers: if you pay close attention to your own hand, you may notice the fingers are ever ever so slightly curved inward. It’s a very subtle detail, but I noticed that, despite how slight it is, it can make a hand look more lively, and less stiff.
Second, the “M” on the palm! Your hand moves in many ways, and because it does it creates creases in your hand. The most prominent creases appear to make an M shape; this is handy to remember for what I’m going to talk about next. (It also could be a “W” I guess, or to be more specific a “ )X( “; just think of it in whatever way helps you remember!)

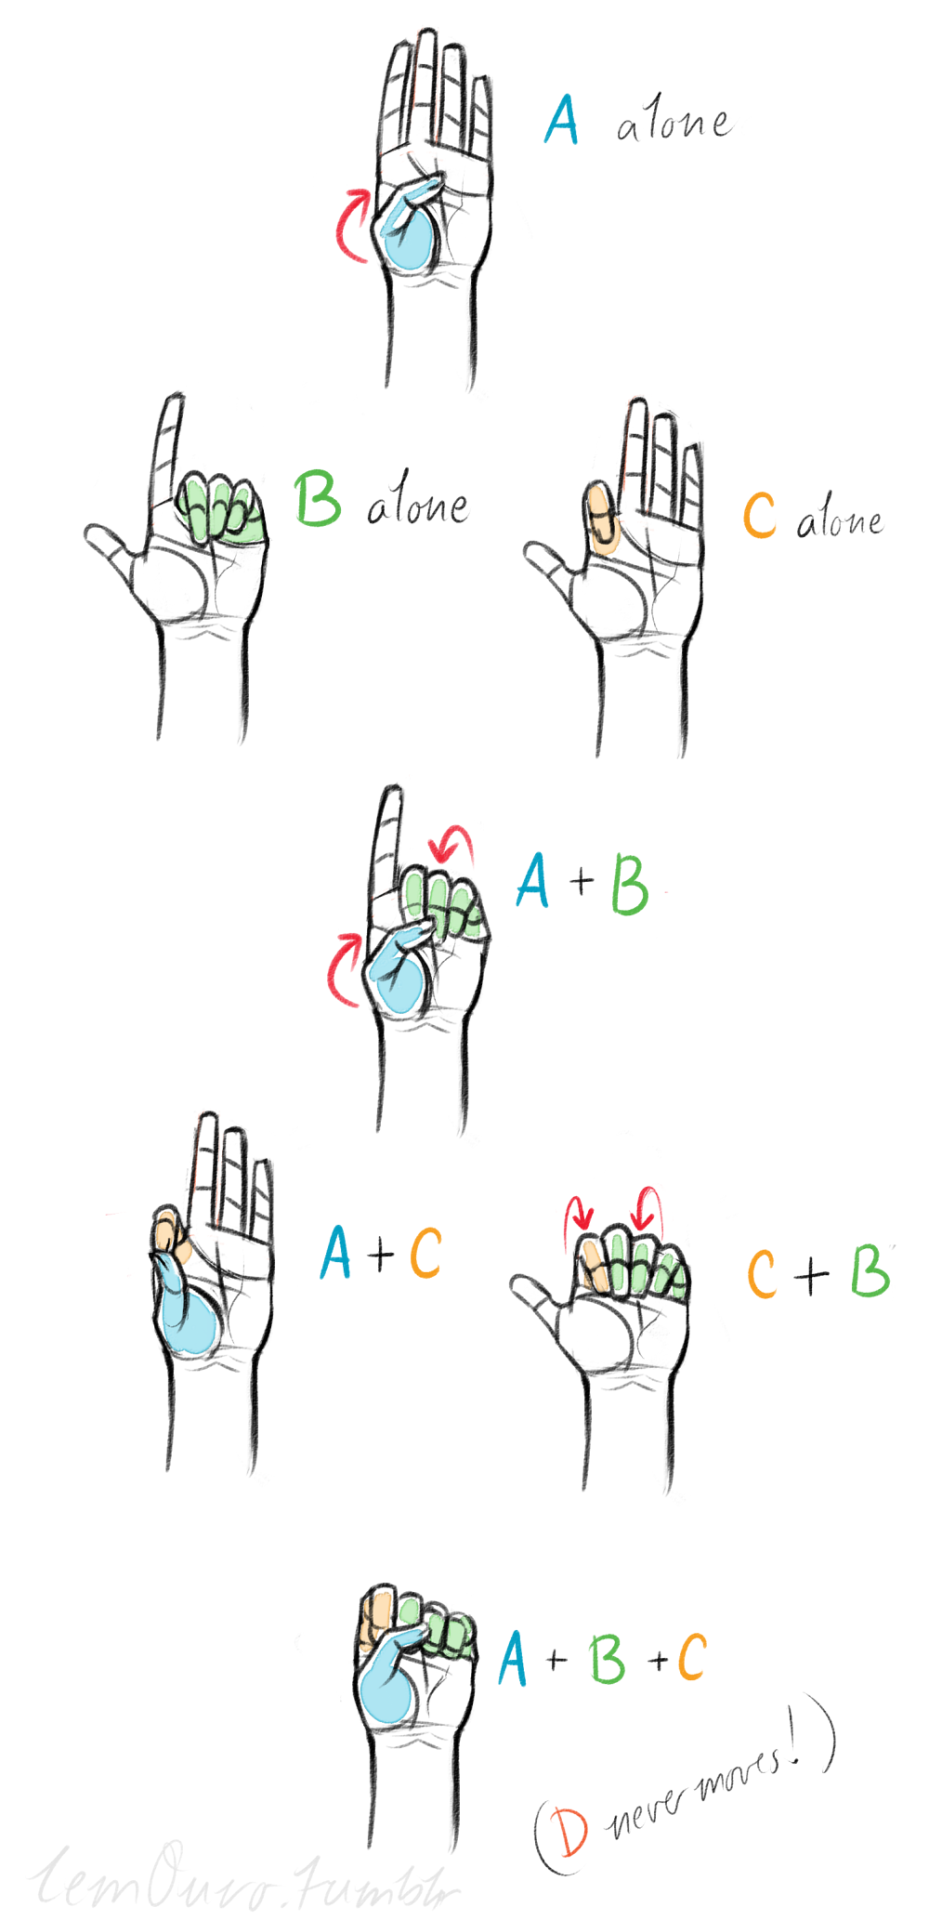
SO now that you see the M, draw your hand as a basic blocked shape and add your details. As you do, you can see that the M divides the palm into four basic parts!


When the hand moves, parts A, B, or C of the palm, alone or in different combos, will create the general poses that the hands do normally. These parts are the parts that move, with D being stationary, no matter what!
Here’s a chart of all the possible combos. Once you have down what part of the hand moves for a certain pose, you can change up the fingers and tweak it a bit to do what you need to make it more specific!
This is simply my method of drawing hands. God knows there are hundreds of tutorials out there by other artists, but personally, this way helps me the best (after learning the anatomy first).
This way I can divide the hand and combine the parts in any such way I need!
Hands take a lot of effort to grapple, and you need to practice them a lot, especially foreshortening of the hand; that’s really something you need to learn through your own studies. Look at your own hands, draw hands from life, from magazines, shows, comics; just draw hands! You’ll eventually figure out a method that works best for you. So to get better at drawing hands; draw hands!! And don’t stress over it, have fun with it!


-
 slaviiik liked this · 3 months ago
 -
 juniorsweet liked this · 3 months ago
 -
 kiwipit liked this · 3 months ago
 -
 katnuur liked this · 3 months ago
 -
 mai-fanblog liked this · 3 months ago
 -
 masterpost-collections reblogged this · 3 months ago
 -
 cabbagecabbage reblogged this · 3 months ago
 -
 twokilogramsofnotebooks reblogged this · 3 months ago
 -
 fanatic144-blog liked this · 3 months ago
 -
 fictaciousreality liked this · 4 months ago
 -
 daeyeoubi liked this · 4 months ago
 -
 troubadourraconteur liked this · 5 months ago
 -
 niika-inspo-board reblogged this · 5 months ago
 -
 morefuckinknives reblogged this · 5 months ago
 -
 alieba liked this · 6 months ago
 -
 princce7 reblogged this · 7 months ago
 -
 mortem-bk liked this · 7 months ago
 -
 piratesunnyshine reblogged this · 7 months ago
 -
 homeyvib3s liked this · 7 months ago
 -
 punk-bug liked this · 8 months ago
 -
 uncleflaco liked this · 9 months ago
 -
 supimhere liked this · 9 months ago
 -
 sketchingvictr liked this · 9 months ago
 -
 cape-of-questing liked this · 10 months ago
 -
 pwbsuperblog liked this · 10 months ago
 -
 usefull-usefull reblogged this · 10 months ago
 -
 ana-pt liked this · 10 months ago
 -
 burnt-tomato-slush liked this · 10 months ago
 -
 apenvssword liked this · 11 months ago
 -
 unlikelyfanstranger liked this · 11 months ago
 -
 hanifjalilhasan liked this · 11 months ago
 -
 snapshotfairytale reblogged this · 11 months ago
 -
 gaybitchjuice liked this · 11 months ago
 -
 tiny-tardis liked this · 11 months ago
 -
 rasver liked this · 11 months ago
 -
 benji-ransec liked this · 11 months ago
 -
 helenagrassmanncassimiro liked this · 1 year ago
 -
 itsjustchaotic liked this · 1 year ago
 -
 im-feeling-artsy reblogged this · 1 year ago
 -
 lizzybeanbutt liked this · 1 year ago
 -
 salmonchipz liked this · 1 year ago
 -
 piratesunnyswiss reblogged this · 1 year ago
 -
piratesunnyswiss liked this · 1 year ago
-
 tznto-0zz-blog liked this · 1 year ago
 -
 scrapbox-in-the-attic reblogged this · 1 year ago
 -
 skirtpockets liked this · 1 year ago