That’s Right Folks, Following The Unbelievable Response We’ve Had To These Tutorials, I’ve Licensed

That’s right folks, following the unbelievable response we’ve had to these tutorials, I’ve licensed a BRAND NEW SECOND SERIES of tutorials to a mystery publication (may not be a mystery to some of you!). This means that in addition to the FREE TUTORIALS I’ll be dropping here on Tumblr and around the web each week, there’ll ALSO be a DIFFERENT, 2ND tutorial every week for you, should you wish to subscribe. Full details coming on FRIDAY! Here’s a little peek at a section of one of the 2nd series’ tutorials, which looks at how to THINK when you draw RUNNING FIGURES… And if you want ALL MY OTHER TUTORIALS so far for FREE, just go HERE and HERE! Lorenzo!
More Posts from Zelo-ref and Others


JX3 qixiu martial art school || Coser: 唐八狗 PHX:@十二岁萝莉 Photoshop@我左青龙右白虎腰间纹个米老鼠 @盯叮叮丁 Backup: @悠司Yuuji_ @鬼才Kisai

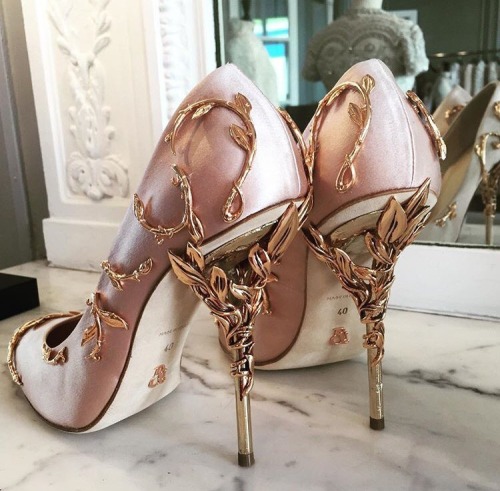
Costume for La Mer de Glace, act III, 1909
(Robe en satin de fil métallique argenté ornée de sequin et perles tubulaires parsemées et brodées de duvet de cygne blanc) Ballet-opéra by Jean Lorrain, music by Charles Silver Nouveau Musée National de Monaco [photo Mauro Magliani and Barbara Piovan, 2010]
Source/Source
Odd question. But can you post a closeup on your personal preference on how to hold a knocked arrow when you draw?
As you can see in a lot of my pictures, I prefer the Mediterranean Draw, even though I shoot a Mongolian Horsebow as well as the English Longbow. The reason for this is simply that I was taught the Mediterranean Draw when I first picked up archery and I just stuck with it. It is what works best for me!


I hope this was helpful :)

How To Shade
a quick tutorial on shading (with graphite) by yours truly. this is the process I use for shading, and there are tons more out there if this one doesn’t work for you.
MATERIALS USED

1 HB graphite pencil
1 2B graphite pencil
1 4B graphite pencil
1 blending stub (the bigger the better)
1 plastic eraser (white)
1 kneaded eraser (grey)
now why do I use two erasers? well, they’re very different from one another, and each serves their own purpose.
the plastic eraser is harder, and when it erases, it erases everything. the kneaded eraser is soft, and it doesn’t completely erase everything all at once. you can use it to pick up some of the graphite and leave some behind, lightening (but not totally erasing) your shading. plus, the kneaded eraser is so soft you can mold it, and it doesn’t leave pencil shavings. if one end gets too used, you can just stretch it out, and it’s as good as new.
REFERENCE USED

now lets get this started, shall we?
STEP ONE
scribble lightly over your drawing with either an HB (aka a regular #2 pencil) or 2B pencil. you don’t have to be extremely neat, but do it light and nice enough so it can still be erased/you can still see the original lines underneath.

STEP TWO
take your blending stub (the wider the better, and if you don’t have one, use a tissue) and rub in the opposite direction of the scribbling. don’t press too hard, because it might streak/not work if you do.


STEP THREE
erase the extra shading around the edges (using the plastic eraser.).

STEP FOUR
roughly add your darks

STEP FIVE
roughly add your lights by erasing with the kneaded eraser

STEP SIX
add your finishing touches (secondary shadows, background, etc)

(I reshaped the sides, added more lights, and added the background shadow)
and voila! you just did some shading!


-
 malcontentmoon reblogged this · 3 months ago
 -
 sunshineandlabyrinth liked this · 4 months ago
 -
 bubblegumlover99 liked this · 3 years ago
 -
 payaso-pastel liked this · 4 years ago
 -
 artsy-toots reblogged this · 4 years ago
 -
 capriciouslycandid liked this · 4 years ago
 -
 krokodilaugen liked this · 4 years ago
 -
 bushido-jack liked this · 4 years ago
 -
 sarahjacobs liked this · 4 years ago
 -
 art-refrence-stash reblogged this · 4 years ago
 -
 chevatocastroso liked this · 4 years ago
 -
 telecamania liked this · 5 years ago
 -
 mangosteen21-blog2 liked this · 5 years ago
 -
 librariumth-ad-infinitium liked this · 5 years ago
 -
 wintersound liked this · 5 years ago
 -
 izzyoppossum liked this · 5 years ago
 -
 aurore78 liked this · 5 years ago
 -
 wickedspeak liked this · 6 years ago
 -
 duwango reblogged this · 6 years ago
 -
duwango liked this · 6 years ago
-
 phoenixkluke liked this · 6 years ago
 -
 dinosaur-post liked this · 6 years ago
 -
 nekochanuwu-blog liked this · 6 years ago
 -
 r0-bartics liked this · 6 years ago
 -
 vivek-snp-blog-blog reblogged this · 6 years ago
 -
vivek-snp-blog-blog liked this · 6 years ago
-
 zoeyp03 liked this · 7 years ago
 -
 dutifullysparklyvoid liked this · 7 years ago
 -
 madisonsmusings liked this · 7 years ago
 -
 art-refs-n-tutorials-blog reblogged this · 7 years ago
 -
 poinsettiaatnight liked this · 7 years ago
 -
 just-one-of-the-wallflowers reblogged this · 7 years ago
 -
just-one-of-the-wallflowers liked this · 7 years ago
-
 faunstellation liked this · 7 years ago
 -
 negyek liked this · 7 years ago
 -
 scribulations liked this · 7 years ago
 -
 the-bulls-ref reblogged this · 7 years ago
 -
 admiralexclipse reblogged this · 7 years ago
 -
 3dsman liked this · 7 years ago
 -
 toddjh liked this · 7 years ago
 -
 callipygianflamingo liked this · 7 years ago