NSFW because there will probably be nude refs | this is a side blog to sort all of the art stuff I need | none of it is mine
151 posts
Latest Posts by artrefforsteph - Page 5


The getting Started Course is here, go check it out here: http://cgcookie.com/concept/cgc-courses/getting-started-in-digital-art/
HIIRAREFS: Basic and Intermidiate guide to colouring in
What better day to end the year then with a basic guide to colouring- This is for beginners or intermediate artists. Colouring is a big part to an art piece, whether you decide to use colours or not, that’s up to you, but for the most part, having some knowledge on appliance of colour will really help you out!
____________________________________________
ARTISTS WITH AN INSPIRING KNOWLEDGE OF COLOUR APPLICATION! Please take the time to have a look at other artists work so that you ca research and get inspired!
Gullacass: Uses brights, dulls and pastels to create brilliant guro, pop and macabre pieces| DA + TUMBLR
TinyCalcium: Old friend of mine who explores brights and mustard colours and places them as a foundation for their work | TUMBLR
BeastPop: Talented with opposing and Triwheel colours. Outstanding cell-shading, and knows how to flexibly bend colour form to their will in popart. | DA
H0stel: Fantastic composition of light direction and applies colour to bodies based on ambient occlusion. | TUMBLR
_____________________________________________
COLOUR SLANG: I use some strange slang to express colour types and shades as well as groups. Although they may not be canonically correct, I will use these terms to describe colour palates to the best of my ability! Analogous: Colours that are near or adjacent to each other on the colour wheel, EG: Red and Orange
Oppositional/complimentary: Colours that are opposed or opposite from each other on the colour wheel, EG: Cherry and Green
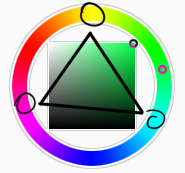
Triadic: Colours that form a triangle on the Colour wheel, EG: Cyan, Magenta and Yellow. These three colours when mixed together will make black.
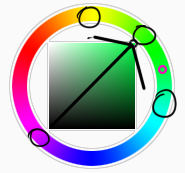
Arrowtype/Quadcolour: Four colours, that generally form an arrow shape on the colour wheel.
Tetradic: Colours that form a rectangle or square in the colour wheel

Neons: The very brightest you can get a colour, be careful where you use them as they can look ugly together at the most. Try to use neons when you are adding bright glowing objects to your piece. Neons are great for highlights.

Brights: Slightly washed Neons. Appropriate if you have characters that are colourful.

Washed: Very washed brights with a hint of grey. These are also useful for colourful characters.

Pastels: Colour with white in them to make them seem light.

Baby Pastel: Pastel with even more white in them, good for subtle highlights.

Darks: Colour with black added to them. Used mostly for lineart.

Mustards: Colours with dark grey added to them

Earthen: Colours with brown added to them

Warm and Cool colours: Warm colours are colours that range fromMagenta to Yellow. Cool ones range from Lime to Fuchsia.

Straight tones: A greyscale palate. or a straight scale of one colour from black to it’s neon form.

Warm and cool tones: Warm tones are a greyscale mixed with warm colours and cool tones are greyscale mixed with cool colours.

Skintones: Warm washed or pastel colours generally used to colour in skin, but they don’t have to be warm at all! ( I will not show you a palate for this however)
______________________________________________
WHAT TO AVOID WHEN COLOURING: beginner artists, tend to go ahead and start by colouring their line art with neon and mustard colours. Neons are not necessarily good for base colours unless the character has a glow.

I often see lazy attempts to shade, often a beginner artist with use an airbrush and use black and white to shade and highlight their piece. This is not very effective, and I’m sorry to say… It’s kind of gross as well. Try to avoid being lazy. If you have a piece that has bold black lines, avoid using soft shading and airbrushing at this point of time.
Black and white isn’t always the best option when colouring in your piece, but it also depends on the style you are trying to convey. If you plan on only using straight tones to colour in a piece, black and white is good.
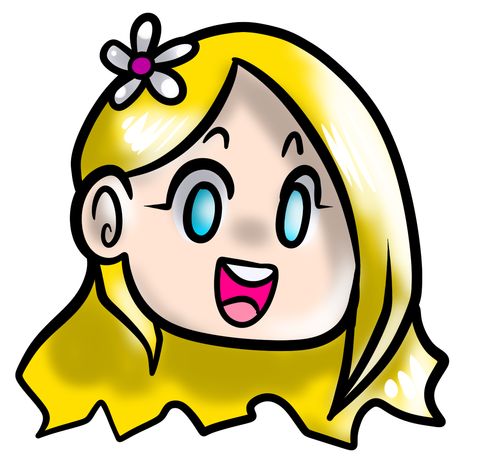
A GOOD BASIC WAY TO COLOUR For this basic tutorial I will show you a nice way to colour in a piece with bold lines. I will be using Minty’s Classic character as an example.
Begin with using brights that have been washed down a little and washed skin tones if your character is human based. Avoid using neons or mustards if you are able. If there is white on the character, such as the white on an eyeball or the teeth, consider using baby pastels. For Minty’s eyeballs I have used a baby pastel blue. I have chosen to use a darker and more washed version for her Irises.
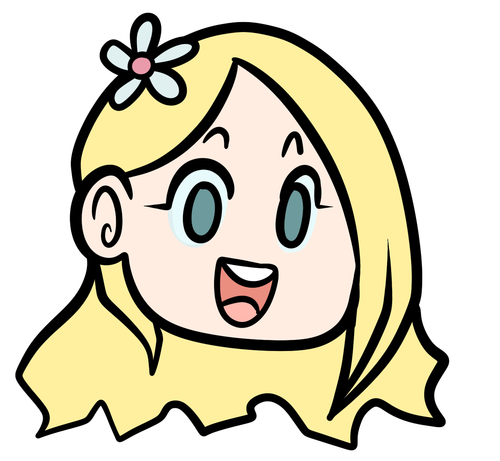
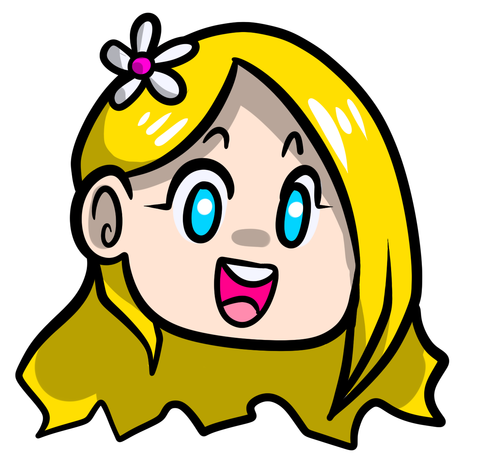
With you foundation colours placed down, use a washed warm colour for the skin tone, such as a salmon. If the character’s hair or fur is warm coloured, use a pink or red orange to shade that as well. Use the cell shading technique. This may mean you will have to erase some of your shading so be sure to do this on another layer. For your baby pastels, you can use a regular pastel to shade it. For Minty’s eyes I have used pastel blue and lowered the opacity by a little.

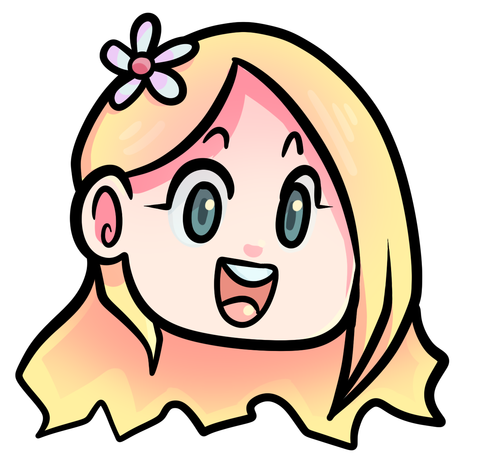
For Highlights, I have chosen to use baby pastel yellow. I wanted the piece to be warm.

Applying a light airbrush over the top of the piece makes it feel a little softer. I have also applied the airbrush over the initial borders to create colour bleed, giving a very subtle reflective approach.
Colouring your line art layer, particularly if you have bold lines, can really make a piece look more interesting! I like to leave the overall outline black. You can gradient and bleed colour in your line art as well
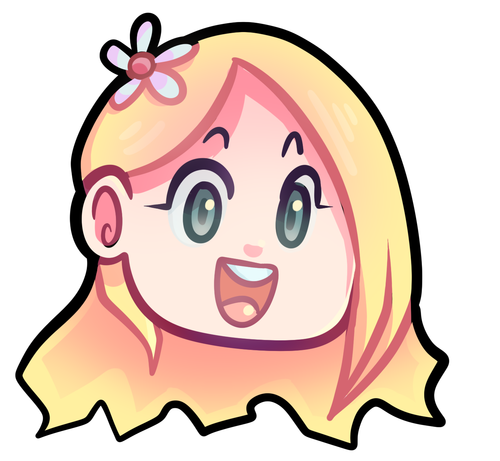
Light tracing is a technique lots of artist’s use, where they run a sharp line of highlight next to line art to divide borders.
This looks a lot nicer than the black and white shading, doesn’t it!? __________________________________________
This is a very very simple guide to applying colour to your piece! If This helped, please reblog and share this guide around!
If you have any questions or feedback, don’t be afraid to send me a message!


sorry for any grammar mistakes
long time without a tutorial… I tried to explain my general process of working here, hope someone will find it useful :)

:) hope you like it!
my current brushes i used a lot here: painting brush(speckles), the ones i called sim
https://dl.dropboxusercontent.com/u/12795238/sim2014_23_08.abr
enlarged tutorial images:
https://dl.dropboxusercontent.com/u/12795238/wald%20tut%20large%20images.jpg
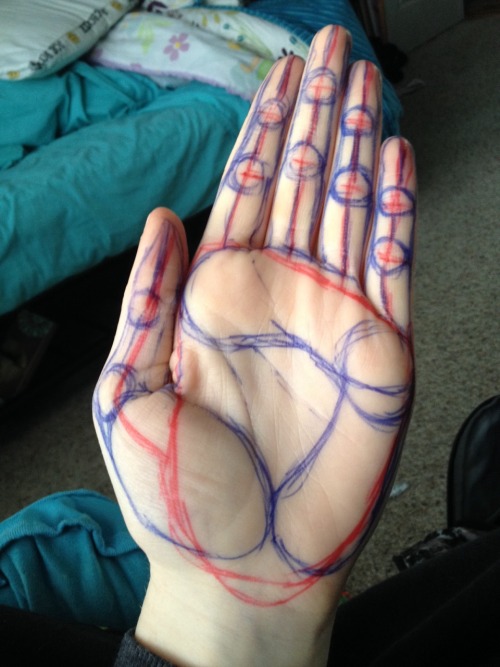
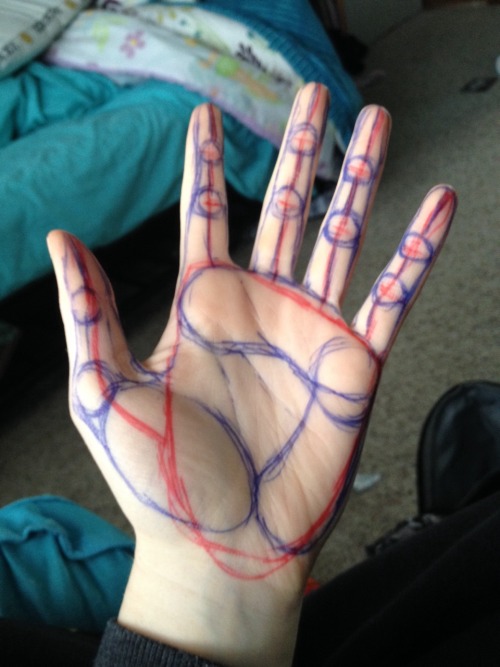
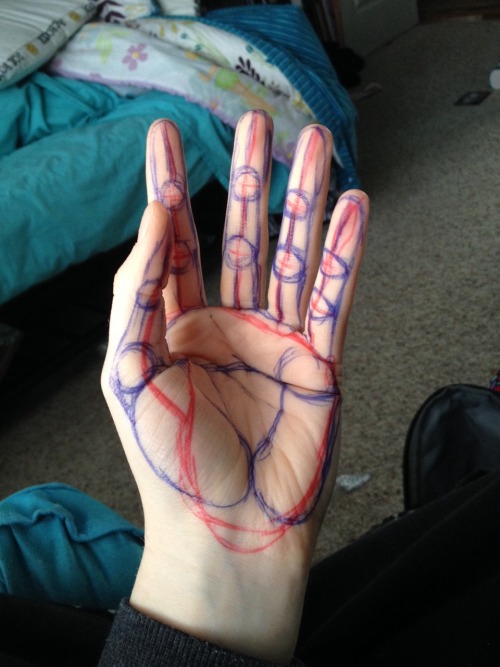

I always struggled drawing hands before anyone told me what to do. So here is a HANDy dandy drawing reference to see the steps on an actual hand. There are three big muscles in the palm. The thumb lump is most important because without it you’ll never even get the shape right. Circle up the knuckles and draw bendy lines (red) to connect them. Make sure the fingers go from medium-tall-short-shortest just slightly (index=>pinky finger). Notice the big red squareish shape around the palm-that’s the first thing I do. Note: every infer has 2 knuckles don’t forget the thumb does too…just in a weird way.

Tuesday Tips - Hair There’s no hard rules to draw hair (or anything for that matter), but the one thing that I try to keep in my mind is that there’s AIR in hair. I can draw it as a shape because there’s hundreds of thousands of them, but I’m also considering the space between them. For example, the volume of dry hair and wet hair will be dramatically different. Also, the way it behaves will differ greatly from person to person. I mostly think about the “weight” of the hair. Longer hair will means that the mass of hair will be heavier and react accordingly. *As always, leave a message if there’s a topic you would like to see covered. Norm
Any tips on drawing mouths?
Oh gosh I will try
I do basic closed mouths like

altered pretty easily for parted lips

annnnnd teeth…

You can put as much or as little definition into your teeth as you like, but I go about halfway

And remember that it’s dark inside mouths, and that there’s a tongue in there. I’m terrible at tips, I’m sorry! Polararts has a much better tutorial haha.


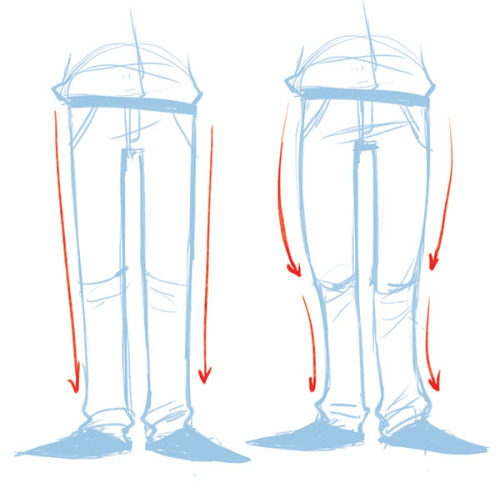


Okay so I followed this video about foreshortening and…
Sycra. I love you so much for making this video.


Text tricks.
<sup> makes words go like thiiiiis.
<sub> makes them do thiiiiis.
<small> makes words go little. The more <small> you have the smaller the word.
Same thing applies with <big>.
<u> makes underlines.
Go here for Full Width.
̛̰̖̲̰͑ͨ͒̌͑̍̿̈͘Z̨̜̲̥̯̮̭͍̳ͧͣ͋̊̋͗Ȁ̪̼̠͎͒ͨ́̚͘͢͞L̸͉̬̻͌̒͑̊̽͡Ğ̝̮̝̗̲ͧ͝Ȍ͍̪̪̖͕̟͈̝̰̆͋̾̀ is found here.
Go here if you want some uʍop əpısdn.
_______
Of course these are just basic things. You can also look at the HTML button for the codes if youre not up for searching through Google for them.
The button is here:


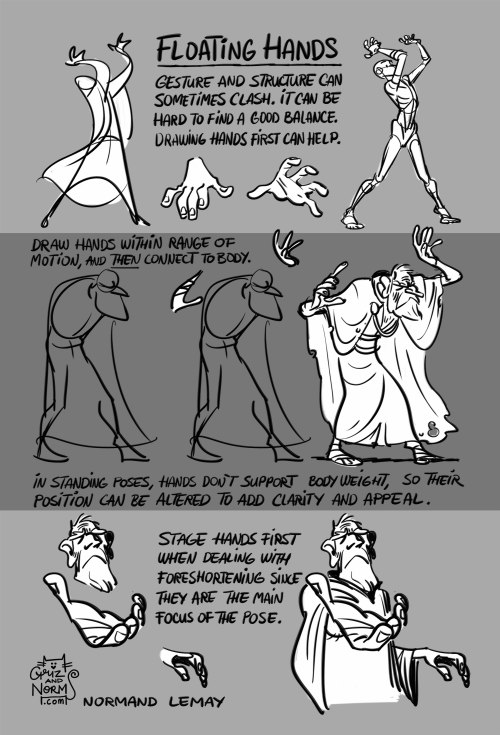
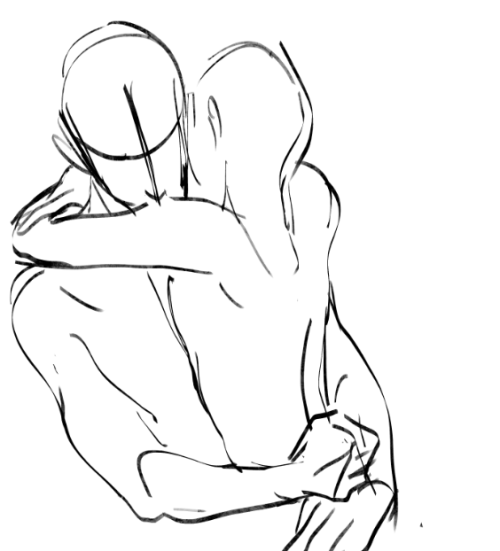
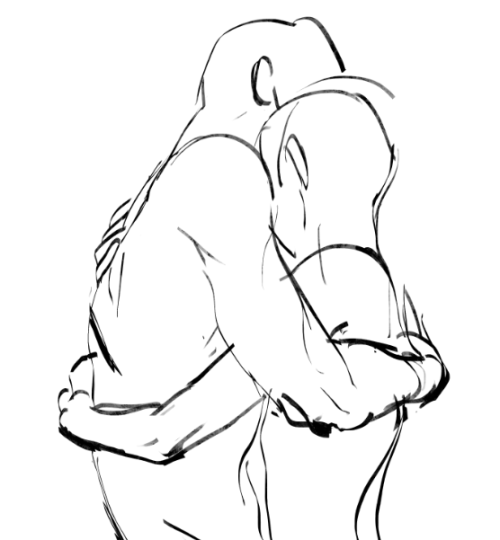
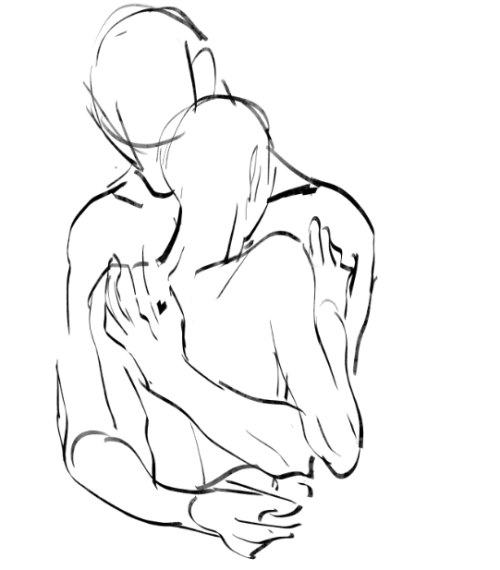
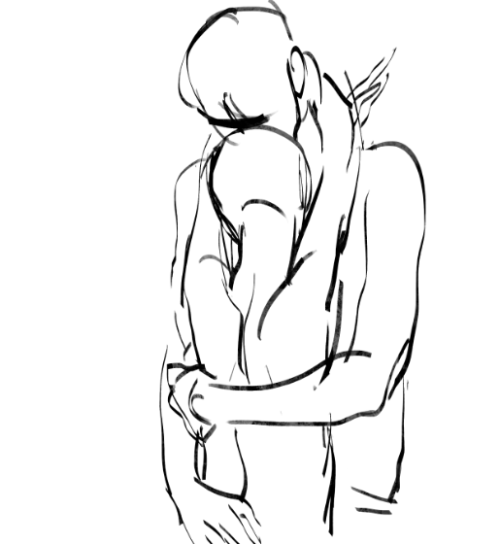
Tuesday Tips - Floating Hands I use this a lot when storyboarding a first pass of a sequence. Placing hands in the right, most appealing position can be tricky. In order to create a clear silhouette for the hands, I often draw them “floating in the air”. Then, using my general knowledge of anatomy, I just “fill in the arms”. This way I can create a much more expressive and clear pose than if I was just radiating out of the torso. That’s when structure and anatomy can get in the way of a clear message. And hands carry a lot of meaning, so I want to make them as clear as possible for my audience to see them. I would say the same applies to life drawing. Since they often don’t carry the body weight (legs most often do), I feel like i can take the freedom of changing their position slightly to make a better visual statement. -n
how do you draw hair in your syle?
how do i draw hair in my style* i think thats what you mean right? Okay hair is seriously my favorite things to draw because its super fun and its really not that difficult once you get the hang of it. You need to understand how hair works though, that is very important!!!
you need to know the ‘flow’ of the hair. seriosuly. understanding how this works makes your life so much easier because then you dont need to copy EXACTLY how the characters hair looks like (if you are drawing fanart or something) and you can just make up your own way of drawing the persons hair (following the flow) and it still looks great! Yes even the crazy bedheads like kuroo has flow and parting. i hope i made sense, im terrible at explaining.

now that you know the flow, did you notice that the arrows all come from one point? That is where the hair is parted usually. I often start off where it parts and follow along the ‘arrows’.
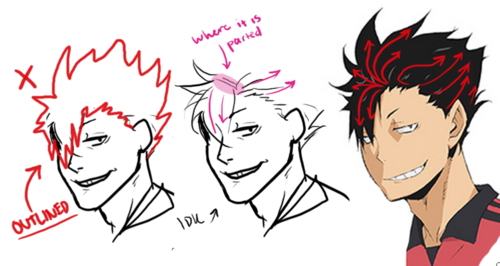
dont draw the ‘outline’ of the hair only (meaning you dont draw what is happenig inside of the hair), there is no flow and it looks really choppy and its super difficult (unless you are really good at it go ahead idk). see how in the middle kuroo, I start with where it is parted? SO MUCH EASIER TRUST ME!!! So remember, always always always know the flow and the where the hair parts!!!
as for my style, i dont know i just draw hair and boom. style? here are a bunch of habits i do when i draw hair:

look at the very left side where it shows how I draw hair strands. remember to start with simple lines or big shapes and then gradually break it down smaller and smaller and you should be good! hope it this was helpful in some way :)
Hey Ross, I'm currently 15, a Junior in high school, and love to animate. I don't think going to an art institute/university is the right move though when I get out of HS - financially or for many other reasons. Community College is a huge possibility though, as it's less expensive and would still teach me more things about animation all together. For the most part, I believe animation can be a self-taught experience, but I'd like to hear your thoughts on this.
That’s great dude. Don’t feel like you HAVE to go get an education in animation to succeed. I tried it, but it wasn’t for me. I found I wasn’t really learning enough compared to what I learnt just fiddling and making mistakes by myself. I mean look at Arin, he didn’t even finish high school yet he taught himself to be an animator. Some people learn better being pushed by an education system, some are better left to figure things out for themselves. If think you’re better going it alone then GREAT! You’re an autodidact!
Here’s some stuff I’d recommend you focus on while getting started:
Learn Flash or Toon Boom.
Maya/3DS Max/Zbrush if you’re interested in 3D (I have a minor background with it)
Study life drawing and human anatomy. Try this if you’re at a loss for material: http://www.posemaniacs.com/
Keep an organized folder of art reference (find it by following art tutorial blogs or your favorite artists). I have gigabytes of reference in my folders.
Get your head around cinematography. Watch legendary films and figure out what makes the shots great. One exercise is to take your favorite shots and make silhouette thumbnails of how things are placed, helps you break it down in your head.
Composition! It’s crazy and even those who get it sometimes don’t get it.. but just look it up online to get your head around it. It’s all about placement and arrangement of shit.
MAKE FRIENDS! Talk to other artists like yourself who are starting out. I met Arin online through Newgrounds when I was 16/17 and we’ve been friends ever since. It’s important to have like minded friends!
Keep a sketchbook, draw all the time. If you prefer doing it digitally then that’s fine, but keeping a sketchbook is a magical thing. Also helps with your line confidence, at least I think so.
If you want to develop your own stories to go along with your animations, consider the following books: Screenwriting 101 (I LOVE this book, really great read AND it’s written by someone pretending to be The Hulk), On Writing: A memoir of the Craft (Stephen King! Haven’t read this one yet but friends recommend it) and also Save the Cat! (this one is more so about selling scripts and writing to a formula, don’t take it as gospel.. But it’s interesting).
Voice act! Shit man, just get a decent microphone when you can. Make goofy voices, do imitations. Get silly! Lots of animators have at least some experience doing voice acting!
WATCH STUFF. Seriously, I can not stress this enough. Everything is derivative from other works and that’s okay. Inspiration comes from everywhere and anything. My late friend Monty also preached this, he even proudly told me some of his early influence for RWBY such as Black Rock Shooter. Finding influence breeds passion. You’re not slacking off watching cartoons, you’re researching.
ANIMATE! Do it however you can! Stop motion lego, flipping paper.. I don’t care. Just do it. Whatever you learn, It all translates across any version of the medium.
ANIMATORS SURVIVAL KIT. This book is a must and most animation schools highly recommend it. It was written by Richard Williams the director of Who Framed Roger Rabbit (among other things). If you’re not big on reading, then you’re in luck because it’s MOSTLY pretty pictures. http://www.amazon.com/The-Animators-Survival-Richard-Williams/dp/0571202284
Lastly but not least.. Just don’t stop. The people you see online and on TV right now, they’re not kicking ass because of some god given talent. They’re there because they didn’t stop. They persevered through it all and kept going, no matter what anyone else told them.
Good luck!


i tried to make a tut on how i draw bodies but it came out as a mix between me trying to make sense of my lazy technique and general art tips??
i get overwhelmed by complex scheming and sketching so i try to sketch with the least lines/shapes possible.
if you find this method too difficult-dont worry. ive had years of practice and ive developed a lot of shortcuts for myself, so this might be like reading the notes of a student who has their unique set of abbreviations.
hope that helps tho??


i just found myself using this random trick that one of my art professors taught me and i thought other people might like it!
other tips: -at rest, the elbow hits the bottom of the ribcage, and the wrist hits the bottom of the crotch -the distance from your inner elbow to your wrist is about the same length as your foot -the length of your hand (from wrist to the tip of your middle finger) is about the same length as the distance between the bottom of your chin and your hairline
so, if you have a feeling that proportions are wrong on something, those work as quick gauges. like, if a character’s forearm looks too long, try to visualize their foot being the same size and see if that works. if the hands look too big, look at their size in relation to the face.
hope this helps someone!


If you have no idea what to draw...

its like having all the money you wanted ,but you dont know what to buy. Making this to look at when I get stuck with lame ideas. These are all suggestions from my followers:
Taking a break: No option for me but it surely can be good for other overworked peeps
Exploring new art forms: depending on your art style, surrealism would be something I’ve never tried before.
Shape game: Either sketching blindly and connecting the dots or sketching random shapes and fill them with faces or whatever comes to your mind.
Draw something you never drew before: …a good picture…
Draw a shark: How to draw a shark by Will Terrell
Read books: Let your mind to the picture first and then your hand.
Poses: Action poses - freestyle dancing - fight styles - (dancing people in general)- life drawing - online 3D model
Redoing Artwork: Either your old stuff or from your favorite artists, your way.
Reverse storyboarding: take your fav movie and sketch the the shots after every camera change.
Screencaps: study them, draw them, look at composition
Characters: Let your OC’s do extreme expressions, let them do things (driving,cleaning,running,etc)
Concepts: How people could look like on other planets. Look at Character Design
Planing an art project: A comic in my case, thinking about environments and characters etc.
Drawing upside down: ¿¿¿¿¿¿¿¿¿¿¿¿¿¿¿¿¿¿¿¿¿¿¿¿¿¿
Fanart: Illustrate your favorite book, series,Manga ,etc
Sideblog: Gathering all the references for all your needs
Just a quick tip to artists

If you’re an artist who likes to work really close, (like me), do yourself a favor and put up two views. You can do this by clicking View–> New on your toolbar.
There’s nothing worse than finally zooming out and realizing what you were doing was very wrong. This saved me a lot of grief tbh. I’m sure everyone knows this already but ._.;; I arrived quite late to that party.