Curate, connect, and discover
Art Tutorial - Blog Posts
may i ask how do you come up with your characters designs and outfits??? i have such trouble thinking up functional costumes for my characters and i admire yours so much omg
ofc ofc!! I’ll try to keep this short n simple so there are pretty much just three steps in costume creation, compiling reference, sketching, and creating the final piece!!
Compiling reference is pretty self-explanatory! I recommend having a folder in your computer to save costume design to, or pinterest bcos pinterest is a fucking gem. Just. Hoard all the armor/clothing you can get your hands on. even if the only part of a design you like is the shape of some coat buttons. stash that shit away man. Here are some references I used while designing armor for Rato!!

The next step (and also the lengthiest step, at least for me) is sketching!! This can be………intimidating to get into, but it’s not that bad once you dive in!! Just think of it as tossing all your reference pictures into a giant melting pot and then throwin a bunch a your own personal flavor in there too for good measure.
I super duper recommend sketching outfits in a paper doll sort of way, with shapes instead of lines, and in greyscale! Good outfit design depends 90% on shapes imo, and blocking out clothing forms makes the entire process much much faster and easier to think about. The greyscale is so you don’t have to distract yourself by thinking about colors just yet B^) for example:

when Im designing outfits I like to lay out a bunch of sketches of the character naked/in underwear/w/e and then just go down the line blocking different chunks of the armor out. Each different shade of grey is a different layer so I can easily add stuff on top of or underneath other clothing pieces. It really helps to have a bunch of sketches on one page so you can recycle pieces of different mock-ups you’ve done!! Im sure you can see that a lot of the Rato sketches up there have the same boots/coats/chestpieces :~) its honestly just throwing shit at a wall and seein what sticks
and then you just gotta finalize it!! think of colors and materials and all that good stuff. Im not sure what else to write without making this obnoxiously long, so hmu if you have any other questions!!
I can't express how much I LOVE the way you draw hands! They are just absolutely amazing and so SO expressive. Do you have any advice on how to improve? (other than the obvious, "practice", lol)
THANK YOU!! Hands are my #1 favorite thing to draw and i love using them and touching to enhance the feeling of a drawing so that makes me so happy to hear!! lol not the dreaded 'just practice' - I tried to put together an impromptu example for you: I’ve always loved drawing hands and include them in my art a lot but I can say for certain that there was a huge boost in my abilities when i started tracing from real life images to better understand the way fingers curve and deform around objects, especially - I’ll take a reference picture or two, trace, figure out which looks better and then try to re-draw it:
You want to draw a character holding a bottle? Alright, find an object that’s about the size you want, get your camera (a shitty res phone camera will do in my case), and get to it!
I like to do some variations because sometimes things just look *goofy* when you have simpler lines depicting them, so here’s 4 different ones:

Alright, next step - rough lines over to see how it translates to 2d:


#1 looks goofy so that one's out - I like #2 the best but the grip'll translate better if I close the grip of the two first fingers, so I'll do that (or retake the picture) and then re-do it on my own while eyeballing the reference i just made (I usually just draw the lines for hands directly but if i'm having trouble i break it down into rough shapes first) :

Think of it kind of like building a neat little reference library in your own brain - next time I want to draw a hand holding a bottle I can think back on this and what I picked up :)
Thanks again, hope this helps!

pixel art tutorial! I hope this helps if anyone needs it :))
Useful


A shading/lighting tutorial by TamberElla of dA~ The supplement in the original has been added in here as well.
tips for drawing with microsoft onenote and mousepad
microsoft onenote tips
highlighter colors layer to make a nice effect! but light colors don’t really show up over darker colors so I don’t recommend using highlighter on dark mode I haven't figured out how to get a white color that matches the background :/ there's an eye dropper under Ink Color -> More Colors… but even when I use it on the background white, the colors don't match. if someone has figured it out pls lmk highlighter brush makes it so that you get thick horizontal lines and thin vertical lines. use this to your advantage, especially when filling in a large area with color. it'll go much faster with horizontal strokes than vertical strokes there's a stroke eraser!! it's vv helpful (I wish the actual art programs I used had this)
mousepad tips
it's hard to get good lines by clicking and dragging your finger across the mousepad with the same finger (you have to press hard/continuously click with one finger and that makes it harder to control the flow of the line) instead I recommend moving the mouse to where you want a line to start and clicking the mousepad with one hand and moving a finger on other hand to make the line you want (no need to continuously press the mousepad hard, just keep in contact with the mousepad) -- it's much easier to control the flow of the line and there's less finger strain


Some tattoo rough concepts I’m working on do not steal please I am willing to design tattoo commissions dm me on my Instagram bath.artistry


lil tut I did cuz someone asked!
(if you can't read it, open the image in a new tab ^^)
RELATED TUTORIAL (it's about how to know where to add shadow and light :>)
If you have any questions, ask! and if you have any suggestions for tutorials you want me to make in the future, lmk and i might get around to it! X3
✨reblogs greatly apricated✨
And i know! there's gonna be a massive amount of spelling mistakes TwT I'll try and fix them!

A few people on DeviantArt asked for a fur shading tutorial, and even though no one here asked for it, you get it too! >:3c


Overview of some topics when it comes to drawing characters who are burn survivors.
DISCLAIMER. Please keep in mind that this is an introductory overview for drawing some burn scars and has a lot of generalizations in it, so not every “X is Z” statement will be true for Actual People. I'm calling this introductory because I hope to get people to actually do their own research before drawing disabled & visibly different characters rather than just making stuff up. Think of it as a starting point and take it with a grain of salt (especially if you have a very different art style from mine).
Talking about research and learning... don't make your burn survivor characters evil. Burn survivors are normal people and don't deserve to be constantly portrayed in such a way.

edit: apparently tum "queerest place on the internet" blr hates disabled people so much that this post got automatically filtered. cool!

here is how I draw leg
step 1: draw circle
step 2: add a rectangle at kinda forward angle
step 3: another rectangle but angled backwards
step 4: last rectangle this time forward again and longer than the last two
step 5: add lines to bulk up your leg where needed, this prevents it from being overly skinny compared to your characters body
step 6: add paws/talons and bulk up any extra areas as you see fit
step 7: use last step as a sketch, add any details like fur or scales as needed

Here's how I make feathered wings
step 1: Draw curved line
step 2: make a kinda curved shape
step 3: repeat that shape until wing is preferred size
step 4: use everything previous as a sketch and line over it

Simple wing tutorial, I made. I love simplifying wings. But sometimes if I want a realistic approach I get stuck, so I stared at a picture of a bat for reference and doodled this
step 1: draw curved line
step 2: draw several curved lines where the original peaks, these will be the wing fingers later
step 3: make archs between each line to create wing membrane
step 4: use previous step as a sketch and line over it on a separate layer
your shading is AMAZING specially when its conveying organic forms..... do you have any tips for people who dont know wrf going on (with shading)
ok so HI. hi. my old tutorial pisses me off so i will make a new one
i made a guy whose sole purpose is to be shaded so dont worry he likes it. and his name. his name will be mr. Boob. mr boob does not have to be blue

theres probably way better explanations of how to do it but unfortunately trying to "emulate" shading does ask you to somewhat understand ur character in a 3d way. like what would the 2d shape be if you "sliced" it? mr boob is made of so many circles. his tail also does a kind of weird perspective foreshortening thing because its pointing at you. is this being conveyed

you obviuously dont have to draw a horrendous grid on your characters skin to do this . BUT it helps you put down (or at least envision) the lines of the form shading :


dont worry about cast shadows or the shading color because this is FORM SHADOW time only. think about what surfaces of the character are obviously facing away from the light source and put down the "separation line" of the shading based on that. thr most important thing is that youre trying to separate light from dark
im going to pick the first one for cast shadows bc it will be the most obvious to me

ok so. his ears and snout are blocking other surfaces of his body from the light, which means a shadow is cast!!!! bam. i saw someone describe cast shadows as what the light's pov "can't see." his entire body is putting down a cast shadow on the ground too

im impatient so i blended the form shadows now. its usually the easiest to just NOT blend cast shadows as a way of conveying that they are still cast shadows. but you can still blend them if you want to show "distance" between the obstruction and the surface its blocking. but its just a way of saying form and cast shadows should not be treated the same even if their softness coincides

im going to lump reflection and ambient light together because theyre like. similar. reflections dont just happen in mirrors
since the sky is blue, making the ambient lighting, i tinged mr. boobs existing shadow to be a bit blue. (*this is kind of important because it can help you decide a shading color, which should USUALLY be based on the environment) (unless your character is just in the transparent void then it doesnt matter)
since the ground is pink, i made pink light bounce off of him. pointed and labelled. i dont rlly know how to go more in depth than that

contact shadows are literally shadows formed from direct-touching contact. very little light can reach in there, even from how reflections disperse, which means youre free to use the darkest color available (black). in this case mr. boob is making contact with the floor. because he is sitting on the floor.

i touched him up a bit and wow!!!!!!!!!! look at mr. boob!!! he is so beautifully sculpted.
and one more thing


thats right. i made mr boob PINK. hes fucking ruined now. just kidding i would never say that to him
what im trying to convey here (its the easiest with really light colors) is a transitional color. this can also show subsurface scattering depending on how you use it which is fun to look at. the mistake i made on my last tutorial was "Just pick a warm saturated color!" which is really wrong in examples like Blue mr boob. because it would be weird to use a warm color to transition from blue to blue.

if you have a character that isn't bright enough then obviously the shadows wont be as visible. its BEST to bring more attention to highlights and reflections to reveal the form a bit. they play the biggest role with darker colors
thats all i can think of. fun things to look up:
structuralization + contour lines + foreshortening etc. 3d lingo
form shadows
cast shadows
ambient light
contact shadows
subsurface scattering
im also just speaking out of my ass otherwise. i didnt look up any of these terms until the end now im inferring and hoping i got them right
and remember every time you shade mr boob will be rooting for you
Really curious, but how do you do the coloring part in your artworks? It looks so juicy and nice. Especially interested in how you did it with the recent Enki sketch you made! (the one with blue, yellow, and many many more colors)
While I couldn't really explain the methods in a brief text post, I did make this vid to articulate my thought process!!
finished art :))

Hey so artist to artist, share a secret, how do you achieve that effect? I'm obsessed with how raw it looks love to coloura love the impression and softness just *chefs kiss*
https://www.tumblr.com/corn-cardigan/760825147001339904/random-stuff-from-july-legarde-thing-i-probably?source=share
<- last art from this post
Thank you so much (´༎ຶོρ༎ຶོ`) !
The way I paint is honestly a hodgepodge of methods. I’m in no way a professional painter or visual development artist - I work like this because it’s a nice change of pace from my usual stuff. But here’s a look into my process!


I work in glazes, then I build up to full opacity when I render. This way, whatever subject I’m painting melds with the background color. I prefer my pieces having low contrast and details. I save the most contrast and details for focal points and areas in direct light.

I’m also mindful of what direction my brush strokes are in as a way to sorta replicate traditional painting. It tends to do some heavy lifting in terms of indicating form. ((I love low effort things with big payoffs yippee!!))

It’s really noticeable in my last painting but I add these borders when the subject’s colors contrast too much with the background. By adding that transition border, it makes the subject feel less like a sticker and more incorporated into the background.

When painting portraits, my focal point will usually be the face and eyes. So I prioritize all the rendering and information into that area. Everything else outside that zone is kinda a mess of colors, shapes, and brushstrokes - but it’s ok because it’s not the priority. (Also the above pics are WIPS so if I finished them, it would be a bit more refined…)


Somethings I did in 2022 that kinda exemplifies my points. Although if I did these again, maybe I’d bump down the contrast and make it more focused??
Again, painting is not my main thing!! I just do it for fun and it’s meditative and when you're a storyboard artist, you miss colors…
I always strongly recommend studying contemporary and classical painters who have a stronger, articulated grasp on this matter. I’m just noodling around most of the times.
Lengthy post but hope this helps!!! 💕


I have to draw a lot of gold and metal for my work, but wasn't happy with any of the metal tutorials i could find around. I prefer really specific instruction, so after some research i put together what i think works as a generalist's guide/tutorial. Not perfectly accurate, but i hope it's helpful!
I forgot I have to be active here so here’s my Twitter tutorial on how to draw folds I made a while back to help a friend!


My first anatomy tutorial! How I connect arms to the torso. Simplified the muscles for better comprehension
PS. Pectoral is misspelled as “pectorial” in the picture! Don’t make that mistake haha


UMBURGRR!!!!!!!!!!!! PLEASE DRAW A DOODLE OF RIDDLE ROSEHEARTS AND MY LIFE, IS YOURS.
OKAY but fr though your art is so MAJESTIC!!!!???!! I swear it has this aura that makes it so compelling, the way you color and render makes all of your works so appealing to the eye and your style is genuinely just AMAZING!!!!!! (if you don’t mind, what art program and brushes do you use??) anyways sorry for talking so much THANK YOU SO MUCH AND HAVE A GREAT REST OF YOUR DAY!!!!!!
GIGGLING right now you're too kind 😭❤️ but honestly, thank you so much it means so much to me (i cry) and ofc! here's my brushes, program, and process 😎 (ft. mr riddle rosehearts)
For my art program I use procreate with a canvas of 300 dpi and for brushes I use kraymer's hard brushes on gumroad !!
Anndd here's how I apply them:


Can I ask how you do rendering so well? I’ve been trying for a while and I’ve only been able to figure out basic shading.
firstly, Thank you!
Secondly, heres a fun behind the scenes of my art! I start with choosing a consistent environmental light. This is something to help the character seem more grounded in the scene. This can be as simple as making a new layer and flooding it a light colour to set everything in the same scene.
Next is figuring out where the lighting is coming from, and making the shadows and THEN where the light actually hits as a part of the shadow/multiply layer. I make an additional layer for overlay for the brightest highlights!
the rest is honestly just studying how light lands on different objects! like learning the planes of the face is super important and im still learning how it works!
This is a wonderful reference I use a lot, as well as honestly??? Just experimenting and practising! learning about things like different kinds of shadows and contouring is always good.
Hope this helps!


More art tutorials by Disney artists Griz and Norm Lemay


HEYY my 2nd color tips pdf is now available ! ^o^ hope you enjoy!
BUY HERE or HERE


HEY, I'VE MADE EDITING TUTORIAL! ORIGINAL ART BELONGS TO USEDBANDAID!!!!


*slaps new blog*
This bad boy can fit so many freackin' old arts on him


Can't afford art school?
After seeing post like this 👇

And this gem 👇
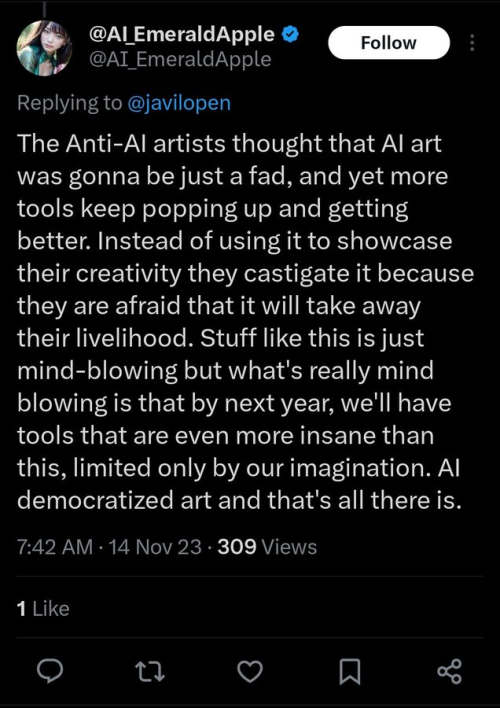
As well as countless of others from the AI generator community. Just talking about how "inaccessible art" is, I decided why not show how wrong these guys are while also helping anyone who actually wants to learn.
Here is the first one ART TEACHERS! There are plenty online and in places like youtube.
📺Here is my list:
Proko (Free, mostly teaches anatomy and how to draw people. But does have art talks and teaches the basics.)
Marc Brunet (Free but he does have other classes for a cheap price. Use to work for Blizzard and teaches you everything)
Aaron Rutten (free, tips about art, talks about art programs and the best products for digital art)
BoroCG (free, teaches a verity of art mediums from 3D modeling to digital painting. As well as some tips that can be used across styles)
Jesse J. Jones (free, talks about animating)
Jesus Conde (free, teaches digital painting and has classes in Spanish)
Mohammed Agbadi (free, he gives some advice in some videos and talks about art)
Ross Draws (free, he does have other classes for a good price. Mostly teaching character designs and simple backgrounds.)
SamDoesArts (free, gives good advice and critiques)
Drawfee Show (free, they do give some good advice and great inspiration)
The Art of Aaron Blaise ( useful tips for digital art and animation. Was an animator for Disney. Mostly nature art)
Bobby Chiu ( useful tips and interviews with artist who are in the industry or making a living as artist)
Sinix Design (has some tips on drawing people)
Winged canvas (art school for free on a verity of mediums)
Bob Ross (just a good time, learn how to paint, as well as how too relax when doing art. "there are no mistakes only happy accidents", this channel also provides tips from another artist)
Scott Christian Sava (Inspiration and provides tips and advice)
Pikat (art advice and critiques)
Drawbox (a suggested cheap online art school, made of a community of artist)
Skillshare (A cheap learning site that has art classes ranging from traditional to digital. As well as Animation and tutorials on art programs. All under one price, in the USA it's around $34 a month)
Human anatomy for artist (not a video or teacher but the site is full of awesome refs to practice and get better at anatomy)
Second part BOOKS, I have collected some books that have helped me and might help others.
📚Here is my list:
The "how to draw manga" series produced by Graphic-sha. These are for manga artist but they give great advice and information.
"Creating characters with personality" by Tom Bancroft. A great book that can help not just people who draw cartoons but also realistic ones. As it helps you with facial ques and how to make a character interesting.
"Albinus on anatomy" by Robert Beverly Hale and Terence Coyle. Great book to help someone learn basic anatomy.
"Artistic Anatomy" by Dr. Paul Richer and Robert Beverly Hale. A good book if you want to go further in-depth with anatomy.
"Directing the story" by Francis Glebas. A good book if you want to Story board or make comics.
"Animal Anatomy for Artists" by Eliot Goldfinger. A good book for if you want to draw animals or creatures.
"Constructive Anatomy: with almost 500 illustrations" by George B. Bridgman. A great book to help you block out shadows in your figures and see them in a more 3 diamantine way.
"Dynamic Anatomy: Revised and expand" by Burne Hogarth. A book that shows how to block out shapes and easily understand what you are looking out. When it comes to human subjects.
"An Atlas of animal anatomy for artist" by W. Ellenberger and H. Dittrich and H. Baum. This is another good one for people who want to draw animals or creatures.
Etherington Brothers, they make books and have a free blog with art tips.
📝As for Supplies, I recommend starting out cheap, buying Pencils and art paper at dollar tree or 5 below. If you want to go fancy Michaels is always a good place for traditional supplies. They also get in some good sales and discounts. For digital art, I recommend not starting with a screen art drawing tablet as they are usually more expensive.
For the Best art Tablet I recommend either Xp-pen, Bamboo or Huion. Some can range from about 40$ to the thousands.
💻As for art programs here is a list of Free to pay.
Clip Studio paint ( you can choose to pay once or sub and get updates. Galaxy, Windows, macOS, iPad, iPhone, Android, or Chromebook device. )
Procreate ( pay once for $9.99 usd, IPAD & IPHONE ONLY)
Blender (for 3D modules/sculpting, animation and more. Free)
PaintTool SAI (pay but has a 31 day free trail)
Krita (Free)
mypaint (free)
FireAlpaca (free)
Aseprite ($19.99 usd but has a free trail, for pixel art Windows & macOS)
Drawpile (free and for if you want to draw with others)
IbisPaint (free, phone app ONLY)
Medibang (free, IPAD, Android and PC)
NOTE: Some of these can work on almost any computer like Clip and Sai but others will require a bit stronger computer like Blender. Please check their sites for if your computer is compatible.
So do with this information as you will but as you can tell there are ways to learn how to become an artist, without breaking the bank. The only thing that might be stopping YOU from using any of these things, is YOU.
I have made time to learn to draw and many artist have too. Either in-between working two jobs or taking care of your family and a job or regular school and chores. YOU just have to take the time or use some time management, it really doesn't take long to practice for like an hour or less. YOU also don't have to do it every day, just once or three times a week is fine.
Hope this was helpful and have a great day.
"also apologies for any spelling or grammar errors, I have Dyslexia and it makes my brain go XP when it comes to speech or writing"


Someone wanted some facial advice, so I just collect some tips. Free to ask for more advice.


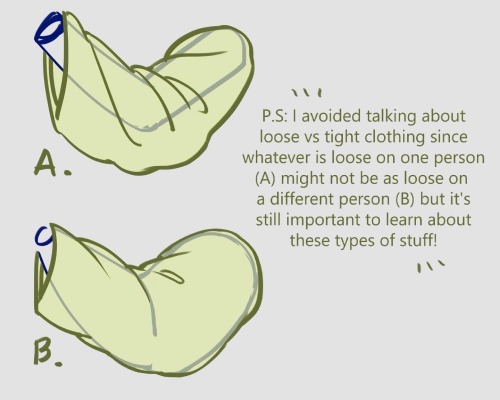
“Thinking about compression from a side view”
Source: Anime Private School on Twitter